Here, we explore the world of online English language instruction. From practical tips on virtual classroom management to innovative strategies for engaging students remotely, we’re here to help you navigate the challenges and opportunities of teaching ESL online.
Are you looking for ways to create highly engaging and enjoyable online English language lessons for your online students? Then you want to check out ManyCam. ManyCam is a virtual webcam and video effects app that allows you to manipulate your webcam by adding various effects into your video frame. You can use ManyCam’s virtual webcam as a video source within other apps (such as your online teaching platform), or you can live stream directly from ManyCam.
This can be a great addition to your online teaching experience, helping you increase student interaction and engagement, as well as save you money and time by replacing some of your physical props with special effects that come with ManyCam.
We’re going to show you how to use ManyCam for your online classes, so you can up your online teaching game.
Why Use ManyCam for Online Teaching?
One of the keys to creating a rich online learning experience is to ensure a high level of student engagement. And one way you can build engagement into your lesson delivery is by improving the visual and auditory experience through video, imagery, music, and social media.
With ManyCam, you can accomplish this through its broad range of features:
Live stream or record using multiple video sources
Select video source from multiple webcams, including your mobile device’s camera
Set up audio playlists and share audio during a live stream or recording
Add picture in picture video or images into your video framein
Draw and add text
Display a clock, timer, or stopwatch
Replace your background with an image or video (with or without a green screen)
Insert lower third titles to distinctly display your name and other text
Add effects like images, borders, emojis
Change how you look on camera with virtual face masks
Add custom watermarks to your videos (Windows)
That’s a pretty impressive list of things you can do. Before we go deeper into how to use ManyCam for your online classes, let’s take a moment to understand the significance of this feature set and how online English teachers use them to create higher student interaction.
Many online teachers use a myriad of physical props during their lessons. But, how many props can you reasonably have readily available in your teaching workspace? Even if you did have the space, how much would it cost to buy all of it?
ManyCam unlocks the real potential of your lesson delivery by offering you countless ways to introduce imagery, text, and other effects without taking up any physical space. All of these features are at the tip of your fingers, right within the app itself.
With over 10,000 digital effects and assets included in ManyCam, there’s no need to fuss around looking for play food, soft toys, flashcards, or other teaching aids. Of course, you can use these alongside ManyCam, too.
ManyCam lets you conveniently display any image, video, text, or effect to your screen on the fly. What this means to you, the online teacher, is that you are able to teach, discuss, or review any topic using any type of visual or audible media (that you are permitted to use) and create a fun learning experience for your students.
Watch a video summary of this article
How Good is ManyCam?
ManyCam is in a class of its own. Most of ManyCam’s competitors have concentrated on live video streaming and recording functionality. But ManyCam includes a wide array of features that make this webcam software particularly useful to online English teachers and the higher level of interaction they can gain by using it.
Certainly, ManyCam isn’t without its drawbacks. For one, it could improve on its usability and design (which has gradually gotten significantly better). As well, ManyCam is heavy on your computer’s processor due to how it manipulates video from your webcam and other video sources.
However, if you have a modern computer that meets the system requirements, and a little patience to learn how to use ManyCam, there’s little not to like about it. It also helps to have an external HD webcam which will typically give you higher resolution video streaming and recording, more control over your webcam’s position, and workspace lighting than a built-in webcam.
ManyCam is an online teacher favorite, and many online English teachers have made it an integral part of their online teaching to build trust with students. Some online ESL companies even encourage their teachers to use ManyCam.
While ManyCam has a long list of features, we are going to take a closer look at the key features that are useful for most online teaching situations.
Feature: Virtual Backgrounds
One of ManyCam’s most useful features is its ability to replace your background with an image or video.
This feature is not unique to ManyCam, as virtual backgrounds have recently gained popularity in videoconferencing apps like Zoom. One key distinction with ManyCam is that you can use its virtual background feature in other apps via ManyCam’s virtual webcam. The virtual webcam makes it possible for online teachers to use ManyCam’s virtual webcam as the video source within Skype or the virtual classroom platform(s) they use to teach.
This is an excellent way to engage your students, as you can use an image or video that is relevant to the lesson theme for your background, and improve interaction with your students.
The Virtual Background feature has three modes:
Blur
Replace
Chroma Key
Blur: Selecting Blur will digitally blur your background, so your students will only see you in focus. This may be useful when teaching online while traveling and staying in a hotel, particularly if the hotel room is dimly lit.
Replace: Selecting Replace will replace your background with any image or video you select. ManyCam comes with several preset backgrounds you can use, or you can use your own image or video. A green screen is not needed to use the Replace feature. To make good use of the Replace feature, you should have a well-lit workspace and good lighting. Certainly, this makes it possible for online teachers to work from anywhere and replace their background without having to lug around a green screen.
Chroma Key: Similar to Replace mode, selecting Chroma Key will replace your background with any image or video. However, to use the Chroma Key mode, you will need to have a green screen as well as excellent lighting. Chroma Key will produce a better virtual background than Replace, if you have set up your workspace for it.
I recommend using a green screen to get the best use out of ManyCam’s Chroma Key feature. If you’re new to green screening, you’ll notice there are several screen colors available. For most uses cases, including online teaching, green is the optimal screen color. You can learn more about how to use ManyCan with a green screen in our green screen set up tutorial.
To get going with the Chroma Key feature in ManyCam, navigate to the Virtual Backgrounds section of ManyCam from the right side of your ManyCam menu. Next, enable the Virtual Background using the toggle as shown in the image above. Then select the Chroma Key option to allow ManyCam to detect your green screen.
You can use the Color Picker tool to calibrate ManyCam to your green screen, or you can use the Auto feature, which will attempt to detect and calibrate ManyCam to your green screen on its own. I recommend using the Color Picker option, because it allows you to calibrate the Chroma Key to your green screen shade.
Here are some tips to ensure your experience with ManyCam’s Chroma Key feature goes as smoothly as possible:
Avoid shadows and shades appearing in your green screen. Make sure your green screen fabric doesn’t have any creases or folds (see our guide for setting up a green screen)
Use the color picker tool to calibrate the shade of your green screen more granularly. The auto-detect feature can sometimes be a hit or miss due to variations in lighting, webcam resolution, and computer processing power.
Keep your area well-lit to ensure all the green screen material is detected by ManyCam.
Use LED lights instead of incandescent soft white bulbs to illuminate your workspace more brightly and evenly. LED lights are also more energy-efficient and cost-effective over the long term.
Using ManyCam’s Chroma Key feature in your online classes can make the atmosphere fun and exciting for your students in many ways. Here are some ways you can engage your students using ChromaKey:
Take students to on virtual field trips such as a farm, a grocery store, or a park
Use relevant photos for your virtual background for vocabulary building and reinforcement activities. You can teach and practice talking about rooms in the home, areas at a school and in the classroom, restaurants, names of continents, countries, cities, oceans, and famous landmarks. You can also talk about transportation and various types of vehicles.
Practice telling the time using a clock as your virtual background
Talk about food and drink, and describe flavors and tastes
Practice math and spelling activities using letters, numbers and mathematical symbols
The learning and engagement opportunities ManyCam’s ChromaKey feature adds to your online teaching and learning experience are endless.
Feature: Borders and Stickers
You can add borders to your video to liven up your screen. To apply different effects to your video frame, click on the Effects button in the ManyCam feature panel. The available effects can be chosen from a list of available effects sorted into folders.
Click on the borders folder where you can download various border effects to use in your video frame. Here are some ways you can use borders in your online classroom:
Use a birthday border to help celebrate a students’ birthday
Similarly, you can find a large variety of stickers categorized in folders in the Effects menu. You can insert them into your video frame and position them where you want. Stickers can be used in a few ways:
Display shapes such as stars as a reward for a job well done in class
Use stickers as a replacement for physical props; this is a good option if you’re traveling and don’t want to carry physical props with you
Feature: Drawing and Text
ManyCam’s Draw feature lets you draw, write, and type and display these over your webcam in real-time.
You can find the drawing and text tools within the ManyCam Draw panel. To use the drawing function, switch the toggle button to “on”, select the pen and start drawing anywhere inside your video frame.
Here are some options of activities that can help your students stay engaged during lessons:
Play a game of drawing and guessing; you can draw a picture and elicit responses from students to guess what the drawing is. This is an excellent activity for both vocabulary building and retention, as well as for adding some fun and competition.
Play Hangman; you can easily draw a stick figure for this fun game to build vocabulary and spelling skills.
Feature: Virtual Face Masks
Face Mask effects are one of ManyCam’s coolest features because with it, you can wear a mask – or more than one mask – without having to buy costumes at the store. The Face Mask feature can be found in the Effects panel together with stickers and borders. Click on the face mask icon and choose the mask you want. ManyCam has a decent variety of face masks you can download from its media library.
The greatest benefit of this feature is it gets your students laughing and gazing at you in amazement that you have transformed yourself into a cat, witch, or princess.
Here are some suggested activities to improve student engagement using ManyCam’s face masks:
A game of charades: put on a cat mask or other various animal masks and ask students to guess the animal
Dress the part! Pick a mask that’s relevant to vocabulary being studied; apply a nurse mask or a construction hat, virtually!
Wear a costume for festivals or holidays, to get your students into the festive spirit
The face mask feature is a game-changer, but don’t overuse it to avoid the novelty from wearing off!
Feature: Picture in Picture Media
ManyCam is capable of displaying visual media from multiple sources like YouTube, PowerPoint, or even your mobile device. This is a mighty and useful feature because it allows you to quickly share visual content within your video frame.
You can set preset sources and switch between presets, or you can add content on-the-fly – whichever suits your situation. You can then add layers to your frame to display media using the ManyCam picture in picture mode, or quickly swap between video sources.
This is a great option for online teachers who want to share videos, images, presentations or other media that is relevant to the lesson. It’s also an excellent way to improve interaction in your online classroom, as you can blend in a range of media to increase engagement and facilitate learning.
Other Features
ManyCam has a whole host of features, many of which we haven’t discussed in this post. Indeed, we’ve only scratched the surface regarding features. Some other things you can do with ManyCam include:
Stream to Facebook or YouTube live
Use ManyCam in videoconferencing and social apps using its virtual webcam feature
Set up a video playlist with customizable durations
ManyCam is available for both Windows and macOS operating systems, but you will need to have a modern CPU, adequate RAM, and a graphics processor. See the full system requirements for ManyCam here.
ManyCam does have a free version, as well as a paid Standard license, but to get all of the features we have covered in this post, you need either a ManyCam Studio or ManyCam Premium license. Additionally, the free version has a blatantly obvious watermark, and records and streams video at a lower resolution.
ManyCam Standard: $49 per year (1 device, 4 video sources, Full HD resolution, limited features)
ManyCam Studio: $79 per year (2 devices, 50 video sources, 4k resolution, all features)
ManyCam Premium: $99 per year (3 devices, 200 video sources, 4k resolution, all features, priority support)
Wrapping It Up
If you incorporate ManyCam into your online teaching approaches effectively, you’ll have few challenges improving student interaction. It’s not a perfect software, and like any software, it does require some upfront effort, has a bit of a learning curve, and does have some of its own quirks.
But online ESL teachers from all walks of life use it and sing its praises, not to mention notable ManyCam clients like Apple, Google, Intel, and Apple. I use ManyCam regularly in my online classroom, and using it has greatly improved how my students engage with me during lessons.
So, you’ve decided that you want the freedom to teach online, from anywhere, great!
But what supplies exactly do you need to get started? How much do you need to invest? There is so much equipment and different brands to sift through, what a potential headache!
Luckily, we’ve put together the essential list of what you need to get up and running, from hardware to software and everything in between.
Let’s get started with our list of the equipment you really need for teaching online.
Interview: What Equipment do you Need to Teach Online?
First, say hello to Harold. Owing to his IT skills and background, he was hired in 2018 by ALO7 to provide IT support to its many online ESL teachers based in USA. This is a secondary role he is tasked with in addition to teaching online for the company.
Harold has troubleshooted hundreds, if not thousands, of technical issues with online ESL teachers and their equipment. This gives him a unique perspective into what type of equipment online teachers use, what works well, and what to avoid.
In this 25-minute video interview, Harold talks about everything you need to teach online. He covers a range of equipment and other technical aspects, including: computer, internet requirements, headsets, webcams, green screen… and some others aspects of his life as an ESL teacher.
Desktop Computer
It goes without saying that you will need a computer to teach online. While many online teachers use laptops, we recommend investing in a desktop computer instead.
Desktops are not only more cost-effective than laptops, but they are far more easily upgradeable, and thus have a longer lifespan. The temptation to buy a laptop to teach online will be high, but the cost of owning a laptop will be much higher, over time.
There may be other reasons to own a laptop, though. So, be crystal clear about your specific goals with online teaching, and decide what’s perfect for your use case.
You need to make sure the computer you buy ticks certain boxes. Let’s look at those minimum requirements:
Computer Requirements
Hard drive: 128 GB or more, to store lesson plans, files, videos, etc.
Memory: 8 GB or more
CPU: Intel i5 or higher
Don’t save at the wrong end. Live video conferencing eats up a lot of memory and processor power, so having a powerful computer is vital.
Laptops are extremely convenient as they don’t require much space and are portable, so you could theoretically teach from anywhere!
If these advantages outweigh the cost advantages of a desktop computer, a laptop is right for you.
However, if you want to save some time and mental energy then no worries, we’ve rounded up a list of the best computers for teaching below:
Budget Laptop
Don’t let this low price tag fool you, the Acer Aspire 5 is powerful and solid enough to give you the performance you need in your online lessons. Not only that, the widescreen will make it easy to arrange your windows mid-class, keeping you stress-free and in control.
2021 Newest Acer Aspire 5 Slim Laptop
[asa tpl=”flat_box_horizontal”]B08WX9M8GP[/asa]
Premium, Ultra-portable Laptop
This is the laptop for those who are on the go. It’s thin and light, versatile (can be used as a laptop or tablet) and it comes with LTE, meaning you don’t need to worry about getting disconnected from the Wi-Fi mid-lesson!
Most online ESL companies require their teachers to wear a headset, and many of these companies expect their online teachers to wear a headset that has a boom mic.
This is partly due to the expectation that wearing a headset with a boom mic provides better audio quality; but also partly because wearing one makes you look like a professional online teacher in the eyes of the company and students.
Fortunately, a good wired headset with boom mic should not cost you more than $50, and there are many options to choose from. High-quality Bluetooth headsets will cost you more, somewhat above $100.
Don’t buy cheap ones: They’ll easily break, or they have poor sound quality which is a no-go for online teachers.
We’ve again done the research for you already, and rounded up the top 3 headsets used when teaching English online. So relax, pick the one that feels right for you and get teaching!
Wired Headset
Plantronics Blackwire 3320 Wired Headset with Boom Mic
A fast and reliable Internet connection is a must for online teaching. Your Internet connection largely depends on the service quality in the area where you live, but for the majority of online teachers working from home, this will not be too difficult a requirement to meet.
Still, a few things you need to ensure about your Internet connection is that it meets the online ESL company’s minimum upload and download speeds, but also has a low ping rate (latency). Generally, you should be aiming for upload and download speeds of 10Mbs or higher, and a ping rate less than 100ms.
Some online ESL companies also require their online teachers to use a wired connection, because connecting to the Internet with an Ethernet cable generally means a faster, more stable connection.
Modern laptops include a built-in webcam which saves you a lot of hassle in this area, phew!
But… what if you are using a desktop computer which doesn’t have one? What if your employer requests a separate, external webcam (I’ve had it happen before), or maybe you just want to provide extra quality videos to your students. What then?
No need to make many words here: We’ve been using this Logitech webcam for years, and it flawlessly does its job.
Logitech C920x Full-HD Pro Webcam
[asa tpl=”flat_box_horizontal”]B085TFF7M1[/asa]
Online Teaching Software
Ok, now you’re set up with all the hardware needed to teach, but what do we need software wise?
If you teaching company does not provide an own teaching platform, you will need to use one of these video conferencing tools:
Because you are teaching online, lighting plays an important part at your workstation. Some online ESL teachers go overboard with their lighting setup, but in truth, your lighting setup does not need to be elaborate or expensive.
At a very basic level, you can do well with one or two inexpensive LED desk lamps and position them to get the best illumination on your face and body. Your aim is not to glow in the dark here, but rather to ensure your students can see you clearly.
The positioning of your lights is just as important as the brightness of your room. We recommend LED lights for most online teaching setups because they don’t emit as much heat, last longer, and are generally brighter than other types of lights.
Some LED lights also give you the ability to adjust the light temperature between cool and warm colors; this is especially useful if you intend to use a green screen while teaching online, but also not a bad feature to have for just about anyone teaching online.
You’re all set for technology now but what about your office?
Maybe you already have a comfortable set-up which you can use; if so, then this is the area you can save a bit of money.
However, bear in mind that you will sit in your office chair for (hopefully) many hours of the day. It needs to be comfortable and appropriate for your teaching style.
Your chair should provide exceptional support for your back and neck, meaning that an investment in this chair now will result in not paying out to a chiropractor 6 months from now!
Once again, we’ve selected a recommendable mid-range priced option for your, saving you the hassle!
Once you have the essentials out of the way, don’t be afraid to spruce up your teaching space. These things, while cheap, offer a massive boost in presentation which your students will certainly appreciate.
Your props should be relevant to the age group of the ESL learners you teach, and should provide opportunities to elicit responses and encourage interaction from your students. They can also be excellent for warm-up activities, showing and telling activities, and games.
Online ESL teachers should be equipped with props and teaching aids, including:
Although a green screen is not a necessary piece of equipment for teaching online, having one can make a huge difference to your virtual classroom as well as student engagement.
With advances in technology, software is getting better at layering your background with images and videos, without having to use a green screen. But it’s not yet perfect, and a green screen still gets you better results for the time being. Besides, they are an inexpensive investment for the value they bring to your online classroom professionalism.
Hopefully, you should already have some of these things on hand which leaves you with only a few things to pick up. After that it’s a case of gaining experience and establishing yourself as an online guru!
Green screening was one of the movie industry’s best kept secrets for years. With current technology, anyone can easily set up a green screen and take advantage of the benefits of using them in the online classroom.
There are so many ways you can use a green screen to take your lessons to the next level.
In this extensive post, we talk about everything you need to know for using a green screen for online teaching: how it works, the equipment and software you need, and tips for setting up your teaching environment.
And an add-on, we’ve compiled some nice classroom background you can download and use for free.
What is a Green Screen?
A green screen is a backdrop made up of a single color (usually green, but sometimes blue). It is usually made of fabric, such as muslin cloth. You can also make it from cardboard, canvas, and even use a green painted wall.
The green screen is used together with a technique called chroma-keying. We don’t go into the technical details here; instead, we’ll give you this to-the-point explanation from MentalFloss author Nick Keppler:
Chroma-keying is the process of isolating a single color or brightness value in an electronic image and then making that value transparent in post-production, allowing another image or footage to be placed “beneath” the color that’s been blanked out.
Although green is used so often that “green screen” and “chroma key” have become almost interchangeable, any color will work. Green is the go-to because it doesn’t match any natural skin tone or hair color, meaning no part of an actor will be edited out through chroma key.
Green screens are used in a variety of photo and video shooting scenarios; one of the more well-known uses of the green screen is the weather report on television.
The example below shows how chroma-keying with a green screen works. The green color behind the person is isolated, then replaced with another image layer:
Why Should You Use a Green Screen in Your Online Classroom?
Obviously, using different backgrounds during an online lesson will help you to deliver more effective and fun lessons, and compensate for the disadvantages of not being physically in the same room:
You can use backgrounds related to the lesson topic to create an immersive learning environment.
Instead of using props, you can show specific objects or situations in the background to explain concepts, elicit discussion and check comprehension; for topics such as geography, landmarks, landscapes, nature, food, and more.
You can make your lessons easier to follow and show videos, presentations, or exercises, while your students can still see you on the screen.
Besides, using a green screen has some practical, not-so-obvious advantages:
Your students can’t see your furniture, clothes, or personal items (or mess) in your home.
Your family members or roommates can walk around the home without having to duck and crawl behind you while you teach online
You can work from almost any location without your students knowing where you are.
You can change up your virtual background without redecorating your actual work space.
Overall, a green screen will let you look more professional, create better results, help you get better ratings and thus, earn more classes.
Although a green screen setting is neither complicated nor expensive, you’ll need to invest in some equipment:
A Computer with Fast CPU and Sufficient RAM
It’s important to realize that software to use for chroma-keying your green screen background during a live online ESL lesson can be incredibly demanding on your computer’s processor and memory. You need to make sure you have a capable computer to handle the chroma-keying processes.
Our recommendation is to have a computer with at least the previous-to-current generation Intel i5 CPU running at 3GHz with no less than 4 cores, and at least 8 GB of RAM.
Important: With tablet computers and smartphones, you won’t be able to use a green screen.
Green screens range from very cheap, to costly. You don’t need an expensive pro-grade kit. Indeed, many online ESL teachers make do with fabric they buy from the local fabric store. You can mount them on a stand or frame, or hang them on the wall or the ceiling.
Buy a green screen large enough to cover the area behind you adequately: It should be both wide and high enough to cover the entire area picked up by your webcam. Dimension requirements will vary for each person based on their height, work area, and whether you stand or sit while you teach online.
Here are a couple of affordable, recommended options available on Amazon:
Green Screen Studio Kits
The majority of online ESL teachers will be working from home. For those who have a spare room or home office where they set up their online classrooms, green screen kits are a quick, all-in-one solution.
JEBUTU Green Screen Backdrop Stand Kit, 5 x 6.5 feet (ca. 1.5 x 2 m)
Portable Green Screen Stand (durable steel), washable polyester fiber screen, with carrying bag and five spring clamps
Although the studio kits portable, they’re not really convenient when you change your teaching location frequently.
Collapsible Backdrops for Ultra-Fast Setup
If you teach online in your home with limited space, then your best option is to get a collapsible green screen backdrop. They can be quickly opened and closed, don’t require assembling or fudging around with separate stands, and can be stored away in a closet or in the basement when you’re not using it.
Elgato Green Screen – Collapsible Chroma Key Backdrop, 58.3 x 70.9 inches (ca. 1.50 x 1.80 m)
ShowMaven Green Screen Collapsible Chromakey Panel, 58.3 x 80.7 inches (ca. 1.5 x 2 m)
Auto-Locking Frame, Chroma Key Screen with Wrinkle-Resistant Fabric, Aluminum Hard Case
[amazon-button link=”paste the Amazon link here”]
Portable Backdrops
Portable green screen backdrops are different from collapsible green screen backdrops in that they can fit in a suitcase, making them the ideal option for online ESL teachers on the road. You can hang them on a stand or wall behind you, or mount them on the back of your chair.
One major downside of portable green screens is that due to their compact size, you have to position them more precisely to fully cover your background. If you like to teach while standing, or even move around a bit, then this type of green screen backdrop is probably not the right item for you.
Neewer Chromakey Backdrops, Double-Sided Green and Blue Screen, 5 x 6.6 inches (ca. 1.5 x 2 m)
Write a one-line descripDurable steel frame sewn into the fabric. The steel spring frame pops open the backdrop in seconds and helps maintain its shapetion here
Though not for everyone, some online ESL teachers prefer not to mess about with positioning the green screen backdrop. If you have enough space and a wall you can paint, green screen paint is an excellent option. Even if you would rather not paint your wall green, you can get a wooden board, drywall or a thick sheet of cardboard to paint over.
The great thing about green screen paint is that you don’t have to worry about creases and folds, kicking or tripping over the green screen stand, or messing about positioning it. You just paint the wall, or lean the board against the wall, and you’re good to go.
Of course, painting a color across a wall or board means you will need to know how to paint, and to make sure the paint is consistently applied. You may also need to apply a few coats to the wall or board.
ChromaKey Green Paint 1 gallon (3.79 l) Green Screen Equivalent
Water-Based Latex Paint with Low reflectivity, Made in the USA, Dries in 60 mins
Many people who use green screens will tell you that your lighting setup is more important than the green screen. When using a green screen for online teaching, lights serve two purposes: Illuminating the teacher and the green screen.
As you will discover when you set up your green screen in your work space, these two aspects will often conflict with each other.
You might find that your face and body in the webcam view are well-lit, but there is some fuzziness around your head. On the other hand, you might find that your face and body in the webcam view are well-lit with no fuzziness around your head, but there is some fuzziness around the ends of the green screen.
This fuzziness (often referred to as bleeding) is usually due to too much light on the green screen, causing the color to spill.
Both the amount of lighting as well as the color tones you use will play a role in striking the right balance. Different chroma-keying apps also handle the chroma-keying process differently. Ultimately, you will need to play around with your lighting setup until you get it just right.
You will need an app that will chroma-key your green screen background. There are several free and paid apps available to accomplish this. What app you use will depend on your computer OS, as well as your specific needs. Some go beyond chroma-keying capabilities, like ManyCam Studio, which has an extensive set of features that enable you to show clip art, YouTube videos, add lower third text on your screen, wear a virtual mask, and much more.
The popular videoconferencing app Zoom, includes a virtual background feature that lets you skin your background with an image or video using a green screen, and if your computer’s CPU is powerful enough, you can skin it without a green screen. Zoom is an excellent app, but it’s only useful you’re using Zoom specifically for online teaching. If you use another platform, or if the online ESL company you work with has its own proprietary platform, you will need to use an app like ManyCam Studio, which creates a virtual webcam device on your computer that you can use with a green screen and more. Some teachers even use ManyCam and Zoom to access the additional features ManyCam offers while using Zoom.
Here is a list of apps that let you take advantage of your green screen:
Price: starting from $39 per year or $79 lifetime for one device
Available for Windows and macOS
ManyCam Studio is designed to give you a suite of screen effects while live-streaming. Although ManyCam has a free version, to unlock the chroma-key feature, you will need to purchase the paid version. ManyCam has an impressive feature set that can transform how you teach online and interact with your students.
OBS is a free, open-source software you can use to record and live stream your screen with a green screen background. Besides being free, OBS packs some really cool features, such as being able to set up multiple scenes, which means you can display images, videos, text, browser windows, and more, alongside yourself via your webcam.
Free is hard to beat, but you’ll need to rely on the community and a public knowledge base to get support if you need help. It’s recommended for more advanced users.
Video Meeting Software
Nowadays, most software for video conferencing has already built-in background-removal functions. They work even without a green screen – of course, with one, they produce much better results.
These software programs include the most popular ones:
You can use all the video meeting solutions for free; however, for regular teaching, we recommend using the paid versions which offer more functionality and stable connection. Prices range from $10 to $20 per month.
Here’s how easily it works in Google Meet:
In a meeting, click on the menu item with the three dots in the bottom bar, then choose “Apply visual effects“ from the pop-up menu.
In the sidebar opening on the right, simply choose one of the default backgrounds images, or upload an image.
Use background images and effects in Google Meet
Google even offers animated backgrounds with birds flying around or with different weather outside – which looks simply wow!
You see the effect isn’t perfect in my example; I made the screenshot without using a green screen and proper lighting. (Still impressive how good it works nevertheless!)
In MS Teams or Zoom, you’ll find the background-removal functions analogously in the settings; it’s not complicated.
However, these video meeting tools don’t offer advanced configuration settings, so the results may not be as perfect as you expect. And you can’t use them when you need to teach with another software or with a teaching platform of your teaching company.
That’s why buying a software like ManyCam seems like a good investment; you won’t get broke from a $79 one-time fee. You can use it with any video conferencing tool or teaching platform, and tailor it exactly to your needs.
Setting Up Your Green Screen for Online Classes
Video Tutorial
In this short video, online ESL teacher Michael Wasserstein guides you through the important aspects of setting up a green screen for your online classroom.
Install and Run Your Chroma-Key App
The first step we recommend you take is to install and run your chroma-key app. Get familiar with the features of the app, so you can set up your green screen and lighting according to the functionality and recommended settings of the app.
Set Up Your Green Screen
Measure the area behind you that your webcam captures. An easy way to determine the green screen size you need is to use a spare bedsheet in place of the green screen. Use some measuring tape to measure the dimensions of the bedsheet that come into the webcam view so that you can figure out the length and width of green screen fabric you will need to buy.
You might need some help from a family member or friend to hold the bedsheet while you measure the area. A 6 x 9 feet (ca. 1.8 x 2.7 m) muslin cloth green screen should be sufficient for most online ESL teachers.
You also need to decide if you will be attaching or hanging the green screen to the wall, or using a frame to hold your green screen in place. We recommend using a frame, as this will make it easier to move around the green screen as needed, and won’t damage your wall.
After you have purchased your green screen, make sure it is free of creases or wrinkles by ironing them out with an iron on low temperature. Once you’ve done that, you can attach it to the frame.
Some green screens are set in a retractable frame, and if you are using one of these, then you can simply pull it open and lock into place.
Make sure your green screen is correctly positioned to fill up the area behind where you will be sitting or standing while teaching online. You will need to do this with your chroma-key app open on your computer so that you can view the area your webcam displays.
Set Up Lighting and Adjust Brightness and Positioning
Now that you have your green screen in place, you need to determine how bright your online teaching workspace is, and how many lights you need. If possible, choose LED lights with different color temperature settings, so you can increase or decrease brightness in different spots of your work space.
You will need to position and adjust your lighting with you standing or sitting in front of your computer with the chroma-key app open to preview yourself and your webcam.
You’re not done with lighting just yet. Next, we need to find and insert an image layer to replace the green screen behind you to test your green screen and lighting set up with your app.
Choosing an Image to Chroma-key
Although you can use any image to replace the green color in your green screen, we want to start with the most basic image that will enable us to test and tweak our green screen and lighting set up. For this, we can use a plain white image because a white image is void of any color, and will reveal any issues with light spill/bleeding.
If you see any fuzziness or bleeding around your head or on the green screen itself, you will need to check for and iron out any creases or wrinkles in your green screen, and reposition your lighting. Using the white background will also help you figure out if you need to get add lights to your setup.
This image illustrates how the white background will replace the green screen. Notice the slight green spill around the hair, body, and hands:
Note: If you have long hair, we recommend tying it back to reduce the green spill around your head.
Now, you are ready to use your teaching studio. Everything you need to do now is finding great images or other media to use to “decorate” your classroom background.
Classroom Backgrounds: Find Media to Use with Your Green Screen
As an online ESL teacher, you will constantly be on the hunt for media to use in your online classroom. A few excellent sites where royalty-free images can be found for free are:
These sites have a broad range of photos, illustrations, vectors, and videos to choose from, so you should have little difficulty spicing up your green screen images.
If you need some inspiration, look at these 10 great classroom images from Pexels we’ve selected for you as a starter:
Now that you have a good idea how to use a green screen in an online classroom, get started! It’s really not as difficult as you think, it’s very affordable, and the difference using a green screen will make to your online lessons will be dramatic.
It might take you a bit of time to adjust your green screen and lighting to get the ideal setup. It will take you a couple of days to get comfortable using the chroma-key software. But within a month (or less), you will find green screening a cinch, and you’ll begin to wonder how you ever taught online lessons without one.
Repeat after me: “You can’t use props too much in the classroom.“
Do you agree?
Props – or visual teaching aids – make the learning process fun and effective for the students as well as the teacher. That’s why successful ESL teachers build their stock of props over time and use them in every lesson.
If you are looking for inspiration, what to try out next, here is our list of the best ESL teaching props, together with tips on how and when to use them.
Why Using Props in the ESL Classroom is Important
When young learners begin acquiring their first language, they are essentially like sponges, absorbing everything they see, hear, smell, touch, and taste.
Toys, books, games, and activities can help to make the experience more fun, particularly if they are used in a manner that enables young learners to be physically involved in the learning process. Of course, there’s also the show and tell aspect of using these child-centered resources as part of the learning experience.
For ESL students, especially young learners, acquiring a non-native language poses different challenges. As an ESL teacher, you will likely be using props and other teaching aids, not only to make the learning experience more fun and engaging, but also to elicit responses from students to develop their English fluency.
For online teaching, props can even more help to focus the student’s attention. In an online lesson, you have less control of the learning environment and potential distractions.
But you can make use of the fact that the students are used to watching videos or playing online games at home with lots of action happening on the screen. With many props (and high teacher activity), you can deliver an experience close to watching a cartoon movie and draw full attention.
In truth, anything can be used as a prop for teaching any subject, if it is used purposefully. As ESL teachers – whether in the classroom or online – we want to get down to business quickly using ready-to-go teaching props and aids.
We teach many students and classes throughout the day, so having a core set of props and aids can be a major time and lifesaver.
Good props for teaching ESL are those which can be used across a broad spectrum of classes, students, and contexts. There simply isn’t enough room to fill your home or office with props for every single context.
That’s why you want to build up an inventory of props that can cover a wide range of ESL age groups, topics, themes, and proficiency levels.
A prop is evidently a meaningful prop, when you can you it to:
That said, not all props need to be multi-textual to serve a purpose. Very young learners may be more challenging to keep on point, as they have short attention spans. For these situations, noisemakers and clappers will come in handy.
So, let’s get you set up with the right props for ESL teachers and how you can use them in the classroom.
Recommended Props for ESL Teachers
Let’s look into various categories of teaching props, most of them suitable for in-classroom teaching and online teaching as well.
Hand and Finger Puppets
Hand or finger puppets make excellent props for ESL classroom instruction. Use them to captivate your students through conversation, role-play, and other forms of engagement.
Because they slip onto your hand or fingers, puppets can magically transform into make-believe characters your students will connect with and grow to love.
In this video, Karen Frazier, co-author of the Let’s Go series, gives us an excellent model of how to use puppets in the ESL classroom to introduce conversation:
As you can see, puppets are great props for ESL instruction. For young ESL learners, you can breathe some life into your puppets – and your lesson – and completely transform the learning experience for your students.
Buy hand and finger puppets on Amazon:
Melissa & Doug Hand Puppets: Safari Buddies
Set of 6: Elephant, Tiger, Parrot, Giraffe, Monkey, ZebraStuffed Animals
Stuffed animals are a favorite with young ESL learners, and like puppets, they can be used in various learning contexts. Indeed, you can use puppets and stuffed toys interchangeably.
The main difference between them is that stuffed toys are a little more challenging to bring to life, as you can’t move their parts with your hand like you would with a puppet. Still, there are many types of stuffed toys, that you’re more than likely to find a specific toy you’re looking for.
You can set them on a table or shelf, or hold them in your hands while teaching. Most of all, stuffed animals are soft, cute, and cuddly, and kids love them.
Use stuffed toys during warm-up activities, storytelling, or even creating an imaginary zoo, farm, or aquarium.
Food is a popular topic with ESL students, and play food is a great way to get students talking about food.
Use play food to describe food groups, colors, shapes, and tastes. You can also use play food to talk about more complex topics like healthy vs unhealthy food, popular food around the world, or meals of the day.
So, go ahead and use play food to engage your students in fun, interactive activities. Make a picnic. Have lunch. Cook dinner. Order a meal. Dig in!
Including a toy grocery basket, 2 cutting boards, 2 kitchen knives, and 4 dinner plates. Foods are put together with Velcro and can be repeatedly “cut and sliced“
Which child doesn’t love to hit, kick, throw, or catch a ball? We can’t think of one.
If you’ve never used balls for props in the ESL classroom, you’ll soon realize how much fun they can inject. Use a ball to assign student turns during any activity. There are no limits to the kind of activities you can do in the ESL classroom with a ball.
Here’s an example of Jenny White using a ball to effectively engage her students in a vocabulary game:
What’s remarkable about using a ball while teaching is that you can get your students on their feet and physically active during the activity. And if you’re already rethinking how students move in your classroom, it’s worth considering how the layout itself affects participation — here’s how seating arrangement shapes ESL learning.That not only improves their concentration and participation, but also adds elements of competitiveness, teamwork, and coordination between thoughts and actions.
If you teach ESL online, you can use a ball for talking about sports, colors, and shapes.
Your ESL students will have a ball learning English – seriously!
Every ESL teacher should be equipped with flash cards for all occasions. Whether teaching in the classroom or online, flash cards are nifty because you can use them in so many contexts to enhance the learning experience.
Use them for activities and games, drilling vocabulary, pronunciation, conversation, and role-plays. Though most stock flash cards are geared towards young learners, you’ll find a wide variety of flash cards that cover more complex concepts such as nouns and prepositions, and themes such as emotions.
Flash cards are also easy to pack and carry, they make an excellent teaching aid for traveling ESL teachers. So, if you’re planning a family vacation but plan to teach ESL online during your travels, flash cards will fit neatly into your suitcase.
Here are some ideas for using flash cards for teaching primary children, by Carol Read of Macmillan Spain:
These flashcards are available on Amazon:
Star Right Numbers & Sight Words Flash Cards Set of 4
144 Sight Words Flash Cards: Numbers, First Words, Colors, Shapes, and Alphabet; with binder rings
There isn’t much we could say about dry-erase boards that ESL teachers don’t already know. Dry-erase boards are an English teacher’s biggest asset in the classroom.
But what many ESL teachers may not realize is that smaller dry-erase boards (primarily designed for children) are compact enough to hold in your hands. This makes them useful teaching aids for demonstrating grammar, vocabulary, assessments, or keeping scores during a class activity.
Get a magnetic dry-erase board and use it with magnetic letters and numbers!
These are great options on Amazon:
U Brands Contempo Magnetic 11″ x 14″ Dry Erase Board
Magnet, marker, and double-sided Velcro mounting strips included
Magnetic letters and numbers are extremely useful for teaching ESL to young learners, and go well with a magnetic dry-erase board. They can be used in numerous ways, especially for learning the alphabet, counting numbers, spelling, practice phonics, and do math.
You can also use scrabble letters in place of magnetic ones, though scrabble letters would be better suited for the classroom than online instruction.
This set has all you need:
253 pieces Magnetic Foam Letters and Numbers Kit, with Double-Sided Magnetic Board and Storage Box
52 uppercase letters,156 lowercase letters, 20 numbers, 14 math symbols, 5 cartoon refrigerator magnets, 1 double-sided magnetic writing board, 3 marker, 1 eraser and 1 sturdy storage box
Though hand clappers are not so useful for instruction, they can be useful teaching aids during activities, or simply to keep young learners attentive and focused. You can even use them to celebrate student birthdays during class.
If you teach online, you probably just need one hand clapper; since they usually come in inexpensive packs, you may as well have an assortment of hand clappers on hand, and use them to practice language skills such as identifying colors.
Other options to hand clappers are maracas and squeaky rubber chickens.
Let’s make some noooooise with these hand clappers:
Our focus in this post was to reach both teachers who teach in the classroom as well those who teach online. We’ve given you some pretty awesome examples of props you can use in the ESL classroom.
There are undoubtedly more teaching aids than we could possibly cover here. You can use everyday items and almost anything as a prop or teaching aid, as long as you use it in ways that are meaningful to learning and the learning experience.
Teaching English online from home sounds great: Making money without leaving your home, deciding on your schedule, meeting new people and engaging them in conversations… too good to be true?
On the other hand, I’ve almost never heard of a teacher who became rich, and many complain about being stressed or even burnt-out.
So, if you consider stepping into an online ESL career, the question is legitimate: Is teaching English online worth It?
In this post, I am going to weigh the pros and cons of four aspects of this career – the final verdict is up to you then.
Is Teaching English Online Even Legit?
Perhaps before we even delve into the pros and cons of teaching English online, we should clear up any doubts about it:
Teaching English online is a legitimate, viable way to earn an income. People are teaching English online, both part-time and full-time.
We don’t suggest anyone to quit their current job to pursue a career as an online ESL teacher, but we can recommend it as a way to supplement or diversify your income streams. That’s not to say it can’t develop into something more. Indeed, some online ESL teachers found their way into full-time careers in online ESL.
Teaching English online is a good option for people who have seasonal jobs, are freelancers, or bootstrapping a startup. Even for those who don’t need the additional income, teaching English online can be a great way to bring more fulfillment and joy into your life.
The online ESL industry is populated with school teachers who have made the transition to online teaching: stay at home parents, musicians, artists, career ESL teachers, and world nomads who have discovered they can enjoy a decent lifestyle in countries where the cost of living is relatively low.
So now that we have cast any doubts about whether teaching English online is legit, let’s examine the opportunity from different angles and determine if teaching English online is worthwhile for you.
Video Interview: “Teaching ESL Online is the Best Job I’ve Ever Had“
Michael Wasserstein is an online ESL teacher who lives in Florida. Prior to starting his career as an online ESL teacher, Michael worked as a computer training consultant. But as the market forces in his career changed, Michael found himself at a crossroads that would eventually lead him to the world of online ESL education.
Michael only works with one company, and he is one of the most popular online teachers in the company. He is also a member of the company’s academic team, enabling him to enjoy a near full-time schedule in online ESL.
Making Money as an Online ESL Teacher
People who enter the online ESL industry don’t do it to get rich. You probably won’t get rich teaching English online, either. However, not everyone has the opportunity or fortune to earn fantastic salaries or launch a successful, multimillion-dollar startup.
The fact of the matter is, for many people, searching for an online teaching job is a means to making ends meet, or paying down debts. So, let’s be crystal clear that if you’re looking at teaching English online from a monetary perspective, it’s likely because you need to make money.
Let’s look at the pros and cons and see if teaching English online is worth the money:
Pros
The money is real, and you can get hired and start earning in as little as one month. The income can be fairly steady, depending on your popularity and availability.
Some companies reward top performers with additional work such as recruiting, training, and content development.
There’s a very low startup cost; you probably have the most expensive cost (i.e., a computer) already covered.
Because you can do this from home, there are no commuting costs.
Because most online ESL jobs are offered on an independent contractor basis, some of your expenses may be tax-deductible.
If you have to travel, you can still teach English online. You don’t have to take days off (unless you really want or need to). So, in essence, you can still make money while traveling.
Cons
Though some companies offer rates as high as $50 per hour, most fall in the lowly range of $10 – $20 per hour. Remember, this is pre-tax income, too.
There’s no fixed income; you get paid per completed lesson, which means you have to be good at maximizing your teaching opportunities by optimizing your work schedule
While some companies offer 24/7 online classes, most work tends to fall within the early morning and evening hours, mainly due to time zone differences. This somewhat limits your potential to earn more.
The work can get extremely sparse during holiday and festival periods.
Your online teaching income is somewhat at the mercy of the Internet gods and freaks of nature. If you lose your Internet, electricity, or your computer crashes, so does your income. Tough luck.
How Much Can You Expect to Make?
How much money you earn as an online ESL teacher is going to depend on some factors, but primarily your earning potential will be tightly correlated to your availability to work.
Some people have a high availability to teach English, and thus have more earning potential. Others look at online ESL teaching as a side hustle, and fit it in or around other work.
So even though you could potentially make $75,000 per year teaching English online with a company like VIPKid, in reality, the earnings for most online ESL teachers will be lower. Below is a table we have designed to help you estimate your potential monthly earnings based on a $20 per hour rate and 4 weeks per month. Note that these amounts are before taxes:
When it comes to teaching ESL online, the adage “money isn’t everything“ holds true. What you will discover from the broad range of online ESL teachers is that many find the work enjoyable and personally rewarding – and, thus, absolutely worth doing.
Many could not imagine doing anything else.
Much of it comes down to being passionate about the work and the difference you make in the lives of your students, but beyond passion, most of it boils down to whether you have the right personality for this job.
It isn’t everyone’s cup of tea, and for some, the job may actually feel unrewarding at times. Particularly, if you are introverted and find it uncomfortable engaging with others, this may not be the ideal opportunity for you.
Let’s have a look at the pros and cons in terms of job satisfaction:
Though many people feel nervous when getting started with teaching online, teaching online for the most part is not stressful.
As most lessons are scheduled in the early mornings and evenings, and on weekends, there is a lot of spare time during non-teaching hours to focus on other personal or work priorities.
Many companies offer incentives and rewards for outstanding performance. For example, some Chinese online ESL companies will invite their top teachers to visit China, all expenses paid.
Though online teachers work independently of their homes, there isn’t a sense of feeling isolated. You are always interacting with students, and there are numerous channels for online teachers to interact with each other. Some companies have been quite effective at building vibrant communities for their online teachers.
Because online teachers are essentially independent contractors, that enables them to choose how much they work, work with one or more companies, or split their work between online teaching and other types of freelance work.
Cons
If you don’t enjoy interacting with children, this job will not be enjoyable for you. Though there are online classes for adult ESL learners, the largest segment consists of learners between the ages of 6 – 12.
A lot of the work happens in the early mornings and evenings, so depending on your location, you could be working during hours when most people are still sleeping. Most online ESL classes with Chinese students are scheduled between 6pm – 9pm (China Standard Time), which is 5am – 8am (EDT). If you like sleeping late or sleeping in, this job is not for you.
Online teaching often involves having a high level of energy and enthusiasm. If you are introverted and have difficulty stepping outside your comfort zone, it may not be a good fit.
Online teaching is essentially sedentary work. If you have a hard time sitting in one place for several hours, you might feel uncomfortable at times. A standing desk may be a good option in this case.
Some online ESL companies levy penalties for last-minute cancellations, missed classes, or complaints. For some people, this can be a bitter pill to swallow and detract from the satisfaction that comes with teaching English.
Some online ESL companies have been known to operate unpredictably or unethically. For example, some companies have changed their terms with short notice, while others have expected teachers to attend training sessions or other work-related sessions without pay.
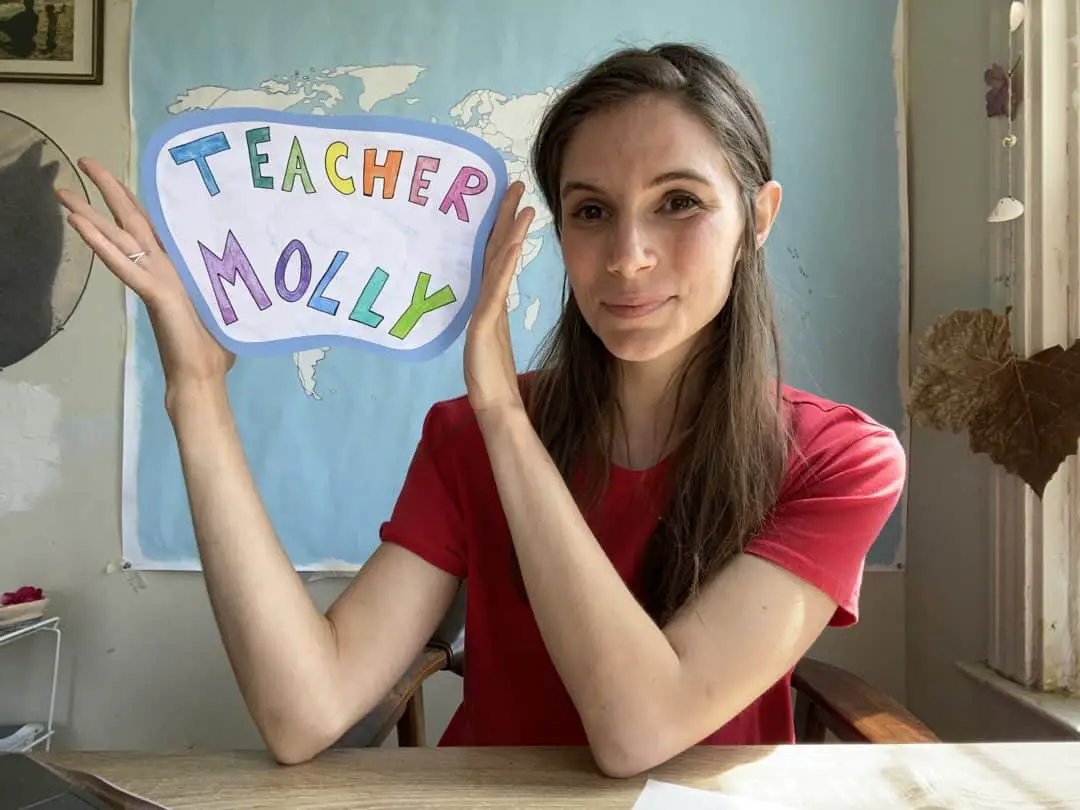
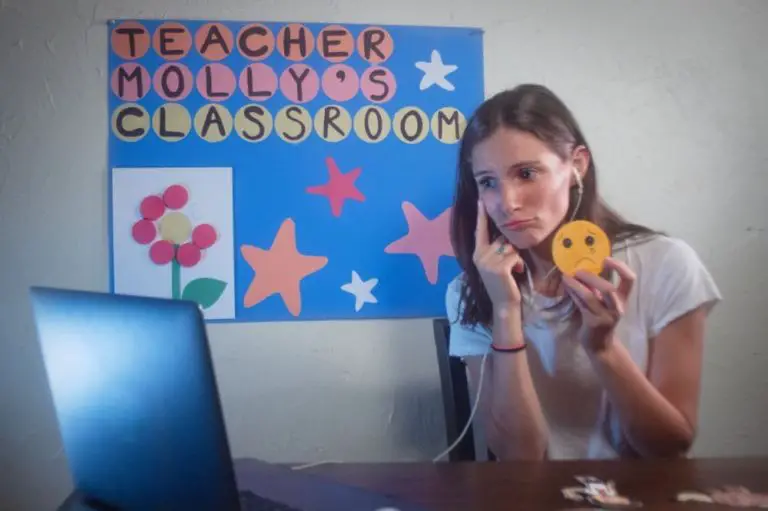
Teacher Molly giving an online English lesson about feelings. (Photo: Molly Oberstein-Allen)
Challenges
Most experienced online ESL teachers will agree that the job itself is not difficult.
If you are fluent English, enthusiastic and engaging, and genuinely passionate about teaching and helping your students improve their English fluency, there isn’t anything complex about teaching ESL online.
However, as with anything, some aspects of being an online ESL teacher can be difficult to cope with. There will be times when you feel frustrated, feeling like it isn’t worth it, and throwing in the towel.
Based on my experience, though, the pros far outweigh the cons. As long as you have carefully selected who you want to work with, and selected well, the negatives will be a once in a blue moon thing.
However, decide for yourself; here are the pros and cons again:
Pros
If you know English, you can teach English online. Most online ESL jobs are not actually about teaching grammar, verb tenses, or other mechanics of the English language.
Most online ESL companies have their own teaching platforms and courseware, so, beyond reviewing the lesson content beforehand, there is practically little to no preparation required to do the job. You basically show up, teach your lessons, teach them well, and finish up.
Some companies may also require you to complete post-lesson evaluations of your students. Most of these can be completed within minutes, and many companies pay you an additional fee to complete the reports for each lesson
If you have a computer and a stable internet connection (which you probably do if you are reading this), you can teach English online. Some companies will require you to install some software to perform the lessons, while other companies have developed their courseware to run in a web browser, with nothing to install on your computer.
Cons
You will get complaints. There isn’t a person on this planet who can perform at a level of perfection. And even if you deliver what you thought was the perfect lesson, there will be times when a student (or parent) disagrees. You’re going to get complaints just because the student (or parent) does not like you.
It is a fact of life you need to accept. It is not something isolated to teaching English online, of course. But, as you will be teaching hundreds, if not thousands of online classes over time, you will have to come to grips with it.
It is never comfortable to get complaints from students or parents, and that’s one of the things that make this job more difficult. If you struggle with receiving complaints, this job may not be for you
There are going to be times when the staff of the online ESL company will baffle, anger, confuse or disappoint you in some way. Part of this is routine in any type of employment, but another part of it will be rooted in cultural differences in workplace ethics. People in different parts of the world view work obligations differently, interpret and resolve conflicts differently, and have different priorities.
Beyond the cultural differences, you will likely also experience misunderstandings due to language barriers. There is a good chance that some staff members you have to deal with inside the company don’t have a high level of English fluency. It is ironic, indeed. But it is true. For these situations, you need to be patient and keep your cool.
Getting Hired to Teach English Online
As with many things, getting hired into online ESL teaching used to be super easy. If you spoke English, looked like someone who ought to speak English, and had a pulse, you were hired.
It is still relatively easy, but, as the industry evolves, requirements for hiring online ESL teachers are becoming more stringent. You will need a university degree as well as a TEFL certification for most dependable online ESL teaching positions today.
Due to new legislation of the Chinese government, since summer 2021, Chinese companies aren’t allowed to offer online lessons given by foreign teachers to Chinese students (residing in China). Before, China was by far the biggest ESL market; as a result, the demand for online teachers tanked.
However, people are learning English as a second language in almost every country of the world, so there are still enough opportunities.
If you are a native speaker who is a visible minority, don’t feel dismayed. Things continue to improve on that front. It is difficult to say discrimination in ESL will vanish completely, but take comfort knowing that many visible minorities are teaching English online with a great deal of success. And, some online ESL companies are equal opportunity employers.
Here are the pros and cons of getting hired into online ESL teaching:
Pros
If you speak English fluently and have a university degree, chances are good you will be hired quickly, especially if you are a native English speaker from the US, Canada, UK, Australia, or New Zealand. In most cases, you will need to have a TEFL certification as well.
If you demonstrate enthusiasm and a high degree of passion when interviewing and performing your demo lesson, there is really no reason why you would not be hired.
If one online ESL company isn’t hiring, another one is. There are plenty of choices when it comes to whom to work for at the moment. We anticipate some consolidation as the market matures, but for now, you have the pick of the litter, and can even stack up your calendar with lessons from multiple companies.
Cons
Native English speakers without a university degree will be challenged to find ongoing work. For those with degrees, this might not be seen as a con, but for those without, it is an unfortunate reality.
It is harder to get hired if you are a non-native English speaker. Many companies prefer a native speaker to a non-native, and some companies will only hire natives speakers.
Though it is gradually improving, native English speakers who are visible minorities still face discrimination, not only when applying for jobs, but also from students and parents after they have been hired.
Wrapping Up: Is Teaching English Online Worth It?
If you are adaptable, open-minded, and enthusiastic when interacting with people, then teaching English online is entirely worth it.
It offers you a lot of flexibility that other types of work don’t, and for many people, it is one of the most enjoyable parts of their day.
You probably won’t get rich teaching English online, but it might open the door to new opportunities you never imagined.
Almost needless to say: Internet speed and reliability are vital for online teaching.
As an online teacher, you’ll likely lose the fee for any lesson during which your Internet was the reason to cancel or substitute the lesson. You may be penalized monetarily. Your popularity and ratings may take a hit. You may see lessons pulled from your schedule.
Certainly, the last thing an online ESL teacher wants to do is lose time, income, effort, and stress due to their Internet connection being slow or unreliable.
So, fast, reliable Internet should be at the top of your list of technical requirements. This guide explains the minimum speed requirements for online teaching, as well as the best options for backup connections.
The Minimum Internet Speed for Online Teaching
Most online ESL companies have prescribed minimum Internet speeds to work with them as an online ESL teacher. Here are some examples of requirements from some top online ESL employers:
Company
Required Internet Speed
VIPKid
Wired High Speed Internet at least 25Mbps
ALO7
4Mbps/8Mbps (upload/download) and Ping at most 100ms
Magic Ears
10Mbps (upload/download)
As you can see, the Internet speed requirements differ between each of these companies. However, none of these companies’ Internet speed requirements are difficult to satisfy.
Still, online ESL teachers live across the globe, and ensuring you can achieve these speeds consistently is paramount. To be on the safe side, we recommend subscribing to an Internet package that exceeds the minimum requirements:
Recommended Internet speed
High-Speed Internet at least 50Mbps
Ping rate less than 100ms (less than 50ms is ideal)
Why Ping Rate is also Important
Ping rate, or latency, is the delay in how long it takes for traffic to get from a device to its destination. Ping rate is measured in milliseconds, and the lower the number, the better.
If you have a high-speed connection, but your ping rate is slow, that means the time it takes for your video, audio, and other packets of data to reach your users at the other end.
Every device connecting in between will also add delays according to their ping rates, as will the ping rate of your end user (your online ESL students).
Ideally, you want a combination of high-speed Internet and low ping rate.
Wired or Wireless Connection?
Some companies, like VIPKid, require a wired connection, which means your computer is connected to the router via an Ethernet cable, and not through a wireless connection, or Wi-Fi. A wired connection is generally faster, more stable, more reliable and more secure than a wireless connection, so using a wired connection will be more advantageous.
Some modern notebook computers now have a reduced number of ports as a result of their slimmer, lighter designs. For example, recent models of Macs come with USB-C ports only, meaning you will need an adapter to use a wired connection.
Here are some excellent USB-C multiport hubs you can get on Amazon to get a wired connection, as well as add more ports to your computer:
Anker USB-C Hub for MacBook
PowerExpand Direct 7-in-2 USB-C Adapter Compatible with Thunderbolt 3 USB-C Port, 100W Power Delivery, 4K HDMI, USB-C and 2 USB A Data Ports, SD and microSD Card Reader
9-in-1 Type C Hub with Ethernet Port, 4K USB-C to HDMI, 2 USB 3.0 Ports,1 USB 2.0 Port, SD/TF Card Reader, USB-C Power Delivery, Portable for Mac Pro and Other Type
You can use speedtest.net to test your Internet speed and ping (latency) rate. The speed test takes about a minute, and you’ll see something like this:
Speed test results on speedtest.net (Screenshot)
Have a Backup Internet Connection
Why? Because, at some point, things will go wrong. Your electricity could go out due to weather conditions. Your Internet might be disconnected due to service disruptions in your area.
Whatever the reason, you can count on the day arriving when you will show up for work and find yourself without an Internet connection. Online ESL teachers who live in geographic areas where such outages are common can relate.
Here are different options for your backup connection:
Use Your Mobile Carrier Data Plan
The good news is you probably already have that backup Internet connection right on your smartphone. Most modern smartphones can double up as Wi-Fi hotspots, so you can connect to the Internet on your computer using your phone’s data connection.
Use your phone to connect if your primary Internet connection isn’t available. (Screenshot from Mac)
This might not be an option if your mobile data carrier does not support tethering. If this is the case for you, consider switching to another carrier, or think about buying a portable router or mobile hotspot.
Be sure to test your phone’s data connection speed with a free service like Fast.com.
Use a Mobile Router
Mobile routers are excellent backup devices because they operate like a wireless router, except using a data SIM.
Mobile routers are affordable, compact, and easy to operate, so if you need to connect when other Internet connectivity options are not available, a portable hotspot device can be a lifesaver. Plus, you can travel with them, and share the data connection with multiple devices. You will need to purchase a Data SIM plan to use a portable hotspot.
Here are two bestselling routers available on Amazon:
GL.iNet GL-AR750S-Ext Gigabit Travel AC VPN Router
One way to ensure you have fast, reliable backup Internet on a consistent basis, especially while traveling, is to get an International Data SIM, which you can use with a smartphone, tablet or portable router.
An International Data SIM gives you the flexibility of adding pre-paid credit and using it for emergencies only, without having to pay monthly fees or additional fees for tethering. Since this is intended to be used as a backup to your main broadband connection, you’re only going to pay for the data you use when your primary Internet connection goes offline, or when you travel, for example.
Both providers give you a range of Data SIM card options based on how and where you plan to use data, so it’s best to check both out and decide which provider has the right SIM solution for your needs. Data SIMs are affordable, can be used in many countries, and are thus ideal for online teachers who frequently travel.
Portable Wi-Fi Hotspots
Mobile hotspots are great for traveling online ESL teachers because they offer fast, reliable Internet connectivity in many countries across the globe that are popular among ESL teachers.
One of the advantages of using these devices is you can opt for a pay-as-you-go plan, either paying per day or per gigabyte of used data.
The other advantage is that you can rent these devices instead of owning them, so if you plan to use one while traveling, you only pay for the number of days you rent them. If you are a regular or long-term traveler, it is better to own than rent one, but they are currently a little expensive to buy upfront, especially if you will only be using one to teach online ESL.
You can also keep one around at home as a backup device in case your home Internet connection drops. But for that, if you can tether your phone data, we think it’s better to use your phone’s personal hotspot feature or go with a portable router, as both options are less expensive.
Check out the plans from SOLIS Wi-Fi; you can buy a monthly plan or buy data volume which does not expire.
Your Internet connection needs to be both fast and reliable to teach ESL online. Speed should not be much of an issue for most people these days, but reliability is still something of an issue for online ESL teachers. Slow speed and frequent disruptions to your connectivity most likely impact your online teaching schedule, and thus, your income.
Be sure to choose a provider that offers Internet speeds above the requirements of the companies you intend to work with. Always have a decent backup plan for those rainy days when your Internet connection might not be on your side.
Conducting successful online English lessons and engaging young students can be challenging.
Which factors make or break an online ESL lesson?
Many teaching strategies you’ve learned won’t work outside a physical classroom when you teach English online to kids. Online language lessons aren’t just about cracking open a textbook and lecturing for 25 minutes.
It’s your job as a teacher to make sure that each lesson finishes as a hit instead of a hit on your approval rating.
But worry not! Follow the 7 pro-tips below when you teach kids online — and your students and their parents will certainly book you again and again.
What’s So Challenging About Teaching English to Kids Online?
The first thing you have to do when considering an online teaching job is to understand the differences between having classes in a traditional educational environment and having them online.
They are two completely separate experiences.
Your TEFL course might have touched on online teaching a little, but it probably mostly focused on practical classroom skills. Those skills, however, don’t always translate from a physical classroom to an online one with the type of fluidity you might expect.
In an online setting, incorporating outside media, using physical objects, and involving kinesthetic learning methods will largely be unavailable to you as an educator.
You won’t be able to look over a student’s shoulder as they read or write. You also won’t be able to jump through the computer screen and have as many physical interactions with your students. And, of course, it will also be harder to discipline them.
It will be necessary to adapt and to improvise by coming up with new teaching methods, introducing different ways of checking for understanding, and developing innovative ways to keep your students entertained and engaged throughout class.
Furthermore, the way you plan your lessons will change depending on whether you only have one student or a group of eight students online.
Remember, the structure and audience of an online lesson will always influence the approach you should take.
For a successful online career, it’s so important to learn the most effective methods to teach kids English online.
The Key to Online Lessons is Student Engagement
In the online TEFL industry, you will most commonly teach students ranging from about 5 to 11 years old.
Most bookings tend to be 25- to 45-minute one-on-one English sessions.
That gives you just enough time to make an impression, teach a few key concepts, and make the kid’s parents want to book you again.
The most important thing to remember about teaching English online, especially to young learners in a one-to-one setting, is that it’s imperative to make them feel happy and welcome in your classroom.
That means you must give them your full attention, always be pleasant and smile, and deliver quality work. By being kind and friendly, you make students feel comfortable engaging with you.
Student engagement is the most important part of the lesson. When students are active participants in your lessons, they won’t just learn more – they’ll also be more likely to book your classes again.
Let’s explore some methods you can use to get your little students to be more engaged in the classroom.
1. Show Up a Professional
Showing up to class hungover wearing last night’s outfit will quickly get you fired from a professional online teaching position.
Remember, your clients are children and their parents!
That means you have to be a role model at all times. There is an expectation that you will show up promptly to each class, smile, be well-groomed, and maintain a professional decorum at all times.
Keep in mind that each class that you teach is recorded and monitored.
Not only does the student retain a video copy of every class on their student dashboard, usually there is also a company employee reviewing each lesson for quality control purposes.
If a lesson starts steering into inappropriate territory or a teacher dresses unprofessionally, they will soon hear about it.
So do yourself a favor and make sure that a video or image of you doesn’t end up in your company’s employee training manual as an example of the things you shouldn’t do while on the job. (Yes, this happens).
Choose your wardrobe selectively. I would recommend dressing business casual at all times – or check on your company’s specific dress code.
Even though you’re teaching online, it is important to remember that this job is no less “real” than any other. Certain standards must be upheld, and every company has an image to maintain.
A smart, preppy blouse, a button-up shirt, a collared shirt, or a nice, clean polo work best.
2. Prepare Your Classroom
Keeping your background tidy yet visually interesting is key to creating a fun, professional environment for your students.
You don’t want your dirty laundry making an appearance in the background of your video. However, you don’t want your background to look totally boring, either.
Place maps, alphabet posters, or other fun, simple visuals behind you to create a classroom feel that adds some interest without distracting your students or looking messy.
Proper lighting and good acoustics are also essential to creating the right atmosphere for your classroom. Dim, flickering lighting or an echoey room can ruin even the best-planned class by ruining the atmosphere and creating distractions.
If necessary, buy a small, portable lamp to make sure the student can see you clearly on the screen. Sometimes, only using room lighting isn’t enough to illuminate your face on the screen.
Make sure your camera is positioned properly and centered in the middle of your screen.
In my opinion, students should be able to see you from the elbows up. That way, they can see your facial expressions and mannerisms. It also gives students a more comfortable feeling because it is more personal, almost like talking face-to-face.
Before each class, you should always make sure you know who your student is, how old they are, what their language level is, and what you’ll be teaching.
While most online TEFL companies do provide curriculum and online books to help steer each class in the right direction, you can supplement the materials given with little effort to take your classes over the top.
Incorporating props, knowing a student’s level before class, having an idea of a student’s interests, and brainstorming additional games or topics of discussion can really help enhance a class.
If you really want to have a great online class experience, show a student you went the extra mile by including props regarding the subject they chose or doing research on the things that they like to discuss: things like these can mean the difference between getting booked again or being forgotten forever.
4. Use Activities and Props
For a young learner learning about fruits, being sure to have flashcards of different types of fruit would be a great idea. If you have some of those fruits in your fridge, take them out and show the student.
Ask the student to describe the fruit and ask them questions such as “What do you think this fruit will taste like?”, “Do you like this fruit?”, “Do you eat this type of fruit often?”
There are so many games that you can play by incorporating flashcards or physical props while teaching English online to kids.
Just a few weeks ago, I had a class with a young learner about pets.
She really wanted a dog, but her parents weren’t convinced of the idea. During the lesson, I brought my puppy on screen, and we described what it looked like together, what tricks dogs can do, and where dogs like to go.
She was so delighted to see the puppy in class and left a wonderful post-class evaluation. I will be seeing the same student next week for another online lesson.
Many young learners are just starting to learn their numbers, colors, and ABCs. There is so much you can do to make those lessons more entertaining than simply reading from a book.
One of my favorite games to play when students are learning colors is “Find the Color”. It is basically a scavenger hunt where I tell the student to find something around them in the color that I ask for. They love to laugh and run around looking for the perfect item.
When teaching numbers, I always use stuffed animals to teach students how to count. My favorite game is “How Many Bears Do I Have?” The students count each bear, learn to describe them, create stories about each one, and solve math equations using them.
In terms of ABCs, most online providers offer tracing exercises and repetition exercises in each book. To make those lessons more fun, use the power of sound. If a student is learning the letter “A”, try to teach them how to say A softly, then at a medium sound, and then loudly.
When you turn tasks that can often be mundane into a game, students have the best time.
When I was younger, I always watched a cartoon about a group of superheroines who would fight evil with magic wands. At the time, those types of cartoons were relatively new. Now, similar shows are everywhere.
I try to take advantage of that by bringing my light up, magical toy wand that plays music. When a student answers a question very well or solves a difficult question, I turn on the magic wand and reward the student with a song and some horribly hilarious flailing. They love it!
If you’re looking for printable props for your classroom, we’ve got you covered. Download our free beautifully illustrated flashcards and worksheets to teach vocabulary:
Remember the importance of your body language. Smiling and maintaining a pleasant demeanor throughout class will make your students feel comfortable and welcome in your class.
Keeping your voice at an appropriate volume and pitch and speaking and slowly and clearly will also improve the quality of your class.
You can also indicate that you’re engaged in class by nodding to indicate that you hear what your student is saying and refraining from eating, drinking, or scrolling online during class. Use body language and gestures with your hands to help establish your points. Total physical response will help you engage students better and will aid in their understanding of the ideas you’re illustrating.
6. Always Have a Backup
When teaching English online, sometimes accidents happen.
Whether there’s a family emergency, a power outage, an internet issue, or an online textbook not loading, it’s smart to always have a backup plan.
Document everything. If there is a glitch on a website that you need for your lesson, take a screenshot of it. If a student is late for class or a no-show, be sure to record that in case that information is needed later.
If concerned whether or not a textbook will load, download it in advance.
7. Leave Actionable Feedback
As soon as you begin teaching your class, start taking notes about things you observe throughout the class.
If a student keeps mispronouncing a word or has trouble with a certain grammar concept, make a note so that you can remind them to work on it when you leave them feedback after class.
You should also correct mistakes students make during class so that they don’t get into bad habits.
However, it’s important to do this in a kind, positive way. Rather than telling them they’re wrong, simply demonstrate the correct way to say a word or sentence once they’ve finished speaking.
Pay attention to any notes left prior to the class about the student’s preferred correction style and help cater to their needs.
Once you have finished teaching your first class, you might think you’ve done all there is to do. Not so fast, though!
Your job is not over when the lesson ends. After each lesson, you usually have the opportunity to leave feedback for the student or their parents.
This feedback might seem like an unimportant, throwaway step, but you should put as much care into it as you put into your lesson.
Not only can the feedback help your students keep working on their English outside of class, it’s also a way to sell yourself and further set yourself apart from other teachers.
To be an effective online English teacher, it is important to list the positive aspects of the lesson and the student’s abilities. It is equally essential to reference all of the things that a student might have missed in the lesson, or the things that they must work on to improve their overall English abilities.
Be sure to use the sandwiching technique when giving feedback to the students. You want to be honest about your feedback but also delicate in your approach.
Always incorporate ways to improve in between positive sentences, offering the student praise. Always end each lesson memo with a positive sentence, thanking the student for coming to your lesson and stating that you hope to see them again.
Remember, when you teach English online to kids, you only have one shot to make a lasting, positive impression. What you do in your online lessons count.
It doesn’t take too much time to do, and the young learners and their parents always notice it – and often reward teachers for it by booking them again in the future.
One of the best parts of being an online English teacher is having the satisfaction of seeing your students improve throughout their time with you.
You may also realize you have grown as a teacher, too. So, teach, teach, teach – and remember, there is no perfect teacher.
What matters is getting the online English teaching experience you need and putting your best effort forward to grow in your skills.
In the so-called “new normal” we’re all living now, where physical distance has become a sheer necessity, the popular application Zoom is rapidly gaining popularity. It is very practical for meetings and conference calls, and nonetheless effective for online teaching and distance learning.
The change from physical to online has been challenging for even the most tech-savvy teachers, so it’s very important to share information on digital teaching tools to improve both teachers’ and students’ experiences in the virtual classroom.
Read on and learn more about our Zoom guide for teachers that includes essential tips and tools that will make your life easier and faster.
Zoom Guide & Instruction for Teachers
You can use Zoom in many different ways, so you can choose to stick to the app’s basics and adapt it to your and your students’ needs and skills, or you can always explore its new extensions and learn new ways to use it.
Here are some of the essential functions of how teachers can use Zoom most effectively.
Schedule a Meeting
After you’ve signed up for Zoom, you can schedule a meeting. There are two ways to do it.
First, use your personal meeting link that never changes in a personal meeting room for staff or office hours. Also, you can use this link to host sessions with your colleague teachers. This is a great option for one class section and in case anyone enters your Zoom room when you’re unavailable, their access will be denied.
Second, if you have multiple classes, I recommend you to schedule a unique meeting to prevent students from dropping in during classes. You can do that by using the dashboard.
Friendly reminder: Make sure you send your invitations on time, and that the subject line is easy to understand. Always double-check the date.
Teach Live Lessons
If your class doesn’t encounter any technology or internet connectivity issues, you can easily have live lessons and perform remote activities together with your students at a scheduled time.
Record and Share Lessons
Use the recording feature and create video lessons that you can share with your students who weren’t present in class or have unreliable internet at home.
Mute Microphone and Video
Sometimes it can be even harder to control the atmosphere in the virtual classroom. In order to make sure that while one person is speaking, the rest of the students are listening, as a host, you can mute the microphone of all students, or turn off the video when needed.
Go to the ‘Manage Participants’ option.
Select ‘Mute All.’
The shortcut to mute the microphone is Alt + A or Cmd+Shift+A.
The shortcut to turn off the video is Alt + V or Cmd+Shift+V.
Chat (Personal and Public)
In the Zoom chat, students can send a message to the entire class and the teacher. There is also a private chat which you can’t view (something like when they’re passing notes to other students in class when you’re not looking :) You can also disable this feature for students.
Share Screen
When a person shares their screen, the entire class can view it and even leave annotations. As a teacher, you can restrict these functions by disabling the annotation and allow screen sharing only for you.
Waiting Rooms
Students can be held in a virtual lobby and you can admit them one by one to make sure no intruders enter class. You can manage this option in the settings.
Zoom Tools and Tips for Teachers
As the current standard for video streaming for remote teaching and learning, Zoom offers many tools and features that focus on improving the teacher’s experience of Zoom.
Here are some additional great Zoom tools for teachers:
Breakout Rooms
The Breakout rooms allow you to split your Zoom meeting or online class into many separate sessions (up to 50). So for certain activities, you can split students into smaller groups or meet them individually and then meet the class together again, after the group work is finished.
This is how to do it:
Enable breakout rooms in Zoom.
Before class, pre-assign the students of the small groups.
Assign them during class or use the option to have Zoom randomly break the class into groups.
Whiteboarding
This is an excellent feature for group projects or just to launch your warm-up with brainstorming at the beginning of class. Students can draw or write on the whiteboard. This is a great way to make classes more interactive.
The “Flipped Classroom” Model
Teachers that opt for this online teaching model, assign the new material to students to learn it individually and then clarify information and practice it during class. Prepare activities that will engage students to apply new knowledge and encourage brief Q & A sessions on the new material.
Show-and-tell Time for the Younger Students
Young elementary students can’t pay long attention to video online classes, however, it is important to make them feel the communal spirit of the classroom. Schedule days when they can see their classmates, enjoy reading time, share stories, show toys or drawings etc.
Virtual background
Yeah, messiness has become a new normal within the new normal of many of us teachers. Luckily, Zoom got us covered! Use the feature for changing your background and avoid the stress about the way your bedroom or office looks.
Just make sure you use something that will not distract students and always test before class to prevent any unexpected fails. Also, you can change the background to a theme that matches the day’s topic of your class. For example, melting icebergs for a lesson on climate change.
Turn off File Transfer
Young students especially use the chat to get distracted in online classes. If you disable the file transfer, students won’t be able to share GIFs, memes or any other files during class. This will help them to stay focused and is a great way to set rules in online classes.
Reactions & Nonverbal Feedback
Just like in regular classes, students can express reactions and engage directly in class. They can use the icons of this feature and raise a hand when they have a question, clap, disagree or ask the teacher to speak slower or faster. Use these functions to engage your students to participate in class.
Wikipedia Search
This is a chat app that is very practical for classes that include research on the spot. You and your students can search for Wikipedia articles directly from the Zoom chat channels and share them with each other.
Link Your Google Calendar to Your Zoom Account
One of the best ways to stay organized and to keep track of all your appointments and your schedule is to connect your Google Calendar with your Zoom account.
Log into your Google Calendar, go to “Settings” and choose “Gett adds”.
In the pop-up tab look for Zoom for GSuite and confirm the installation of the app.
Create an event in your calendar and select Zoom as the option for the call.
An ID and a password will be automatically generated for your call that you can easily copy.
Connect Zoom to Slack
This is another great way to improve your organization while multitasking as usual. Considering that Zoom and Slack are apps used by most professionals worldwide, it is very practical to connect them and have your task schedule and appointments always at hand.
Log in to both Zoom and Slack via the same email.
Enter Zoom, then find the Slack app in the Zoom Marketplace and install it.
Search for more useful options in Settings.
To be continued…
The popularity of Zoom inspires regular updates and extensions of the app. Some of its tools are features of the platform itself but there are also external apps that can be connected to Zoom.
Online teaching requires exploring alternate approaches in teaching and learning, therefore, it is very important that teachers stay up to date with the new technologies to make their lessons fun and appealing.
Don’t forget to check this post again in months and see what’s new!
So you’ve decided to teach English online to Chinese students – by the way, it’s a great idea: the demand is sky-high!
But you don’t want to start on your own, and you are not sure which company is right for you.
With tons of English teaching companies, it can be hard to figure out which one is best.
This post will discuss which companies are the best and the worst, breaking down the salary, teaching requirements, and teacher satisfaction at each.
It will also talk about what it takes to teach English online to Chinese students, as well as telling you what equipment you’ll need for the job.
The Benefits of Teaching English Online
Teaching English online to Chinese students is a great job for a few reasons:
Work is Abundant: Demand for online English teachers in China is huge, meaning that you’ll never be short of students.
No matter what your qualifications are, you’ll be able to find a job teaching that you can start now.
The job is flexible: You can work from home or on the go. As long as you have a quiet, well-lit space and a strong internet connection, you’re all set to teach.
You can set your own schedule: Choose the teaching time that works for you, and design a job that revolves around your life instead of vice versa.
This means that …
You’re in control of your salary: Feeling good about your finances? Want to take a vacation? Schedule fewer classes, or take a week or two off.
Crunched for cash? Just teach more! Open more teaching slots and watch yourself get scheduled.
You’re off the grid – your schedule, and your finances, are up to you.
It’s low-risk: Most of the tools you need to teach online you already have: a good internet connection, a white wall you can use for your teaching background, a friendly smile.
Because you don’t have to invest much to start your teaching career, you can try it out to see if it’s right for you before you quit your day job or spend a bunch of time or money.
Click to save this post to Pinterest
Finding the Perfect Teaching Company
The teaching market is flooded with companies you can teach for, which can make deciding where you want to teach overwhelming.
There are a few factors you should consider when deciding which company to work with.
Teacher Requirements
First, make sure the company you want to work with will hire you.
Some companies prefer teachers with certain accents (i.e. U.K. or North American).
Some places also only hire teachers who reside in or are citizens of certain places, due to payment and server requirements.
(Source: VIPKID)
Most companies require teachers to have a bachelor’s degree in any field and to be native English speakers. A TEFL certificate is also preferred, but not always required.
If you don’t have a bachelor’s degree or aren’t a native speaker, don’t worry. You may have to look a little harder for work, but there are companies that will hire you.
You’re probably thinking, “Great, I can get hired, but how can I choose the company that’s best for me?”
When comparing companies, you’ll want to consider a few factors:
Payment Model
Look at the salary range for the companies you’re considering, as well as how often you’re paid.
Are you paid per minute, per 25-minute class, or per hour?
Will you receive payment monthly or do you have to earn a certain amount before the company will deposit payment to your account?
Does the company use PayPal or another online payments system?
Make sure you won’t have trouble accepting payments to your bank account in your home currency – this shouldn’t be an issue with major companies.
Required Schedule
Companies vary widely in terms of how they schedule teachers. You want to make sure you choose a company that accommodates your needs.
Some companies require you to set a schedule and stick to it, and give plenty of notice if you want to modify it.
This model gives you less flexibility but usually ensures that you get paid for slots you have opened even if you end up not teaching during them.
Some companies give you control over your scheduling, letting you open and close slots until they’ve been booked, at which point you’ll be penalized for canceling because a student is counting on you to show up.
This model gives you ultimate control, but it can make it harder for you to get booked up at first.
It also can make it harder to commit to a teaching schedule if you’re not self-motivated because it’s easy to cancel classes and give yourself less opportunity to meet new students
Keep in mind that some companies have minimums on how many hours their teachers work.
You may have to sign up for at least 6 classes a week, for example.
Having minimum teaching hours helps you stick to a good teaching schedule, but it can also mean you have to plan in advance or give notice if you want to take a vacation where you won’t be teaching.
Working Conditions and Teaching Support
Read this, because this requirement is more important than it may initially seem.
You’ll probably want to work with a company that has good teaching support and a strong teacher’s community.
When you inevitably run into technical problems or have issues with students you’re teaching, you’ll want to have a community of fellow teachers that you can talk about your job with as well as professionals working for your company that can help you resolve issues.
Having good support will make your class run more smoothly, and it will help you make your classes better.
The Kind of Lessons You’ll Teach
Before signing with a company, consider what kind of work you want to be doing. Different platforms design different types of curriculums and cater to different kinds of students.
Most companies teach children and adolescents, but some work with all ages or only cater to certain populations, such as business people or high school students studying for standardized tests.
Consider also what kind of teaching you want to do. Do you want to converse, teach in a flipped classroom, or have complete control over your curriculum development?
Doing some research about different companies’ teaching styles and audiences will help you get a sense of which place is best for you.
The Best Companies to Teach English Online to Chinese Students
There are tons of online English teaching companies popping up all the time.
With all the choices out there, it can be hard to tell which companies are legitimate and which ones don’t have a clue.
Below, we’ll break down some of the most popular online teaching companies.
Applicant Requirements: Have a bachelor’s degree, the eligibility to work in the U.S. or Canada and one school year of teaching, tutoring, mentoring, or other educational experience
Note: Due to independent contractor laws, potential teachers who have California, New York, or Washington state residence can no longer sign with VIPKID
VIPKID caters to Chinese students between the ages of 4 and 12.
Teachers don’t have a minimum teaching requirement, although VIPKID recommends that teachers work at least 7.5 hours a week in order to maximize booking opportunities.
VIPKID provides teachers with lesson plans and a teaching platform complete with a points system, a feedback system, Powerpoints, and a conversation box.
Teachers don’t plan their lessons. Instead, they use VIPKID’s curriculum, which centers on the flipped classroom method of teaching.
VIPKID is a particularly great company to teach for because they have great teacher’s resources, including “firemen” that are always available to help out if you have problems in class.
For example, if you or your student run into technical issues, the fireman can help you. They can also help if either of you have trouble understanding technical things or if you have confusion about scheduling or lesson time.
Additionally, there’s a great teacher community for VIPKID. Teachers on online forums trade information about improving their classes, attracting more students, and creating classroom props. They also sometimes meet up for in-person gatherings of VIPKID teachers!
VIPKID also offers great personal development resources. They recently offered all of their teachers free TESOL certification. This certification can serve you well in getting other ESL jobs – online or in person.
They also offer lots of workshops and courses for improving teaching skills.
Teacher requirements: be a native English speaker from the U.S. or Canada, have a bachelor’s degree or be in the process of getting your bachelor’s degree; have a 120-hour ESL certificate
Teaching requirements: live in the U.S. or Canada, have a bachelor’s degree and a teaching license or English teaching certificate (like TEFL, TESOL, CELTA, ESL)
QKids has a 6-hour weekly teaching minimum, and requires teachers to have a bachelor’s degree and previous teaching experience.
If you teach for QKids you’ll have to work at least 6 hours a week, and your schedule will be set weekly. You’ll teach 1-4 students in each lesson.
QKids pays teachers $16-$20 an hour, including base pay and bonuses. You’ll receive half pay for lessons where the student doesn’t show up with QKids, and you’ll receive payment for classes you teach during the interview process.
QKids is an attractive company because it offers a competitive salary and, unlike many companies, compensates teachers for their classes during the interview process.
However, their scheduling is less flexible than some other places.
SayABC serves Chinese students aged 5-12. Teachers teach 40-minute classes to 1-6 students at a time.
SayABC has laxer teaching requirements than some other companies. Unlike many companies, they don’t have citizenship requirements for teachers.
However, while teachers used to be able to apply even if they didn’t have a bachelor’s degree, due to changing Chinese government requirements they now require all teachers to have at least a bachelor’s degree.
The biggest complaint SayABC teachers have is of having inconsistent bookings and sometimes not getting as many classes as they’d like.
italki is a great company to work for if you want lots of control over your teaching practice.
Anyone over the age of 18 can work for the platform as a Community Tutor, although Type 1 Teachers need a bachelor’s degree and references and Type 2 Teachers need a teaching license or ESL certificate.
Tutors on the site set their own pay, curriculum, and schedule, and italki collects a commission on your pay.
The site is basically just a platform that connects tutors with students. italki doesn’t have its own teaching platform. Teachers are allowed to use whatever platform they want, although most of the site’s lessons are conducted through Skype.
If you’re self-motivated and want to put the work in to really build a teaching practice, italki may be for you.
However, if you want to jump into a structured program that requires less work, you may want to consider a more traditional teaching platform.
Teacher requirements: Be a native English speaker with a neutral accent, have a bachelor’s degree, have experience teaching or tutoring and experience in the U.S. or Canadian educational system
Teaching requirements: be a native English speaker from the USA, Canada, or UK; have a bachelor’s degree; have a TEFL/TESOL certificate; have one or more years of prior online teacher experience
Consider a job with BOXFiSH if you’re a native English speaker with a bachelor’s degree!
The company pays $22-$24 an hour. If a student doesn’t show up for class, you’ll make 60% of your normal salary, which is higher than what most companies offer.
BOXFiSH teachers work with Chinese students from kindergarten to grade 12. The company offers 25-minute one-on-one classes and group classes with up to four students.
They also offer 5-minute review classes, during which teachers assist students in reviewing lessons that the students have learned independently.
BOXFiSH gives teachers lots of flexibility in creating their teaching schedule, like VIPKID does.
BOXFiSH also lets teachers conduct class via app, unlike many companies. This offers teachers more flexibility in when and where they can give lessons.
Many teachers like the company because it offers a good salary, a flexible teaching schedule, and a generous cancellation policy.
Teaching requirements: No requirements apparently (from what it looks like on their website); it seems like you do need to be a native English speaker, according to OET
Salary: $0.17 per minute or $10.20per hour; $0.20 per minute or $12.00 per hour on Cambly Kids
Cambly tutors make $0.17 a minute, which works out to around $10.20 an hour. If you opt for the Cambly Kids option, you can make 3 cents more a minute, which works out to $12.00 an hour.
The company seems to require its employees to be native English speakers, but doesn’t require tutors to have prior experience or even a bachelor’s degree.
As a Cambly tutor, you’ll chat with students rather than teaching formal lessons. You can choose to teach either children or adults.
Cambly gives you lots of flexibility and has a low barrier to entry, but it also pays less than many other companies.
UUabc has a four-hour minimum weekly teaching requirement.
The company doesn’t require applicants to be native speakers, so long as their English is clear and fluent.
If you work for UUabc you’ll use their provided materials to teach Chinese kids individually or in groups of four.
The company seems to offer pretty competitive pay, but it’s less established than other companies, which means you may not have great teacher support or steady working hours if you decide to teach for them.
As a teacher with EF, you’ll get to work with either children or adults, although most of the company’s students are adults. You may teach students 1 on 1 or in groups of 6-8.
EF teachers are given all the teaching material they need for class.
Teaching requirements: English speaker at an idiomatic level; teaching license, TEFOL/TESL certificate, or equivalent, bachelor’s degree, teaching experience
Salary: Not listed on the company website (Glassdoor reports pay ranging from $8-$17 per hour)
As a teacher with iTutorGroup, you’ll need to commit to teaching during 6 peak hours per week. Other than that, though, you’re free to set your own schedule.
So, while you’ll have less flexibility than you would with some other companies, you can still make your schedule work for you.
As an iTutorGroup teacher, you’ll be able to work with children aged 5-18 or adults aged 18_. The company provides all the materials you’ll need to teach!
iTutorGroup, doesn’t offer information about teacher salaries on its website.
DaDa (formerly DadaABC) is a platform for teaching children aged 4-16 English one-on-one.
Classes are 30 minutes long and teachers must teach for at least 10 hours a month.
Some teachers really love working for DaDa. However, others complain about not getting paid on time, and its lack of flexibility and transparency makes it less attractive than other companies.
LIKESHUO (out of business)
LIKESHUO Teaching Portal
Teacher requirements:
Native English speaker
Bachelor’s degree
Salary: Not listed on the company website (OET Jobs reports $16-$25 per hour for teaching children and $10-$18 per hour for teaching adults)
Glassdoor rating: 1.0 out of 5 stars
LIKESHUO splits their online English teachers into three levels based on experience and credentials. Requirements vary based on level.
The company requires most of its teachers to work at least 30 hours per month.
This company has scant information available and online and has a poor rating on Glassdoor. Some have reported having a good experience working with them, but overall, it seems that this might not be your best bet.
What Are the General Requirements to Teach English Online?
Being an online English teacher is easier than you think! All you need are native-level English, a bachelor’s degree, and a friendly attitude!
What English Abilities Do You Need?
Most online English teaching companies require their teachers to be native speakers. Some also require teachers to be from specific countries. For example, VIPKID requires its teachers to be from the U.S. or Canada.
Keep in mind that there are companies that only require that their teachers have a native level of English.
Does “Teaching Experience” Mean You Have to Be a Classroom Teacher?
Many companies don’t require their teachers to have prior teaching experience. However, if you have teaching experience or a TEFL certificate, you’ll be a more attractive candidate and may even be offered a higher starting salary.
Some companies do require teaching experience, but don’t worry. Often you can count tutoring, camp counseling, childcare, or leadership roles as prior experience.
Employers just want to know that you’re good with children and are able to be an educator.
What Personality Traits Will Help You Teach English Online to Chinese Students?
Perhaps the most important part of becoming an online ESL teacher is your personality.
To really shine through the screen and teach effectively, you should be a lively, fun person whom students can relate to and feel comfortable around.
In your interview and mock class, your employer will want to see you use TPR (total physical response). That means talking with your body as well as your voice, using gestures and signals to indicate that you’ve heard the student and to illustrate concepts.
Don’t be afraid to be expressive and let your personality shine through. Your employer will love it, and so will your students!
Can You Teach English Online Without a Degree?
Most companies require all of their teachers to have a bachelor’s degree or above. However, some do accept students in their last year of university or applicants who have an associate’s degree.
Additionally, some teaching marketplaces allow anyone to teach on their platform.
Do You Need TEFL Certification?
Most teaching companies don’t require teachers to have a TEFL certificate. However, some teachers do require teachers to have a TEFL/TESOL certificate, and others offer teachers who are certified higher base salaries.
A TEFL online course is a good option even if you don’t work for a company that requires its teachers to be certified, because the course will give you teaching skills and will look good on your resume generally.
Some online teaching companies, like VIPKID, offer free teaching certification to their teachers.
What Equipment Do You Need?
Besides CV requirements, you need a few technical requirements to be an online ESL teacher.
You probably have most of what you need, and everything else is pretty easily attained. Here are the physical requirements for teaching ESL online:
Internet Connection
Since your classes will be delivered online, you’ll obviously need a good internet connection to teach online.
Some companies ask teachers to have a wired internet connection to ensure stability, but overall you should be fine if you can Skype and do similar tasks easily with your internet connection.
You can also check different platforms’ websites to see their specific requirements for internet speed and system requirements.
System Requirements
Many companies require you to have at least 4 GB of RAM, as well as a newer OS.
If you have a reasonably new Mac or PC you should have no issues, but check specific websites tech reqs to make sure your current computer is up to snuff.
Your classroom should have good lighting and be somewhere quiet.
Choose a room where you can close the door, and if there isn’t good overhead lighting make sure you have plenty of lamps. You can even buy studio lamps to better light your classroom.
Make sure you’re lighting yourself from the front and that the whole room is well-lit to avoid weird shadows or too much darkness.
Do You Need to Bring Your Own Lesson Plans and Worksheets?
Most companies provide you with all of your teaching materials, meaning you don’t have to do any curriculum planning or prep!
Some companies, however, do require teachers to create their own lesson plans. EF and italki, for example, give teachers the freedom to create their own lessons.
No matter what, there are a few items that you’ll want to prepare in order to make your classroom livelier and your lessons more engaging:
Teaching Background and Props
One of the most fun parts about teaching online is creating your classroom. You’ll want a fun, educational teaching background to keep your students engaged.
Lots of teachers like to decorate their classrooms with alphabet charts, points boards, and other fun wall hangings that attract students attention and help create an educational setting.
Teaching Props
Props help your students understand what you’re teaching, and they also keep them entertained during lessons.
You can use flashcards, realia, and other objects during class. Funny hats, puppets, pictures, and toys will also help you illustrate your lessons. Your students will also love seeing what wacky props you have in store!
Most companies allow you to set your own schedule. Some require you to keep a schedule that you set every week or month, while others let you open and close teaching slots at any time until they get booked.
Some companies having minimum weekly or monthly teaching requirements, while others let you teach as much or as little as you like.
A minimum teaching requirement can help you make sure you’re teaching enough classes to make good money, but it can also make planning trips or taking vacations harder.
Also, even though you can set your own schedule, you’ll still be tied to students’ schedules. As a teacher in China, you’ll have to work when students are around to take classes. Peak class times are in the Chinese afternoons, which means that you’ll be teaching late at night or early in the morning depending on what time zone you’re in.
How Much Is The Pay?
How much you’ll make depends based on what company you work for, but most teaching platforms pay somewhere between $10 and $25 an hour.
Your pay will probably include your base salary as well as incentives for things like starting class on time and hitting a certain number of teaching hours per month.
If you work for a teaching marketplace, you may be able to set your own salary.
What’s the Application and Interview Process Like?
The process of applying to teach English online varies based on what company you’re applying to, but most companies have roughly similar application processes.
You’ll most likely start the process by filling out an application form where you give some basic information about yourself, like what country you’re from, what your education level is, and whether you have any teaching experience.
Next, you’ll do a video interview with someone from the company – either an employee or another teacher. You’ll probably just talk a little with them and go over a few of the things from your resume.
After the interview, you’ll have one or two demo classes. The company will give you some materials to review, and then you’ll use them to teach a mock class to a teacher for the company. The teacher will grade your performance and give you feedback for how you can improve.
During the interview and the mock classes, make sure you look your best, speak clear, fluent English, and are enthusiastic, collected, and prepared. This is your chance to show the company how great of a teacher you are!
After the mock classes are over, you’ll most likely receive notice that you’ve been hired! You’ll be offered a starting salary, and if you accept it you’ll sign a contract for somewhere between 3 months and a year.
After that, you’ll create a profile on the website and start teaching!
Can You Teach English Online While You’re Traveling?
YES!
However, make sure that you’ll have a quiet classroom and a stable internet connection before you start adventuring.
You can set up a classroom anywhere that’s bright and quiet: a hallway, a broom closet, a bathroom, whatever. If there’s no strong wifi, though, you’re out of luck.
You also need to be extra disciplined if you’re planning on traveling while teaching. Keep track of time change differences and scheduling to make sure you don’t accidentally miss class and get penalized.
You Don’t Speak Mandarin – Can You Still Teach English Online?
YES!
Most companies center on an immersion-based language curriculum, encouraging students to hear, speak, and think in English during class time. You won’t be required to speak Chinese at all.
Using props and body language will help you convey ideas to young learners without speaking the same language as them. And you’ll be surprised by how well many students speak English!
What’s it Like to Teach Chinese Students Online?
There are some bad misconceptions floating around about what it’s like to teach Chinese students. Don’t listen to stereotypes: your students in China are probably pretty much just like the people you know in your home country.
Teaching will be a little different depending on what age group you teach. Think about what kind of students you want to teach, and then apply to a company that caters to that group.
Children
Teaching kids is super fun, but it can be draining, too. When you teach children you’ll want to speak slowly, use lots of fun props, and make class interesting and exciting. If you’re bubbly and high energy, you’ll love teaching children!
However, if you’re more serious or staid, you may want to consider working with older students.
High School Students
High school in China can be pretty intense, meaning that your students may be totally slammed with work. They’ll probably pay attention well in class and have good English skills, but they may not give your ESL classes as much attention as you’d like because they have so much other work to do.
Pre-College Students
Students who want to go to university in the U.S. need to pass a language test in order to get admitted to school.
You need to be familiar with CELTA, TOEFL, or other tests to teach these students, but if you’re good at teaching to these tests you can make a pretty high salary.
Keep in mind, though, that teaching to a test is more stressful than other types of teaching because your students are relying on you to get into university.
Adults
Adults take English lessons for a number of reasons. Some simply want to practice their English, while others are specifically looking to learn English for business purposes.
If you’re teaching business English you can make a lot of money because it’s a niche field.
Teaching regular adults is also rewarding because you can develop a good relationship with an adult language learner. They’ll probably also be vocal about what they want in their lessons, making for a more collaborative teaching process.
Is Teaching English Online to Chinese Students Right for YOU?
Teaching English online is a lucrative and flexible job, but it’s not for everyone.
Thankfully, applying to teach online is pretty low-stakes, but you might want to consider whether the job is right for you before you apply.
Here are some traits you should have if you want to be an online English teacher:
Be Self-Motivated
There’s high competition in the online teaching market. Therefore, you should be able to market yourself and persevere to ensure that you get a good student base and regular lessons.
You also need to be able to set and stick to your own schedule, and to wake up early or stay up late to teach.
You’ll be on your own when you teach online. Although this gives you a lot of freedom it also means that you need to be your own boss in lots of ways. No one is in charge of you but you.
Have Thick Skin
Teaching online is a lot of fun, but it’s also a wild job. You might get bad reviews from parents, or have to deal with unruly or even mean students.
Being able to roll with the punches and bounce back from criticism will help you keep going even when the job gets tough.
Be Personable
Your personality is your biggest asset when you’re teaching online. Being able to captivate students, even students who are distracted or don’t want to be in class, is what separates great online teachers from poor ones.
If you are happy and have a sparkling personality, your students will love you and their parents will too. And you’ll probably have a great time teaching if you’re smiling, too!
Online Teaching Might Just Be for You!
If you think you meet these requirements and you love teaching, children, or interacting with people from different cultures, then online teaching is perfect for you!
The job is mobile, person-to-person, and flexible. If that sounds like a great setup, then don’t hesitate… apply to teach English online now!
Do you want to teach English online – to pad your income or work full-time, from home or location-independently while traveling?
Usually, teaching through an online teaching company is the easiest way to start a career in the industry. But you can also build an independent teaching business or advertise on platforms where you are matched with students.
Whichever way you prefer, you certainly have questions upfront and want to prepare for success.
This is where this handy guide comes in: In only a glance, you’ll get an overview of all the requirements, possibilities, and specifics of teaching English online.
Read on to have a head start to your online teaching career!
What is Online English Teaching?
Teaching English or ESL (English as a second language) online can take several forms. It’s become incredibly popular worldwide in recent years because it lets language learners worldwide easily connect with tutors.
Some people look for highly trained tutors or native speakers, while others just want someone they can practice conversing with through the internet.
People teach all age ranges, from young children just starting to learn English to business people working to improve their speaking skills.
You can work with students all over the world: Chinese high schoolers, immigrants who’ve recently come to the U.S., South Korean children, adults in the Middle East.
As an online English teacher, you can also decide how much control you want over the back end of teaching: curriculum development, marketing, and pay and class structure.
Some online English teachers work for companies that manage everything except teaching the class itself, while others take total control of all aspects of their teaching business.
Other Great Guides on Online Teaching
While this article focuses on working for online teaching companies, we have other guides for teachers who want to work independently.
The Benefits
Teaching English online may seem kind of weird at first, but once you find out a little about it, it sells itself. Because there are so many routes to teaching English online, the job can really look whatever you want it to look like. Once you try it, you won’t want to miss the undeniable benefits.
Jobs are Abundant
There’s a high demand for native English speakers to teach online, so it’s relatively easy to get a job teaching.
If you don’t have any teaching experience or training, no problem. Most companies will train you, and some will even pay you for training hours!
Although the demand for non-native speakers is lower, you’ll still find plenty of opportunities to teach provided that your English is good.
Flexibility: The Job Works for You
Teaching English online is a fantastic option for anyone who wants flexibility and a mobile workplace. You can teach anywhere with a stable internet connection, and you can set your own hours.
Also, you can work as little as much as you want, meaning that you can make the job work for you. Whether you’re looking for a new full-time job or a side hustle, online English teaching can work for you.
The Job is Meaningful
Perhaps the most surprising benefit of teaching English online is the relationships you’ll make.
Because you work one-on-one with students, you get to form relationships with children across the globe, and you get the satisfaction that comes from watching children grow and learn as a result of your instruction.
You’ll also learn teaching skills that will serve you well on paper and theoretically if you ever decide to live abroad and teach ESL in person.
The General Requirements
Requirements for online teaching vary by employer, but by and large, companies require teachers to have a bachelor’s degree and either be a native English teacher or speak with native fluency.
Most companies don’t require a TEFL/TESOL certificate, but they encourage it, and you may be paid more highly if you have a TEFL certificate, a teaching certificate in your home country, or teaching experience.
Can you Teach English Online Without a Degree?
While most companies require all teachers to have bachelor’s degrees, some companies are more flexible with their requirements. However, most likely, you will earn less at these companies.
If you work independently and teach own students, there are no requirements at all, except for being a great teacher!
The Salaries
If you teach ESL online through one of the major online teaching companies like VIPKID or DaDa, you’ll generally make $14-26 an hour.
Some companies pay teachers a flat rate, while others set your salary according to your teaching experience and performance in your interview.
So, let’s say, if you teach 30 hours a week at $20 per hour, you’ll earn $2,400 a month. Not bad, isn‘t it?
On online teaching marketplaces like Preply, usually, competition is high; thousands of private tutors offer their services for $15 and below. Having many 5-star ratings and a professional profile, you will be able to make $25 to $40 per hour.
When you are an independent teacher or tutor, you can set your own rates: They’ll heavily depend on where and who you teach. As an experienced business English tutor, you can easily make $50 per hour or more. On the other hand, you’ll have to advertise and find students yourself and have much higher expenses.
Remember that you should consider tax deductions when calculating your expected salary as a freelancer or independent contractor.
Types of Students and Classes
Innumerable people are looking for tutors teaching English as a foreign language online all over the world.
School children take supplemental English classes outside of school, business people learn English independently or through their companies, and people who want to travel to English-speaking countries practice English on tutoring platforms.
If you’re a fun, bubbly person, you’ll probably want to look at online TEFL-teaching jobs aimed at children. Keeping small children engaged for a full lesson can be hard work, but it’s incredibly rewarding especially if you like kids and are a high-energy person. However, if silly faces, props, and big hand gestures sound exhausting to you, you may want to look into teaching adults.
Teaching teens or adults is rewarding because you can often talk about the more advanced subject matters than with children. It’s challenging in its own way because you need to make a class interesting and worthwhile and you can’t fall back on shiny toys and stickers to keep your students engaged.
However, you’ll practice your tutoring skills and may even foment a cross-cultural relationship with someone halfway around the world.
Give 1-on-1 Lessons or Teach Small Groups
Different online teaching companies design classes a number of ways, according to what they feel is the best teaching style and format for their platform and goal.
Although some platforms only facilitate one-on-one tutoring, a number of online teaching companies, such as Boxfish and QKids, allow you to teach classes of up to 4 students.
Teaching more students can be an added challenge because it requires you to keep the attention of multiple students, and sometimes to cater to slightly different English levels at once. However, it also lets you play games and do group exercises in your classes, making class more fun and taking some of the pressure off you as the teacher.
Often you’ll also make a little more money teaching group classes than individual students.
Different Lesson Types
As alluded to above, lesson style will vary based on the age of online teaching companies’ students and the nature of their mission.
Classes that prepare students for English exams, business, or interviews will be structured to hit specific language aims. Exam prep classes specifically are serious and highly structured.
Classes for children often use an interactive platform that revolves around games and songs.
There are also platforms that host conversation spaces, where you and a student simply practice conversational English by talking for a set period of time.
Working for an Online Teaching Company
The hardest part of building your online English teaching career is getting started. Working for a company is definitely the easiest way to get started teaching online, and probably your best option if you’ve never taught online before.
If you decide to work for an online teaching company, you’ll go through an application process and then the company will offer you a salary when they give you a job offer.
At that time, you’ll sign a contract, probably for somewhere between 3 and 12 months. After your contract period ends, your position will be reassessed and assuming you’ve performed well, you’ll renew your contract and may be offered a raise.
It’s a great idea to teach through a company when you first start out because they’ll provide support and help you get started.
Terms and Conditions
The contract usually lays out that you are an independent contractor and not an employee, and as such are responsible for your taxes.
Most of the major teaching companies have teacher portals that let you set your schedule, see what classes you have booked, and manage feedback and payments.
Some companies, like VIPKID, let you change your schedule continuously (although you can’t cancel a class once it’s been booked without penalty), while others, like DaDa and Englishunt, require you to maintain a set schedule.
Some companies also set minimum teaching hours. At DaDa, you have to commit to teaching at least 4 hours a week, and at QKids you must teach for at least 6 hours a week.
Minimum teaching hours can help motivate you and keep you on track, but they can be annoying when life gets hectic, and you want to put teaching on the back burner for a bit.
The Application Process
The application process varies by company, but most online teaching companies have you submit an application and then invite you to an interview.
Following that, there will be one or two mock lessons that you’ll need to prepare and practice for before you’re hired. The whole process may take a week or two, depending on how quickly you move through all the steps.
The interview and mock classes may seem intimidating, but there are many resources online for preparing for both — if you work for any major company, you’ll find tons of demos and advice videos made by their teachers on YouTube.
Pros and Cons
Do you prefer teaching with a large company or independently? Here are the benefits and downsides of working for a company.
The Pros
Online teaching companies provide professional support and pre-made lesson plans and resources.
They communicate with the parents and book classes for you, so you’re only responsible for teaching.
They often have room for raises and further training and certification.
It’s easy to build up a large enough student base to make a steady income teaching with a company.
The Cons
The company makes the rules, and it can be difficult to communicate with management.
The teaching requirements can be strict, and punishments tend to be inflexible. (For example, even if you have to miss class for an emergency, you may be penalized if you don’t have proper documentation.)
You have less room for flexibility than you would teaching by yourself.
You have less earning potential than a specialized tutor would.
You have to file your taxes.
You may end up teaching classes or lessons that you don’t like.
Now for the nitty-gritty. If you want to teach English online, you need some basic tools.
Stable Internet Connection
For starters, should have a stable high-speed internet connection. Some companies, such as VIPKID, technically require that you have an Ethernet connection, but a strong, fast Wifi connection should be just fine.
Computer, Tablet or Mobile Phone
Most companies require that you teach from a laptop or omputer on their platform, but some have apps that allow you to teach from your tablet or phone.
Webcam and Microphone
You should also have a good webcam, mic, and headset. The headphones that come with a Mac are perfectly good for teaching online, but some teachers prefer buying their headsets for increased comfort and reliability.
A quiet, well-lit environment is a must for online teaching. A home or office is preferable, but any spot will do in a pinch.
If you’re traveling, you may have to be creative to create the appearance of a professional classroom setting. You can set up your classroom in a closet, a quiet corner, or a deserted hallway.
All you really need is quiet and a patch of wall where you can set up your teaching background!
Read our Buying Guides for Online Teaching Supplies
In our buying guides, we recommend high-quality yet affordable online teaching supplies.
Tools to Teach English Online
If you teach independently or through a marketplace or company that doesn’t provide or require a certain platform and requisites, you’ll need to figure out what software and physical materials work best for the kind of teaching you’re doing.
Here are a few options you can consider:
Video Call Software
The success of an online class is contingent on the quality of the platform it’s held on. Make sure you choose to host your classes using the video call software that works best for both you and your students.
Perhaps the most popular video call platform, Skype is a great option because it’s easy to use, and your students probably already have it.
It lets you have the chat box and the video open at the same time. It automatically makes the video call visible when you have something else pulled up on your computer, making it easy to refer to teaching materials and communicate with your students at the same time. Skype also lets you easily share files within the platform, which makes teaching much easier. The basic version of Skype, which should have all the functionality you need, is also free.
Zoom is user-friendly, popular, and not prone to technical issues. If you’re teaching one-on-one, you’ll also be fine with Zoom’s free plan. However, some people complain that lots of Zoom features are add-ons that you have to pay for, which means it can get expensive fast.
This is a great free platform for group or one-on-one meetings. It also allows screen and file sharing and is easy to use. However, it’s blocked in China, which means if you make it your main platform you’ll be excluding a huge population of potential students.
WeChat’s video platform allows file sharing, and is a great option if you’re teaching in China because your students will already be familiar with it. It’s also free!
The biggest disadvantage of WeChat is that it stores conversation history on your device, meaning that if you change devices, you won’t have a record of what’s been said. This is particularly frustrating if you’re trying to refer to files you’ve sent or other information you’ve exchanged on the platform.
Other Online Tools
Aside from a good video call platform, there are a number of other online tools that you can use to make teaching easier for you and your students alike.
Google Drive andGoogle Docs allow file sharing and collaboration, making it easy to correct homework, share lesson materials, and edit writing.
Witeboard, a free shared whiteboard, lets you illustrate concepts as you would with a real whiteboard, and lets both you and the student draw.
Calendly andGooge Calendar are both good tools for scheduling lessons and planning out your availability. Best of all, you can share events with your students.
PayPal is the easiest tool for handling your finances and collecting tuition from your students internationally. If you’re living in China, you may also consider conducting payments throughWeChat Pay orAlipay.
Physical Materials
Of course, you need real-life tools to teach, too, not just ones online.
Having a cache of objects to decorate and fill your classroom with will make your students’ learning experience more engaging and fulfilling.
A whiteboard, pinboard, or magnet board is a great tool to have in your classroom because it doubles as a tool and decoration. You can use it for a points system, to illustrate teaching concepts, or to hang pertinent decoration or a sign with your name.
Flashcards are a great teaching tool for any age of language learners. Depending on your students’ age and level, you can put letters, objects, colors, or words on them. If you teach young kids, it’s a good idea to have a catalog of flashcards with basic concepts on them next to your computer so you can use them when they come up in your lesson.
If you’re teaching kids, you’ll want lots and lots of fun props. Hand puppets and realia are great tools. Fruits, stuffed animals, miniatures, and anything that may be pertinent to your lesson will help draw your students’ attention and help them understand you.
Create a log of videos and articles for students to look at before class so that you can have topical discussions about them in class. Likewise, you should have a file of worksheets you can assign after class.
Make the classroom yours! Whatever unique things you can add to your classroom will help you and will make your students want to keep coming back to your lessons.
More Tips for Teaching English Online
Personal Traits and Qualities Needed
Teaching English online looks very different from teaching in a classroom, or, for that matter, almost any other job. To succeed, you should develop the necessary personal traits.
Be Energetic and Engaging
ESL teachers must create a vibrant and engaging lesson for a person halfway across the world who doesn’t speak fluent English. For that reason, being friendly, energetic, and engaging is essential for the job.
You should be able to keep a child’s or adult’s attention, use body language and expressions to illustrate concepts, and be instantly friendly and relatable so that students don’t feel intimidated or shy.
Be Disciplined and Self-Motivated
Also, because when you teach ESL online you’re effectively your own boss, it’s important to be disciplined and to be able to self-motivate. That way you’ll keep booking classes, waking up, and making money.
The blessing and curse of a job that allows you to make your own schedule is that if you don’t decide to work, no one will force you to.
Be Flexible and Adaptable
Last, teaching online constantly throws you into new situations with people with various needs, English levels, personalities, and cultural backgrounds.
It’s exciting and gives you an opportunity to connect with different people all around the world. However, it can also be hard to adjust to all the different kinds of people you’ll meet.
A good online ESL teacher will be able to adapt to new situations and relate to people of all ages, language levels, and dispositions.
The Challenges of Teaching English Online
Teaching English online is, in many ways, an incredibly easy job.
You can roll out of bed in the morning, fire up your computer, and teach in your sweatpants. If you work for one of the major online teaching companies, you’ll never have to do lesson planning or much prep work at all. And best of all, your schedule is flexible.
But it’s not all sunshine and roses.
Unconventional Work Hours
Keep in mind that a flexible schedule does not mean teaching any time of the day or night that you fancy it.
As many teaching companies are focused at teaching students in specific countries, they open classes at times that are convenient for their student base.
This means that if you work with students in China and you live in America your prime working hours will be early in the morning (as early as 3 am, depending on what time zone you live in), and late at night.
While this gives you the day for yourself, it does mean you have to keep unconventional hours if you want to get lots of classes booked.
You’ll Need to Put On a Mask
As an online English teacher, you need to deliver high-quality lessons to your students. This means that you will have to spend some time familiarizing yourself with lessons before class time.
You’ll also need to create a fun and educational classroom environment and teaching props. You’ll also need to look put-together and awake, even when you have a class scheduled at 4 am.
Being a good teacher means always being friendly, patient, and kind. This means that even if you’re sick, tired, are going through personal issues, you need to put your best face forward and be totally enthusiastic and focused during class.
You may have to teach the same lesson over and over again or try to get a kid that’s absolutely bonkers to focus, and it’s your job to maintain your positive, encouraging attitude and never show your frustration.
It Takes a Lot of Self-Discipline
Additionally, you must be organized and self-motivated to teach ESL online. Without the structure and hierarchy of a traditional office setting, you’re in charge of maintaining your schedule, showing up on time for class, and doing the preparation you need to.
It’s easy to lose motivation or forget about a class if you don’t discipline yourself well, and if you miss lessons or get unsatisfactory remarks from parents you can get penalized or even fired.
You can make up to $24.40 an hour, create your own schedule, and work from your home — or a hostel.
Sounds great, right? But how do you get started?
We’re about to break down exactly what it takes to teach for VIPKID: we’ll explain what basic qualifications teachers need, what materials and personality traits you need to teach, and more.
And the best part is, we’re even answering some frequently asked questions about the job!
What is VIPKID?
If you’re not familiar with it, VIPKID is an online teaching platform that lets you conduct classes with students in China for $15.60-$24.40 an hour.
Depending on how often you work, that works out to anywhere between $150 and $6,000 a month.
The requirements for VIPKID teachers are pretty straightforward: you need a bachelor’s degree and license to work in the U.S. or Canada. Oh, and you need to be fluent in English.
You also need 2 years of teaching experience — note that this number was recently updated from one year of teaching experience.
If you haven’t been a classroom teacher, don’t worry. Tutoring, mentoring, and “alternative education” also count.
What does that mean? It means that if you’ve been a camp counselor, you can include that. Been a nanny? Fantastic. Coached soccer? Great! Do you have kids? Perfect.
If, in your estimation, you have had a leadership or teaching role with children, you really should be good to go for VIPKID.
The Requirements to Work for VIPKID
be eligible to work in the U.S. or Canada
have a bachelor’s degree
have two years of experience (teaching, babysitting, coaching, etc)
be fluent in English
Pass the Background Check
Every teacher who works for VIPKID must pass an FBI Criminal Background Check. It’s not entirely clear what findings will disqualify you from teaching, but if you have a misdemeanor or DUI on your record you should be fine.
Some people say that VIPKID is mainly worried about applicants who’ve been convicted of violent crimes or crimes involving children.
Equipment
Because VIPKID is taught online, there are a few things you need to be equipped with to make sure you’re able to conduct classes smoothly.
Ready to get technical?
Just kidding. I’m writing this at my level of tech fluency, so your grandma should be able to understand everything covered in this section.
Hardware and Accessories
First off, you need a desktop or laptop computer to teach for VIPKID. A Microsoft Surface is fine, but an iPad or other tablet isn’t adequate for teaching through VIPKID.
Second, you need an HD camera and a headset with a microphone. Your computer probably already comes equipped with an HD camera, but if it doesn’t you can get one online.
And you can use your iPhone earphones or similar ones as your headset, or you can purchase a more heavy-duty one.
VIPKID Tech: Buying Guide
Stuck trying to figure out which camera and headset to buy? We’ve got you covered.
You can buy [amazon link=”B004FHO5Y6″ title=”an HD webcam like this Logitech one”] for as little as around $20.
And you can get a high-quality headset for around $25! [amazon link=”B004FHO5Y6″ title=”an HD webcam like this Logitech one”] This NUBWO gaming headset delivers high quality at a reasonable price.
Computing Requirements
Beyond all the gadgets, you’ll also need an adequate operating system, meaning Windows 7 or Mac 10.x or above, and at least 4G of RAM on your computer.
Not sure if your computer meets these requirements?
No problem! Just follow these instructions:
Mac
If you have a Mac, click on the Apple logo on the top left corner of your screen. Click “About this Mac”, and a box will come up.
Under the name of your computer, it will say what version it is, and then by “Memory” it will say how many gigabytes of RAM you have!
Easy!
Apple macOS System Info
Windows PC
If you have a PC, search “Control Panel” Windows search bar. Then click System and Security > System.
That should bring up a box that tells you what version of computer you have, along with how much RAM your laptop has.
This box will show you your computer’s specs if you have a Mac.
You’ll also need a stable internet connection that has upload and download speeds of at least 20 Mbps. You can use Speedtest to find out if you meet this requirement.
If your computer doesn’t meet the speed requirements, you can try situating yourself closer to your router or getting an Ethernet cable.
Last, you need at least Chrome version 51 and Firefox version 47 and updated Flash.
Props and Teaching Setup
Okay, you guys — this is the fun part!
Besides the technical requirements for your computer, you need a good classroom setup for VIPKID.
What does that entail?
Classroom Setup for VIPKID
Great lighting
A cool rewards system
Some fun teaching props
An engaging teaching background
A quiet space with no distractions
You can go all-in with your teaching space, making it totally fun and immersive, or you can be more simplistic.
I personally don’t like having my teaching background up during the day because my classroom doubles as a home office (and I don’t want to be in “teacher mode” 24/7), and I also travel a lot, which means I need to take my teaching things with me sometimes.
Because of that, my whole classroom setup is super mobile and transportable — and less flashy and impressive than some other people’s. At the end of the day, though, it gets the job done and the students love it. And that’s what matters most!
A little decoration goes a long way in your VIPKID classroom! (Photo: Graham Carroll)
Let’s bust a common VIPKID myth:
All VIPKID teachers used to have to wear orange t-shirts to teach, but that is no longer the case!
Rejoice and wear whatever solid-colored shirt makes you feel comfortable (and doesn’t make you look like you have freaking scurvy).
Just make sure you’re not wearing anything with logos or anything that’s stained or too revealing.
Personal Traits and Behaviors
Waking up super early to teach young students who might not speak any English takes a specific personality type.
For one thing, you need to be on first thing in the morning.
You might be teaching pretty young kids who can’t understand the bulk of what you’re saying, so you’ll have to rely on exaggerated facial expressions and movements to help them understand you and keep them engaged.
Be Friendly
You should be enthusiastic, friendly, and smiley to make your students feel comfortable and engaged in your classes.
A note on this: you might see Youtube videos from VIPKID teachers who are super duper chipper and preternaturally happy all the time.
That kind of personality is great, but if that’s not you, don’t worry. It’s not me, either, and I get along just fine.
You don’t need to act like you’re in the cast of Disney on Ice during your classes — just be friendly, awake, and welcoming, and don’t be afraid to be a little silly. Your kids will love you for it!
While we’re talking about personality traits, I’d like to note that all this smile-ness goes along with plain old not being rude.
It can be really frustrating when a student doesn’t understand a concept you’ve explained 46 times, especially when it’s 4:30 in the morning.
But remember that your student is probably frustrated, too, and your impatience will only make them feel worse.
A little patience and understanding go a long way when you’re teaching for VIPKID.
Not being rude also means listening. It can be hard to stay focused in class (especially if you’re teaching the same lesson for the 3rd time in a row), but it’s important to stay engaged, listen to the student, correct their mistakes, and provide encouragement.
Me during an online lesson. (Photo: Graham Carroll)
Be Awake
Yawning in class is a big no-no, and some parents will call you out on it.
I definitely have days where I can’t help but let a little yawn escape from my mouth, but I’ve found ways of disguising it: by covering my mouth with my hand, ducking out of the screen to “grab a prop”, or opening my mouth and acting really surprised!
You’ll find methods of disguising yawns that work for you, too — promise.
Being awake also means not looking like you just rolled out of bed. Again, you’ll see some people on YouTube who go to class at 5:00 in the morning with freshly curled hair and a full face of makeup. Again, I am 100% not that teacher and I do just fine.
I usually go to bed in a solid t-shirt with no logo so I can teach in it, and then I make sure my hair looks just this side of being a rat’s nest before I teach.
If I do wear makeup, it’s usually mascara to make me look more awake and maybe red lipstick to help students pay attention to what shapes my mouth makes when I pronounce words in English.
The great thing about the camera is that it really blurs your features, so you’ll look good even if you have a raging zit on your nose and an eye booger the size of Texas hanging out in your tear duct.
Be Self-Motivated
Working from home means that you don’t have a boss telling you what to do and when to do it. So you need to make sure that you’re prepared, organized, and ready for class.
Beyond that, you need to be your own hype man, making sure you’re motivated and confident before class!
You need to hold yourself accountable, making sure you’re aware of when your classes are scheduled and are prepared for them.
Availability
Exactly when you need to wake up to teach for VIPKID depends on what time zone you live in.
You don’t need to be available during every slot that you can possibly teach lessons, but it’s a good idea to make sure that you’ll be able to teach some classes before you go through the effort of applying and interviewing.
You can teach for VIPKID anytime between 7:30 PM and 9:00 AM CDT, or between 8:30 AM and 10:00 PM Beijing time.
The highest demand for classes is between 5:00 AM and 9:00 AM CDT, and between 12:00 AM and 9:00 AM CDT on the weekends. And high demand means you have an increased likelihood of getting booked during those times.
Note that there’s no Daylight Savings Time in China, so the schedule shifts forward an hour when Daylight Savings Time starts.
Frequently Asked Questions
This section includes answers to a few common questions about VIPKID teacher requirements. If you have a question that’s not answered here, feel free to drop a comment below!
Am I Locked into a Certain Schedule Once I Sign Up?
No! You can open slots whenever and close them back up again until a student has booked them without penalty. VIPKID is super-duper flexible — it’s one of my favorite parts about it!
How Long Is the Contract Period for Vipkid?
Each VIPKID contract period lasts 6 months.
Do I Have to Teach a Certain Number of Classes Each Week to Stay Employed?
Nope! VIPKID recommends that teachers teach for at least 7.5 hours a week, but you won’t be penalized if you don’t maintain that every week or have to go on vacation or take time off.
Can I teach for VIPKID if I’m not living in the U.S. or Canada right now?
Yes! You just need to be eligible to work in either country.
Conclusion
Teaching for VIPKID is super fun, and almost anyone can do it! All you need is a bachelor’s degree, English fluency, eligibility to work in the U.S. or Canada, and 2 years of experience doing some type of teaching or childcare.
VIPKID has flexible hours, and you can teach online English classes from almost anywhere with a quiet corner and a stable internet connection!
If you’re interested in becoming a VIPKID teacher, drop a comment below — I’d love to answer any questions you might have and help you on your journey!
VIPKID provides lessons and curriculum, has excellent support staff for teachers and students, and schedules your classes for you once you’ve decided your availability.
All you really need to do is show up with a smile!
VIPKID classes are 25 minutes long, and the students are 3-12 years old.
How to Calculate Your VIPKID Salary
At most jobs, your wage is calculated using a simple equation, more or less: your hourly wage times how many hours you work.
Simple, right?
You can earn between $15.60 and $24.40 an hour teaching through VIPKID, and you can work … well, pretty much as many or as few hours as you want.
Which is great, except all the wiggle room doesn’t tell you much about how much you can actually expect to earn through VIPKID.
In the next two sections, we’re going to break down each component of your VIPKID salary to give you an idea of where on the spectrum you might fall and how to increase your paycheck.
Part 1: How Much Can You Earn Hourly?
As we’ve mentioned, you can earn $15.60 and $24.40 an hour through VIPKID.
How much you’ll get paid depends on how many classes a month you teach, how high your base pay is, and whether you finish the class on time.
The Equation for Hourly Pay =
(Base Pay ($7-$9) + Finished Class Incentive ($0.80-$3.20) *2 Classes Per Hour
Your finished class incentive is determined by how many classes you teach per month and how many lifetime classes you’ve taught through VIPKID.
And remember, there are two classes in an hour.
How is Base Pay Calculated?
Your base pay is calculated based on two factors: how much teaching experience you have and how well you perform in the interview and mock class.
In terms of teaching experience, you may be wondering what does and doesn’t count.
Obviously, classroom experience counts. It’s unlikely that you’ll make $9 base pay per class unless you’ve been a classroom teacher and have your teaching certificate or have some other type of significant experience.
However, if you have a TEFL certificate, have been a classroom assistant or tutor, have taught abroad, or have even been a camp counselor, you should list these on your application — they do count as past experience, and they very well may help you get higher base pay.
There are a bunch of factors that you have to consider in answering this question!
The first is what you’d like your schedule to look like, and the second is whether you’re hoping to work part-time or full-time for VIPKID.
The majority of classes are held in the early morning and late at night. I live in the Midwest, so I teach sometime between 6:00 AM-9:00 AM regularly and from 5:00 AM-8:00 AM during Daylight Savings Time (China doesn’t have Daylight Savings Time).
The available “peak time” slots for lesson bookings at VIPKID
I could wake up at 4:00 am but I’m not trying to burn out — after all, this is not my full-time job.
I rarely fill all my slots and I don’t teach on Fridays, so I end up teaching 2 hours a morning 4 days a week.
I make $20 an hour, so that totals out to somewhere around $20/hour x 2 hours a day x 4 days a week x 4 weeks a month = $640 a month.
Not bad as extra income, right?
There are people who teach with VIPKID full time. You can make upwards of $4,000 a month if you wake up super early to teach (some people wake up as early as 3 am!) and stay up all night on the weekends.
It definitely requires a certain kind of lifestyle to keep these hours, but for many people, it’s worth it to get to work from home, have their days off, and spend time with their children during the day.
Your Schedule is Completely Up to You
The really great thing about VIPKID is how flexible it is.
When I first got started, I opened every single slot, waking up super early and then taking a nap when I was done teaching at 9. I got a lot of students that way, and I learned what kind of schedule worked for me.
I know now that I like waking up at 5:00, but 4:00 is way too early for me. I also know that I am absolutely not willing to stay up all night teaching on the weekends — I tried that exactly once and swore to never do it again.
I also know that if I teach more than about 4 classes back-to-back I start losing focus and stop being a good teacher, so I try to schedule breaks or leave an empty spot in my schedule on days when I’m booked full.
I figure that it’s better to sacrifice $10 here and there than to burn out and be miserable during my classes.
I went all-in when I first started VIPKID and then let my foot off the gas a little bit, but some people go the opposite route: they dip their toe in the water, opening more and more slots each week until they’re booked full.
You don’t have to decide whether you’re going to be a part-time or full-time teacher now, and you don’t need to stick to any decision you don’t want to long-term.
And that flexibility, in my opinion, is one of the best things about VIPKID.
How Can You Increase Your VIPKID Salary?
Now that we’ve broken down the elements of your salary, here are a few tips for how to raise it.
These six tips will help you organize your schedule, book more classes, and maximize your teaching time for higher profits.
Book More Classes
This one is obvious, but the more classes you book per month, the higher your finished class bonus will be.
Having that goal in mind (and watching your earnings increase) will keep you motivated throughout the month.
Try to set weekly goals for yourself to hit that mark — for example, 11-12 classes a week.
Promote Yourself
Creating an appealing intro video and a concise, impressive bio will do wonders when you’re trying to book classes.
VIPKID is like Tinder for teachers — parents can pick from any number of candidates to conduct their classes, so you want to stick out from the crowd.
Tips for Your Intro Video
Speak Slowly and Clearly
If parents can’t understand your intro, they probably won’t feel overly confident about your ability to communicate with their children in English.
Make sure your lighting is good
Film outside at midday or in a well-lit room to make your video look bright and cheery.
Use Props
A silly hat, a stuffed animal, whatever! Props and goofy accents will make your video more memorable to parents, and they’ll also show them how fun and engaging you are as an English teacher!
This simple video is a great example of how to create your video.
Don’t be afraid to play around with it — parents will love seeing your personality shine. And that means more bookings!
Show up on Time
This one is a giant no-brainer. Not only do you need to show up on time and end on time to get a bonus, but doing so also makes you look professional and will lead to better comments from parents.
A teacher with a reputation for not being punctual probably won’t get too many bookings.
Show up to All Your Classes
This one, like the last one, is less about making more money and more about not losing money.
If you miss class without canceling it or cancel within 2 hours of your class, you’ll be charged a $10 no-show fee. And if you cancel between 2 and 24 hours before class, you’ll be deducted $2 per canceled class.
Note that there are exceptions for emergencies, so you don’t have to worry about being penalized should something awful happen to you or a loved one unexpectedly.
Besides the cancellation fee, parents will be unlikely to book you again if you’ve missed a class with them (unless you have a legitimate reason for doing so), because you’re wasting their children’s time when you don’t show up to commitments you’ve made with them.
Keep a Regular Schedule
Keeping a regular schedule will get you more bookings because you’ll get regular students who book you at the same time each day or week.
Instead of opening slots willy-nilly and sitting around between classes, you can get more reliable clients when you keep a more reliable schedule.
My available class openings during Daylight Savings Time in the Midwest. You can open and close slots at your leisure until they’re booked by students.
A regular schedule is also more sustainable and will keep you accountable, so you don’t start finding excuses to cancel classes right and left when you just don’t feel like waking up early.
Get More Certifications
The more certifications you have, the more levels you’re able to teach. And thus, the greater the pool of students you can teach!
If you want every slot you open to fill up, you should get as many certifications as you can, so you’re available to teach every student.
You can always see which certifications you have – and which you can earn – in the Certification Center.
Conclusion
VIPKID can look just about however you want it to:
You can turn it into a full-time job and work all hours of the night, earning $4,000 per month.
Or you can do what I do and teach a few hours each morning, earning between around $150 and $700 per month depending on your schedule.
Every online ESL teacher wants to increase their bookings – but only some teachers have what it takes to consistently fill all their slots.
If you want to be a top-tier ESL teacher, there are a few things you definitely have to do to max out your bookings and provide consistently good classes.
Intrigued?
Here are some best practices you must follow to be an A+ online ESL teacher:
Be Punctual
Have you ever made plans with a friend only for them to show up 15 minutes late, sweaty and apologizing?
I bet waiting on them was pretty frustrating. When people show up late we feel annoyed and cheated out of our precious time, and that’s all the more true when we’re paying them.
As an online teacher, it’s imperative that you’re always ready for the start of class. After all, it’s not like you can act like traffic held you up between your kitchen and the computer.
Dress to Impress
Make sure to dress appropriately for your lessons. You don’t have to go all out for your online classes or anything – a clean solid-color t-shirt or sweater and combed hair should generally do the trick.
Just make sure you look neat, presentable, and professional, and that you obey any company policies regarding appearance.
Have a Plan
You should go into every class having an idea of what each part of the lesson will consist of and having materials prepared for each part of your lesson.
Most teaching platforms give teachers lesson plans, meaning that most of the heavy lifting is done for you – all you need to do is prepare any relevant props and rewards and review the lesson material ahead of class.
If you’re creating your own lesson plans, it’s not enough to think through each individual lesson – you need to think about the arc of each student’s learning over time.
Your curriculum should help your students build on what they’ve previously learned and solidify new information, and it should be clear to your students themselves how they’re progressing and building toward goals in your lessons.
Creating curriculum that builds on itself and leads toward tangible goals will help your students learn more, and it will also make students feel more motivated and confident in their learning.
Pick the Right Material
It’s important that your lessons are tailored to your students: that they’re tailored to their age level and ability, of course, but also that your lessons speak to your students particular interests.
For example, if you’re teaching a student who’s obsessed with trains, you could have them read passages about trains, use trains in examples, or use toy trains as rewards.
You don’t need a trillion dollar laptop and space age headset to teach online – after all you’re holding English lessons over video call, not commanding the Hubble Space Telescope.
You do, however, need a setup that’s reliable and sturdy. You don’t want your laptop dying halfway through a class or your microphone crackling while you’re trying to teach, for example.
Investing in some decent teaching equipment now will save you headaches and potential embarrassment down the line.
Speak to Their Level
How quickly you speak, how much you enunciate, and what kind of vocabulary you use should all be dictated by the level and ability of the student you’re teaching.
If you’re teaching total beginners, it’s important to speak slowly and clearly, enunciate each word, and use simple vocabulary that they can understand. It’s important to accommodate your students as they develop their listening ability and build a foundation in English.
After all, never learn how to ride a bike if you don’t take the training wheels off at some point!
Don’t Miss Classes
Everyone misses class once in awhile: emergencies arise, power outages and wifi mishaps occur, and sometimes that pesky alarm clock just doesn’t go off.
When unavoidable hiccups happen and you just can’t make it to class, don’t worry: your students and the people you’re contracting with will understand. After all, they’re human too.
However, it’s super important to not make a habit of missing classes.
Doing so will make you seem unreliable and uncommitted, and it’ll give you less leeway if and when you have to miss class for legitimate reasons.
Handle Cancellations Well
Over the course of your teaching career, students will occasionally miss class (or show up late).
If you teach for a platform like VIPKID they’ll help you handle lateness and missed classes, but if you teach independently you should have a firm policy in place so that students know the consequences of cancellations in advance.
You can of course be lenient with students and evaluate cases according to each student’s track record and their unique situation.
You don’t, however, want to be stuck arguing with students about whether they owe you payment after they cancelled class 5 minutes before it was supposed to start for the third time in a row.
Have a Backup
You don’t want to be caught with a malfunctioning headset at the start of class, and you want a poor wifi connection even less.
Having good supplies is key to creating smooth lessons – check out this buying guide if you’re looking to upgrade your classroom.
Having extra supplies on hand is even better.
Investing in a backup pair of headphones, a backup computer charger, and perhaps an ethernet cable or some other alternate means of connecting to the Internet will help you ensure that every class goes off without a hitch.
Hone Your Technical Know-How
You’ll need to troubleshoot problems on your end during class, sure, but your students will also doubtlessly run into problems with your teaching platform.
Knowing enough about the platform and basic computer info to help a student restart their router, reload the webpage, unmute themselves, or angle the camera to their face will save you time and a headache.
And you’ll appreciate not having to call for an intermediary every time a small problem arises.
Create an A+ Environment
The most important components of a great classroom environment are a private, quiet area to teach in and good, bright lighting.
Once you have those components, you can start worrying about cutesy backgrounds and props.
But in the end, it doesn’t matter how many killer teaching tools you have if your student can barely see them, or if there’s so much background noise that it’s hard for them to hear you.
When you smile, you come off as friendlier and happier, which will make your students feel more at ease in class and in turn encourage them to feel more comfortable taking risks and speaking more.
You don’t need to ham it up as much with older students as with younger students, but a pleasant demeanor will go a long way with students of any age.
And the more you practice smiling during class, the more it will come naturally to you!
Use Props
Props are a relatively inexpensive investment that make a huge difference in the quality of your lessons.
They can add a bit of fun to class, which helps engage younger students especially. They can also help you easily explain concepts that might otherwise be difficult to convey.
Whiteboards, flaschcards, and “realia” (i.e. using a real or plastic apple when you’re discussing fruit) are all great props. You might also invest in a puppet to demonstrate dialogue or a toy microphone to signal who should be speaking when.
Props don’t just add fun to lessons – they also show that you’ve put thought and preparation into your lessons.
I’ve had more than my fair shares of scheduling mishaps – forgetting I have a class scheduled until five minutes before it starts, running home to make it to class on time, or showing up a minute late to a class I totally blanked on.
Now, I’m totally on top of my class schedule.
I double check my schedule for the following day every night before I go to bed and close any early morning slots that haven’t been booked because I know I’m not going to wake up to check to see whether I had a short-notice booking at 4:30 am.
I also check my teaching schedule anytime I schedule something, closing bookings the morning after I plan on going out or on travel days and not scheduling activities if I already have classes booked.
Managing your schedule like this will become second nature once you’ve been teaching for awhile, but it’s important to start cultivating these habits early.
Assign Homework
If you teach with VIPKID or a similar company, you don’t need to worry about this step! The teaching platform will assign homework and the student’s learning partner will check it – all you have to do is teach class.
If you’re teaching independently or through a tutoring marketplace, though, you’ll want to assign homework to help your student concretize the information they’re learning and progress faster.
Homework also helps your students come to class more prepared, which makes lessons go more smoothly, and it gives students a sense of control and accomplishment.
Stay Up-To-Date
Join forums, message boards, and Facebook groups (like ours!) to stay up-to-date on the latest teaching developments.
Being ahead of the curve will help you teach effectively and stay in demand!
Just Keep Chugging!
If you take these tips to heart, you’ll be on your way to getting full bookings in no time.
And remember: you’re on your teaching journey and you’ve made mistakes along the way, don’t worry! Everyone has missteps while they’re learning, including your students – and including you.
The more classes you teach, the more you’ll learn how to prepare and make every class a smash hit.
Interested in teaching English through VIPKID? Click my referral link and apply today!
Do you want a lucrative, fulfilling work-from-home job?
Do you want to set your own schedule and maintain flexibility and freedom while making money?
If so, teaching online might be for you.
Teaching online lets you improve the lives of children around the world and earn good income all from the comfort of your home.
This article breaks down how you can start teaching from home and earning money today with VIPKID!
You probably have a ton of questions about VIPKID, and we’re here to answer them in this step-by-step guide to applying to work with this ESL company.
What’s So Great About Teaching Online, Anyway?
You can work anywhere with a solid internet connection
You get to set your own schedule
You can work as much (or as little) as you’d like
You’ll be helping students learn an important skill – English!
You can make up to $22 an hour – plus bonuses (more on that later)
1. Get To Know VIPKID
Over 30,000 people teach with VIPKID, including digital nomads, stay-at-home parents, entrepreneurs, and classroom teachers. Collectively, VIPKID teachers serve more than 500,000 registered students.
Teachers choose to teach English online through VIPKID because the platform allows them to set their own schedules and decide how many hours to work each week.
Basic info about VIPKID classes:
Each class is 25 minutes long, and you’ll always teach a Chinese student aged 4-12. There’s a 5 minute break in between each class.
Peak teaching hours are in the morning and evening in Beijing (we’ll go more into the specifics of your teaching hours a little further down).
Teachers can make $15.60-$24.40 an hour teaching through VIPKID, depending on their experience, bonuses, and how well they perform during the interview process.
Teachers are given a base pay of $7-$9 for each 25-minute class – that number will vary depending on your teaching experience and your performance in your mock class. This works out to $14-$18 per hour, just for base pay.
On top of base pay, you’ll get a finished class incentive that ranges from $0.80-$3.20 per class, depending on how many classes you teach per month and how many classes you’ve taught through VIPKID in total. The bonuses bring your pay up to $15.60-$24.40 per hour!
Besides these requirements, you should have a good classroom setup. That means a kid-friendly background, a quiet spot to teach in, headphones with a mouthpiece, and teaching props including a white board and flashcards.
FAQ: I’m an introvert. Can I teach for VIPKID?
While it’s true that the prototypical VIPKID teacher is bubbly, outgoing, and extroverted, that doesn’t mean there’s not room for different kinds of teachers, too.
Shyer students might prefer calmer, less intense teachers, and older students might prefer a more serious teacher over a super enthusiastic one.
However, you should still be sure to be friendly and full of life during your VIPKID interview.
3. Apply Online!
If you meet the requirements to become a VIPKID teacher, you’re ready to apply right now!
The application process varies in length, but it should take less than two weeks from submitting your application to teaching your first real class if you complete each step of the process in a timely manner.
The application covers basic information about you and ensures that you meet the teaching requirements for VIPKID. It shouldn’t take longer than 10 minutes to complete.
Step 2: Complete a Live or Pre-Recorded Demo Lesson
The recorded option takes 5 minutes, and you can rerecord your lesson as many times as you’d like. You can also do the recorded option whenever you’d like!
The live option is 30 minutes and is scheduled ahead of time, but it gives you the advantage of being able to get feedback about your lesson, ask any questions you have, and even potentially negotiate your salary.
For both the live and recorded options, you’ll be given slides to review and prepare before your class.
Step 3: Pass Your Mock Class
Mock classes are like demo lessons in a lot of ways. In a mock class, you teach for 10 minutes and introduce yourself to the interviewer, get feedback, and ask questions for 15 minutes. You’ll be sent a full lesson plan to prepare for this.
Some people get hired after their first mock class, but most people need to do 2 mock classes before they’re sent over a contract.
I taught English in China for 2 years before I started working for VIPKID and I did 2 mock classes!
Your mock class is your chance to show VIPKID that you understand their platform and have an effective teaching style! This is also the chance for you to show that you have a good internet connection and an appropriate teaching environment.
Step 4: Take or Submit a TESOL Course
If you don’t already have a TEFL certificate, you’ll need to take and pass a TESOL course that VIPKID offers for free before signing your contract. The course is only around 10 hours, and it contains lots of information that will help you be a better teacher!
Step 5: Sign Your Contract
This is the fun part. Once you’ve finished all the previous steps, it’s finally time to sign your contract and start teaching! VIPKID contracts last 6 months.
When you sign your contract, you’ll find out your base salary! Your base salary is determined by how much teaching experience you have plus how well you did in your mock class.
Your base pay will fall between $7 and $9 for each 25-minute class, and you’ll have the opportunity to earn bonuses on top of that as well.
I find online tutoring to be incredibly rewarding and convenient, but teaching for VIPKID has its challenges, too.
You have to either wake up early or stay up late to work
You need to be on-camera and “on” at early or late hours
You can work as much or as little as you want – but you aren’t guaranteed a certain number of hours (Either you get booked or you don’t, and you may find yourself booked solid for stretches and teaching just one class a day at other times.)
Teaching for VIPKID means going with the flow and learning to accept (and maybe even appreciate) some uncertainty
If these challenges sound like something you can deal with, then I’d recommend applying – because for many teachers, myself included, the tradeoff is well worth it.
4. Start Teaching
Once you’ve signed your contract, it’s time to start teaching. Teaching can be stressful at first, but believe me when I tell you that you’ll start feeling like a pro in no time.
Lessons with VIPKID aren’t exactly like normal classroom lessons – VIPKID uses the flipped-classroom method.
This means that students do activities that teach them about the class material before each lesson and then spend their classes solidifying what they’ve learned, practicing conversation, and doing other project- and activity-based things.
This strategy is really great for immersion teaching (like you’ll be doing with VIPKID!) because it means that you’re not teaching the students new material from start to finish — you’re just helping them deepen their understanding and get more comfortable with the English language.
All of this theory and terminology matters kind of minimally in the end, though because you don’t do any actual lesson planning with VIPKID. You’ll get fleshed out lesson plans with down-to-the minute content. Your only job is to show up and teach!
The key to feeling confident when you start teaching is to prepare, prepare, prepare.
Getting your props set up ahead of class will make every lesson a breeze. (Photo by Graham Carroll)
Top Tips for Making Every Lesson a 5-Apple Lesson
1. Open slots early
The earlier you open teaching slots, the more opportunities parents have to book you! Open slots as soon as you can and make sure to check back on your teaching schedule often so you’re not caught teaching a class by surprise.
2. Review the materials before class
Knowing what content is in each class will help you pace yourself properly, and it will also prevent you from trying to figure out how to teach each slide before class.
When you’re reviewing, you can set up props that will help you illustrate different vocabulary words and concepts.
You can also get your rewards set up and brainstorm ways to extend the material by asking questions or inserting extra activities in case your student blows through the content extra fast.
3. Get your classroom set up
Before each class make sure your classroom environment is well-lit, your props and rewards are set up, and your appearance is well-kempt and professional.
FAQ: What will my working hours look like?
The good news is that there’s no maximum (and no minimum) to how much you work for VIPKID! Work however much you want, whenever you want to.
Want to work for 2 hours each morning, 5 days a week? That’s fine. Want to teach 60 hours one week, opening all your slots and staying up all night, and take the entire following week off? That’s fine, too.
Peak teaching times for VIPKID are 5:00-8:00 EST – afternoon for kids in China (which doesn’t observe daylight savings time, by the way. Fun fact, right?)
However, you can open slots from 8:00 pm EST to 8:00 am EST – and you can fill pretty much all those slots reliably on weekends.
That’s It! Go Get Hired, Rockstar!
Becoming a VIPKID teacher is lucrative and fun – and it’s not as hard as it might seem.
We hope this guide gave you the tools you need to start your application process today. Check out our website for more tips about teaching English online and in-person, and don’t hesitate to comment with any questions you might have!
Home-based online English tutoring jobs are a very convenient and profitable option to earn a side income or even make a living without leaving your home.
Online tutoring sites or marketplaces connect you with hundreds of thousands of potential students.
But the competition is quite high.
How do you market yourself, find students and fill your schedule?
Online Tutoring Jobs Are Accessible for Anyone
In recent times, the popularity of online English teaching and tutoring has grown by leaps and bounds. A younger generation of digital natives with access to high-speed internet connection has rapidly boosted the demand for online classes and lessons.
Many of your potential students likely reside in other countries; remote tutoring can thus be crucial in helping you to connect with the particular group of students who will benefit most from your expertise.
The hardware and software requirements needed are certainly accessible to most people.
With a working microphone and webcam, a quiet environment, free software like Skype, a high-speed Internet connection, and lesson plans and exercises that can be easily administered online, you are ready to embark on a fulfilling home-based online English tutoring career.
You also do not have to worry about transportation expenses or long travel times due to bad traffic.
Of course, you have to be comfortable teaching in front of a web camera – knowing how to use facial expressions and upper body gestures to better communicate with your tutees will be a major advantage.
The benefits of efficiency and convenience are clear, but how does a new English tutor find online tutoring assignments?
What Are Tutoring Marketplaces?
Tutoring marketplaces make offering online tutoring services a breeze. After creating your tutor’s profile and adding an option of how you want to get paid, like your Paypal account, potential students will be able to connect with you and book lessons.
With so many platforms, you can try out a few different ones to see which works best for you.
Tutoring marketplaces generally give you more flexibility and control than traditional online teaching companies do. The platform will probably set class lengths, but everything else is up to you, including the structure of your lessons.
You may also have to pass a test to qualify to list yourself as a tutor for a specific subject on whatever marketplace you use.
Some sites, like Verbalplanet, allow you to set your own rate, while others, like Cambly, have set rates.
Some platforms will require you to do lesson planning if you want to succeed, while others focus on facilitating conversations between language learners and native speakers – you just have to show up and talk!
Some, similarly to online teaching companies, require teachers to have bachelor’s degrees and be native speakers, while others let anyone create an account on their platform.
The Pros
Tutoring marketplaces give you complete control over your schedule, your students, and your lessons. You can decide what subject matter to cover and what ages and levels of students you’d like to teach.
The platform handles the payment and some user support.
Most tutoring marketplaces let you teach from your phone or tablet.
Tutoring marketplaces usually have a low barrier to entry, meaning non-native speakers or tutors without bachelor’s degrees may apply.
Some platforms provide teaching software and resources for lessons.
The Cons
Because almost anyone can teach through a marketplace, it may be hard to stand out from all the teachers on the site and build up a client base.
Due to the competition, some teachers also set very low rates, making it harder to earn money teaching for a fair wage.
Students may not sign up for repeat classes or may give you an unfair rating, hurting your reputation on the site.
How Much Can You Make as an Online English Tutor?
Tutor marketplaces like italki and Verbalplanet let teachers set their own rates. Standard rates tend to hover around $10-25 per hour, but you can browse around to see what other tutors like you are charging to help you settle on a reasonable and fair rate for lessons.
If you have a teaching certificate or have experience teaching for tests like the TOEFL or the SAT, you can charge a higher rate for your lessons.
Tutors specializing in Business English and test preparation can easily charge upwards of $50 an hour. Pearson and Varsity Tutors are among the companies that connect expert tutors with students worldwide.
If you charge $25 an hour and work for 10 hours a week through a marketplace, you’ll earn $1,000 a month teaching.
It’s important to remember that teachers in tutor marketplaces and independent teachers do more work than just time spent in the classroom. They’re responsible for their own lesson planning and marketing, which adds to their workload.
The Best Online Tutoring Marketplaces
Ziktalk hosts conversations and doesn’t require tutors to be native speakers or have any teaching certifications. The app works on your phone, and you set your own rate by the minute.
With Cambly, you’ll make 17 cents a minute ($10 an hour) conversing with language learners all around the world. You won’t pay the bills with it, but it is a good side gig. You don’t need to be a native speaker or have a bachelor’s degree to tutor with Cambly, as long as your English is good. Teachers can’t use Cambly on smartphones or tablets. This guide to working for Cambly has more information about what teaching on the platform is like.
NiceTalk hosts conversations between native English speakers and Chinese ESL learners who want to practice their conversational English. Teachers get paid per full minute spent talking, and most of the students are adults. The NiceTalk app is compatible with Android and iOS. Tutors get paid $10 an hour.
Verbalplanet lets tutors set their own schedules and rate. Lessons last 45 minutes, and tutors customize lessons to fit their students’ needs. It’s more involved than a conversation-based marketplace, but the pay is better and the hours are steadier. The site has lots of tools to help teachers manage their clients, as well.
italki lets tutors set their own rate and schedule, similar to Verbalplanet. The platform handles marketing and other client management tasks, so teachers can focus on delivering high-quality lessons to students. You don’t need to be a native speaker to teach on italki as long as your English is good, and you can teach from a phone or tablet.
Other marketplaces are:
tutor.com (offers tutoring for a variety of subjects as well as English)
preply.com (a fast-growing ESL platform that is attracting plenty of students)
tutorhub.com (UK-based platform, branches into other subjects and pays around £20-£40 p/h)
wyzant.com (US-based platform, variety of subjects and can cater to higher ed students)
learnpick.com (another US-based platform with plenty of subjects and students)
8+1 Steps on How to Start
Tutoring on an online marketplace is a little less structured than working for a company, but there are a few steps you need to follow to get your business off the ground.
Follow these steps to create a successful and profitable teaching business through an online tutoring marketplace.
1. Decide Whom and What You Want to Teach
Before you start looking for potential students based on the various avenues described above, you should clarify a few key issues:
Who is your target demographic: kids, high school students, business people, speakers of certain languages, etc.?
What exactly will you be teaching them: beginner vocabulary, conversational English, business English, test prep, etc.?
What’s the real value of your lessons for your students – compared to other tutors?
Once you have a clear idea of your unique selling point, it will be easy for you to connect with the students who are the best match for your services.
2. Decide Which Marketplace you Want to Use
First, do your research. Browse around a few different marketplaces and get a feel for what kind of work you want to be doing.
Do you want the freedom to set your own rate and schedule? Do you want to converse or prepare lesson plans? How much time are you willing to devote to the job? Where in the world do you want to be teaching? Which marketplace?
Consider that you’ll be working with students in a different time zone, so you may have to work weird hours depending on where you teach.
You can read testimonials from different teachers and do some comparisons before you decide on a marketplace.
3. Submit an Application
Next, you need to apply for the job.
In general, you will have to pass through a (more or less strict) screening and verification process before you can start to advertise your tutoring services on these platforms. Some marketplaces have an interview or require you to make a video introduction.
How long it will take the employer to get back to you varies based on the company and how many applications they get.
The tutor.com application website
4. Create a Professional Profile
Once you’ve gotten hired, you’ll need to fill out your teacher profile.
Provide some background information, highlighting any teaching experience, language skills, or certifications.
You’ll want to submit a professional-looking photo and an introduction video that features you looking friendly and speaking clear, native-sounding English.
Your profile is the first impression parents will get of you, so it’s important to really sell your skills and put your best face forward here.
A tutor’s profile on italki
5. Figure out the Specifics of Your Teaching Practice
Finally, you’ll decide on your availability and, depending on the marketplace you choose, set your prices.
It’s a good idea to look at what other tutors like you are charging before you decide your rates, so you stay competitive.
6. Promote Your Teaching Business
When so many home-based online English tutors can be accessed with a few mouse clicks, it is often difficult to stand out from the crowd.
To help increase enrollment in your tutoring sessions, promote yourself using whatever tools are available to you on the platform, as well as on Facebook, your personal blog, online classifieds, and more.
You can spread the word about your services the old-fashioned way, by placing fliers around your area and telling people in your offline social network about your availability as an online English tutor.
You can also spend some money to advertise your services on social media or on local and international classified websites (e.g. Craigslist).
You can always invest in a personal website, some well-written articles, and even some free video lessons to showcase your personality, teaching style and expertise as a tutor.
Your articles and videos may gain significant traction on their own, thus ensuring that you catch the attention of a large number of potential tutees (and/or their parents).
7. Teach Great Lessons
Most importantly, you need to teach the lessons themselves. If you work for a platform that’s not just conversation-based you’ll spend time designing unique curriculums to fit your students’ needs.
To convince potential students to book lessons with you, you can demonstrate your aptitude by offering trial lessons and free downloads of quality learning materials.
If you do a good job, you’ll get positive feedback that will help spread your reputation as a good teacher and in turn increase your client base.
Lessons are the meat of your business, so constantly working to improve your lessons is the most important thing you can do as an online ESL teacher.
Payments vary by platform. Some allow teachers to get paid through the method of their choosing, while others require their tutors to use PayPal or another similar method of payment.
Whatever it is, you’ll want to be sure your payment information is connected to the system so you can get rewarded for your hard work.
Bonus: Network With Other Tutors
Be sure to socialize with your fellow teachers and tutors by participating actively via relevant Facebook pages (e.g. the British Council’s Teaching English Facebook page), Facebook groups, LinkedIn, or Twitter conversations.
Apart from sharing resources and expertise with your fellow tutors, you may also gain valuable referrals and tutoring opportunities.
A fellow tutor with too many potential tutees on his or her hands can redirect them to you if he or she is confident about your teaching abilities.
You can also make your lessons more exciting by collaborating with other online tutors.
When you want to teach English online, getting hired by a company seems to be the easiest way to start your career.
But after a while…
You might become tired of teaching the same beginner lessons over and over again.
Or maybe you’ll want to start looking for opportunities to make more than roughly $15-20 per hour.
Have you ever considered starting your own independent online teaching business – having the freedom to set up your own curriculum, schedule and price model?
In this post, you will learn what it takes and how to get started.
Should You Teach English Online Independently?
Running your own online teaching business is a lot of hard work, and it’s definitely not for everyone. However, if you do go down this path, you’ll find yourself with a sustainable career that gives you flexibility, creative control, and life skills, not to mention a sizable income.
If you have good credentials and can tutor in business English or help students prepare for the TOEFL, IELTS, SAT, or other tests, you can charge a lot of money and will undoubtedly get good business.
If you spend 20 hours a week tutoring in a specialized area at $50 per hour, you’ll make $4,000 a month!
But teaching English independently doesn’t just require good teaching and curriculum development skills.
It also requires you to be self-motivated and unafraid to put yourself out there, to have good entrepreneurship as well as be able to market yourself effectively, manage your finances and your schedule, and take care of nitty-gritty details like paying taxes, figuring out cancellation policies for students, and maintaining a website.
Teaching ESL independently is undoubtedly rewarding. It makes you your own boss, gives you the ultimate freedom and flexibility, and gives you the opportunity to design your curriculum independently.
Keep in mind, you can always teach English in more than one place. For example, you can schedule classes with a major ESL company and practice your teaching skills while you work on your own teaching business and build up a client base.
These are the relevant pros and cons to consider when deciding whether to follow this route:
The Pros
Running your own teaching business gives you control over every aspect of your teaching practice, so you’ll never be subject to the whims of a major company.
You can build up a good reputation and grow a loyal customer base.
Once you’ve become established, you can cooperate with other teachers, help new independent teachers start their own businesses, and even hire teachers to work for you.
The Cons
Running your own business is a LOT of work: administration, marketing, sales, payment, and troubleshooting are all up to you.
You’ll need to put a lot of effort in before you start seeing results.
You assume all the risk, financial and otherwise, for your company.
Most teaching companies have a section based in the country where their students are and have staff that communicates with them in their native language. As an independent teacher, you have no support, so all communication, including fielding complaints, is up to you. This may be challenging if your students’ English isn’t great and you can’t communicate with them in their native language.
7+1 Steps for Starting Your Own Online Teaching Business
Starting your own company can seem totally terrifying, and with good reason. It’s a lot of work, and the responsibility for all of it falls on your shoulders.
It’s important to make a plan and strategize so that your teaching company is stable and well-run.
Here are a few tips that will help you create a successful online teaching company.
1. Choose your Specialty
Before starting your independent business, you need to set clear goals for what you want it to look like. You should figure out what specifically you want to teach, who you want to cater to, and what teaching methods you want to use.
Do you want to teach IELTS prep classes to Chinese college students or do you want to teach conversational English to kids in South Africa? Will you give students material to study on their own before class and then review it with them? Find your niche and work to excel there.
Look at what other teachers with similar experience and specialties as you charge to help determine what a fair price point for your lessons looks like.
You may also want to consider whether you want to sell class bundles, have free trials, or offer promotions.
You’ll also need to write up a student contract that details pricing and your class cancellation policy.
3. Build your Class
Create a model for curriculums including long-term plans and individual lesson plans.
You’ll probably want to modify it to fit individual students once you get to know their language levels and learning styles, but you need to build off of a strong model. This is, after all, the meat of your business.
You should also collect teaching resources, including any materials or textbooks the students will need, props for your classroom, teaching backgrounds, and more.
You’ll need to set up your classroom space, including a headset, a high-speed internet connection, and a quiet, bright teaching environment.
Lastly, you should figure out which platform you want to teach through. Whether it’s Skype or something more sophisticated, it should be easy for both you and your students to use.
This is an absolute must for your teaching business.
It’s not hard to make a website: WordPress, Wix or SquareSpace all make web design easy for anyone to do, no technical skills required.
Your website should feature information about you and your teaching model, including an introduction video and, if possible, student testimonials. It should also include contact information and information about how to sign up for classes.
You can advertise free teaching resources and a free trial class on your website to generate business.
5. Promote Yourself on Social Media
Use social media sites, teaching forums, and YouTube to advertise your company and build a name for yourself. You can write blog posts and use SEO methods to make your company more visible.
6. Set up a Payment Process
You can use PayPal or another payment platform to collect money from students.
Because you’re teaching internationally, you’ll want to make sure it’s easy for students to transfer money to you from a different currency.
If you’re living in China, you may also consider conducting payments through WeChat Pay or Alipay.
7. Always Keep Pushing Yourself
You’re never done building your online English teaching company.
In order to keep your company ahead of the curve and attractive to customers, you should work to constantly improve your business by working on your lessons, marketing, and website.
Once you’ve established your online teaching business, you can profit off of it and benefit by selling video courses on how to teach, as well as model lesson plans, marketing strategies, and other resources to help other teachers.
Also, you can sell premade courses to ESL students.
Once you’ve made these resources for sale you don’t need to do anything besides a little advertising to make money from them.
If you’re thinking of applying to VIPKID, you probably already know about the mock class.
It’s an essential part of the application process, and the good news is that it’s not as scary as it seems.
In this article, we’re going to break down what the mock class looks like. We’re also going to give you some essential tips about preparing for it to help you ace it and become a VIPKID teacher faster!
Note that VIPKID’s mock class procedure changed in September 2018. This post discusses the mock class process now.
What is the VIPKID Mock Class?
The mock class is perhaps the most essential part of training if you want to teach English online for VIPKID: it helps determine whether or not you’ll be hired by the company, and it also has a role in determining your base salary for VIPKID.
It’s an opportunity to practice your teaching skills using VIPKID’s platform with a certified VIPKID teacher, and to make sure that you’re fully ready to teach before you enter the classroom with a real student.
Look at it as an opportunity to improve your teaching skills and fully prepare to become a VIPKID teacher rather than an exam to be graded on!
You’ll take the mock class after you complete your application, interview, and demo.
If you don’t do a totally amazing job on your first mock class, don’t worry: you can take the mock class multiple times!
And here’s the best part: no matter how you do on your mock class, once you’ve gotten to this point in the hiring process you will get hired as a VIPKID teacher. You can take the mock class infinite times, and you’re guaranteed employment once you finish the phase no matter what!
So congratulations on making it this far!
What Does the Mock Class Look Like?
Your VIPKID mock class will take place with a current VIPKID teacher, who will act as a student while you teach and then grade you on your performance.
The teacher will also answer any questions you might have and give you feedback immediately after you finish teaching.
Their feedback (and their availability to answer any questions) is enormously helpful, so be sure to have a pen and paper handy so you can jot down notes when you’re talking to them before and after you teach!
Breakdown of the Mock Class
The mock class is 25 minutes long in total.
The First Few Minutes
You’ll spend a bit introducing yourself and chatting with your “student”. You can also ask them any questions you want during that time, including any questions you might have about how to teach the lesson.
The Lesson
The lesson will last 10 minutes long (15 minutes for Mock II). During that time, you’ll teach part of a VIPKID lesson that you’ve prepared ahead of time.
The Wrap-up
After your ten minutes of teaching are up, the interviewer will review the lesson with you and go over what you can improve on.
What Will You Teach in the Mock Class?
Once you’ve passed your interview, you’ll be able to enter the Certification Center and choose which level you want to do your mock class in. Completing your mock class will certify you to teach students at that level.
Don’t worry too much about which level you choose: you can always go back and get certified for other levels later.
The VIPKID certification center
After you’ve chosen which level you want to certify in, you’ll be given materials to prepare for two different mock classes at that level.
In addition to VIPKID’s materials, there are tons of videos online of teachers going through the mock lessons so you can see how they teach them and decide how you want to conduct your class.
You won’t find out which of the two lessons you’re teaching until your mock class begins, so it’s important to prepare for both of them just in case!
How Should You Prepare for the Mock Class?
The mock class tests you on whether or not you’re ready to be a VIPKID teacher.
So by the time your mock class rolls around, you should be fully prepared to teach. That means having your classroom set up and knowing how to interact with students and use the classroom.
Setting Up Your Classroom
Having your classroom ready means that you have a stable and fast Internet connection, headphones with a built-in microphone and a well-lit area to teach in.
It also means having a decorated teaching environment complete with a teaching backdrop, a reward system, and props you can use to illustrate concepts you’re teaching.
Have props and teaching tools on standby! (Photo: Graham Carroll)
Props
As you can see in the picture above, I have cutouts of Meg and Mike (two characters that appear in VIPKID lessons) near my computer. I also have props and illustrations for concepts that I take out to have on standby for certain lessons.
For example, if I’m teaching about animals, I’ll take out my toy cow and cutouts of horses and other animals in the lesson.
Classroom Background
Your background doesn’t need to be anything fancy. Lots of teachers include maps or ABCs in their classrooms, but really you should do whatever works for you. The main thing is to make sure to have your name and your reward system visible.
As you can see in the picture below, my classroom setup includes my name, some simple colorful decorations, and my reward system, which is currently a flower (the petals are all Velcro so I can put them on when the student earns a point).
My simple teaching backdrop, featuring my name and my reward system. (Photo: Graham Carroll)
My reward system itself is Velcroed to the poster so that I can change it out depending on what I’m teaching.
You can make your reward system anything you want, and there are tons of ideas online if you can’t think of one!
My article about VIPKID teacher requirements has more information about what exactly you need to ace the mock class and become a VIPKID teacher — and it has pointers for making sure your lighting and Internet connection are up to snuff!
How Should You Conduct Your Mock Class?
Let’s get into the dirty details: how should you teach in your mock class to ensure that you pass?
In this section, I’ll break down …
Be Enthusiastic
Above all, be sure to be happy, enthusiastic, and engaging in your mock class. That means big smiles, positive encouragement, and lots of big body movements.
You want to make your students feel welcomed and safe in class, not like they’ll be judged if they make a mistake.
A big part of positive encouragement only is not saying “no”. When the student makes mistakes, don’t say “no”. If they’ve said something that’s not correct English or answered a question wrong, simply model the right answer, cue them to try saying it the right way, and move on.
Make Yourself Easy to Understand
Remember that your students are not native English speakers, and some of them may have little to no English at all.
You have to make it easy for all students to understand you, no matter what their English levels may be.
…By Making Your Voice Heard
One way to make yourself understood more easily is with your voice.
You should slow down your speech and enunciate every word to help students pay attention and comprehend more easily. You can modulate how you speak depending on what level of students you’re teaching.
If you’re teaching students at a very low level, it’s important to speak extremely slowly and clearly.
It’s also important not to pepper your speech with anything extra. Rather than explaining things using language they might not understand, simply jump into activities and make sure to use simple language that won’t confuse them.
If you’re teaching more advanced students, you can speak more normally — just gauge their understanding and be sensitive to it rather than speaking according to how much you think they should comprehend.
…By Using Nonverbal Cues
Use teaching tools and body language to illustrate what you’re saying, especially when you’re teaching younger students.
The best way to do this is by using TPR, or total physical response. This means illustrating your words with body language and hand motions and using body motions to give instructions rather than saying them out loud.
Props and body language will help you illustrate concepts for your students! (Photo: Graham Carroll)
If you want the student to circle something on the screen, draw a circle with your finger. Cup your ear when you want them to speak, and put your finger on your chin pointing at your mouth when you’re speaking.
Your grader will be looking to make sure you use TPR, so be sure to incorporate it throughout your lesson.
The other nonverbal tool you can use is props.
Stuffed animals, paper cutouts, and other objects will help you explain what vocabulary means and illustrates concepts! And your grader will definitely be happy to see that you’ve prepared materials to accompany the slides.
Pace Yourself
VIPKID classes run on strict time parameters, and it’s important for teachers to finish all the material in each lesson during class time so that students don’t fall behind.
For that reason, it’s important for you to show that you can stick to time parameters during your mock lesson.
Try to teach about a slide a minute: it’s a good idea to set up a timer on your phone and put it next to your computer during your mock class to make sure that you’re sticking to the time frame.
Watching other teachers teach the mock lessons in YouTube videos will also help you get a good idea of how to pace your lesson.
Watch Out for Mistakes
Your teacher trainer will be checking to make sure that you’re an effective teacher, which involves being able to spot and correct any mistakes your student makes.
In the mock class, your trainer will make some obvious mistakes on purpose. Be on the lookout for grammar and pronunciation errors, and when your “student” makes them be sure to correct them (without saying “no”) immediately.
You should also always encourage your student to speak in full sentences.
Make corrections gently but promptly.
Let the Student Speak
VIPKID is all about helping students learn English, so it’s important to make sure that they have ample opportunity to speak during class instead of just lecturing the whole time.
With more advanced students, you should shoot for a 70:30 student-to-teacher talking ratio. With beginning students, aim for a 50:50 ratio.
Of course, it can be hard to gauge exactly how much time your student is spending talking, but you can make sure to hit your ratio by having your student read as much of what’s on the screen as possible instead of reading it to them (even when the teacher instructions on the side of the screen say you should read it to them).
Extend, Extend, Extend
Extending is another great way to get your student talking more, and it also shows that you have flexibility as a teacher. Extending simply means adding on to slides and fitting the lesson to your student more.
The first way you should extend is by having some free talk at the beginning of class. Ask your student a few questions about themselves, modulating the question to fit their level.
I always open lessons by asking students what their name is and how they’re doing. Then I do a few other questions to warm them up before starting class.
Good Intro Questions
How old are you?
What’s your favorite color?
What city are you from?
What’s your favorite animal?
What did you do today?
Throughout the lesson, you can also extend by asking the student additional questions. For example, if you’re learning the names of different aquatic animals, you can ask, “What’s your favorite aquatic animal?” or “Have you ever seen a manatee?”
Don’t stress out too much about extension — the way you extend doesn’t have to be anything special, just make sure to do a bit of it.
Be Prepared
This one is obvious, but worth mentioning just in case. You should have gone through the slides before class so you’re not reading what’s on the side of them or figuring out how to teach them during class.
You should also look professional, with your hair combed and wearing a plain shirt with nothing on it.
Last, you should have some props and teaching tools at the ready aside your computer, so you aren’t reaching for them throughout the class.
How are you Graded in the Mock Class?
Your mock class grade will be based on your performance in four areas:
A huge percentage of teachers need to do a second mock class after their first one, and some even need to do 3 or more mock classes.
Doing more than one mock class is not a big deal or a sign of failure: simply look at it as a chance to practice more.
I did two mock classes, and I taught ESL abroad for two years. And I have a friend who’s a classroom teacher who had to do two mock classes as well. So remember that doing more than one mock class doesn’t say anything about your teaching ability.
Mock 2 (and 3 and 4 and 5 …) look just the same as Mock 1, but in these ones you’ll be armed with the feedback you’ve gotten from your first mock class. Be sure to put the tips you get into practice in your next trial class!
Conclusion
Passing the mock class can definitely seem daunting, but it really doesn’t need to be.
Just keep calm, prepare, talk slow, and you’ll be great. And don’t forget to smile and use lots of body language!
If you’re still nervous about your mock class, remember that it’s only 10 minutes long. It’ll be over before you know it!
And if you have further questions about passing the mock class, please drop a comment below. I’m always happy to help another VIPKID teacher out!
Do you want to teach English online to Japanese students from home?
Maybe you’re interested in the culture, the people or you’re learning the language and want the chance to use it in class.
But where do you find them online? And once you get a trial lesson, what do you teach them?
This article gives you all you need to know about finding your new Japanese students, considering their needs when planning lessons and some of the cultural differences you may need to deal with.
Let’s go!
The Best Online-Platforms to Teach English to Japanese Students
You will likely meet Japanese students on the same platforms you teach many of your other students.
These are online marketplaces, where you can create a teacher profile and students can book a lesson with you. Basically, you are free to set your own hours and rates.
For every book lesson, the platforms take a cut of your rates.
The three most popular online teaching platforms, and some of their pro and cons, are:
Verbling
On Verbling, teachers retain a higher percentage of lesson payment but there are fewer students available than other options.
They also include any required teaching tools such as video call, whiteboard etc on the website which makes things easy.
Platforms That Specialise in Teaching Japanese-only Students
As well as these, there are dedicated companies that specialise in teaching Japanese-only students.
Bear in mind that these websites are aimed at Japanese natives. As such, the websites will usually be in Japanese.
Some offer an English language option but for others, you will need to know the language to a certain degree (or be happy using a translator!)
How to Navigate a Site Without Knowing Japanese
If you don’t know Japanese then there are two ways to make a website decipherable.
Change the Website Language
Look for a box that says “日本語”. This means “Japanese” and is where we will change the language.
After clicking on this box, search for “英語”. This means “English” and after selecting this option you should get the website in English (if this is an option they offer).
Use Google Translate
Search for the website in Google
Look for the option next to the website that says translate.
After selecting this, google will take you to its own translation of the website. It won’t be perfect but it will be good enough to make your way around.
Ok, so now we know we know how to read the websites, let’s compare them:
I have experience teaching on Eigox and it has its ups and downs.
The positives are that the lessons are fairly relaxed, most of the time it is a free conversation and when it isn’t you are provided with a lesson plan and all of the materials.
The pay is fairly decent (around $13 an hour) and you are free to set your own hours.
The negatives are that there isn’t a massive amount of work, there is no way to synchronise the calendar with anything else so you have to update your hours each week if you take lessons elsewhere.
They also have a cancellation policy where if you have to cancel a lesson then you not only forfeit payment for the class and are put on the watch (fair) but you also have to pay the cost of the class!
I had this happen once after a double booking occurred (I hadn’t updated my schedule on Eigox). I had to cancel the class and when I found that I would have to pay out from my next paycheque I decided that it wasn’t for me.
Not the worst available but certainly not the best. The website also isn’t one of the most professional, there are more than a few spelling mistakes to be found.
That being said, the entry requirements are fairly low (preferring one year of teaching experience) and their emphasis seems to be on teaching children so another bonus if you are wanting to specialise in that area.
I would say that you don’t want to stay on this platform forever but it looks like an accessible job if you are just starting out.
Ecom looks to be one of the more higher-end companies.
Their focus is on quality over quantity and as such require more experience (2 years) but for higher pay ($16-20 an hour).
Their focus is on business English as well as exam preparation for IELTS, TOEFL etc. Most of their students are businessmen.
One of the disadvantages (at least for myself) is that they are looking for people who can commit to 20 hours a week.
This is great if you are looking for a sole “employer”. However, for those that have other students and are looking to supplement with a few extra hours, this may not be ideal.
Another drawback is that they seem to be a lot more popular amongst teachers than the others. A great sign that they are a quality platform but it means the likelihood of getting a spot is reduced.
Go after this one if you have a bit of experience but getting in may prove a challenge!
What Are the Logistics for Teaching English Online?
There are a few things that you will need to bear in mind when working with Japanese students (and companies).
Technology and Workplace
The first thing if you haven’t got set up already is the hardware. You will need a computer connected to a decent speed internet connection. The internet speed doesn’t need to be the fastest but it does need to be stable.
You will also need a headset and webcam (if one isn’t already built into the computer). These can be picked up fairly inexpensively.
Once you have these then download your chosen video call software (I recommend Skype). This will allow you to, first of all, attend the interviews for the companies you want to work for as well as to conduct the lessons themselves.
When you attend the interview make sure you are presentable. Have a plain or tidy background, with good lighting and make sure to smile!
Time Difference
Some of your students will be Japanese natives living and possibly working abroad. In these situations, you may work with a few that match your time zone but the vast majority of Japanese people live… well in Japan.
Depending on where you live, this could be a small time difference or like me (UK) there could be a large time difference.
It actually works as an advantage for me as I work mornings and afternoons which is ideal for Japanese students who want to do lessons in the evening (after work).
Wherever you are, you need to factor this in when choosing your work schedule.
Payment
If you work on a website that caters to students from all countries then you don’t need to worry too much as you’ll likely be paid in a familiar currency such as dollars via PayPal.
If you work for a Japanese company though you are likely to be paid in Japanese Yen.
This was the case when I worked for Eigox. It was still via PayPal which made things a little easier but be aware of current currency rates and if any charges apply when looking at the remuneration of a teaching position.
Communication
Skype is widely common in Japan and I have used this for contact with most of my Japanese students as well as companies.
Don’t worry if you can’t type Japanese as plenty of people use rōmaji (Latin script) to spell their name on skype.
Special Characteristics of Japanese Students
You will find some similarities in the manner of personality between your Japanese students. This is something that you will get a feel for as you gain more experience.
However, just like any other student, Japanese students come in all shapes and sizes so don’t go into a first lesson assuming you know exactly how they will be.
Adults
In my experience, adults are usually very polite, punctual and attentive. Most of my adult Japanese students are learning for business reasons and so being generally knowledgeable in this area will be greatly appreciated.
Teens
Teenagers will usually be quite polite and like teens from other countries you can still win them over by connecting with them on their interests. Also, remember not to patronise and you should have no problems.
Children
I have found that teaching Japanese children is a lot more similar to teaching any other child online. They may be a little more polite and respectful but you have to remember that they are still children and you will still need to “win” their attention.
What Japanese Students Are Expecting of You
Like with any other student, punctuality and professionalism are expected from you.
With some adults, you can spend more time building rapport and be a bit freer with the activities in the lesson whereas others prefer to “get down to business” and be doing exercises and drills rather than talk about what they had for dinner yesterday.
Like most other children, Japanese children don’t really have expectations of how you should be. If you manage to make the lesson fun and keep the momentum going (and the parents see they are making progress) then you’ll do just fine.
There is a cliche that teachers in Japan dictate the class without a great deal of opportunity for freethinking from the class.
While this can be true for some, Japanese students know that you are a foreigner and appreciate being able to learn in a more relaxed atmosphere with free conversation and learn about your culture.
That being said, I have found it takes a few lessons for them to warm up to you and open up so just try to relax and give it time.
Cultural Differences Between Japan and the West
Although there are big differences between Japan and the west, there aren’t too many cultural differences that you will need to worry about in class.
It’s quite hard to commit a faux pas in English but there are a few things we need to consider.
Hand Gestures
First of all, let’s talk about counting with fingers.
Usually, we start with fingers bent and then extend each one to count. In Japan, it’s the opposite. They start with all fingers extended and curl each one when they count.
Another thing to consider is when pointing to oneself. We are used to pointing to our chest usually to express “me”. In Japan, it is the norm to point to one’s nose in this situation instead.
Lastly, with regard to gestures, it is perfectly normal to use a thumbs up to indicate a good job.
However, avoid the thumbs down at all costs! In Japan, it is the equivalent of “go to hell” which obviously isn’t going to go over well if used!
Here’s a short and fun video about other hand gestures that have a different meaning in Japan:
Comprehension
This can be a similar experience with students from other countries. You ask if they understand something and you will get a “yes” a lot of the time. The problem is that this isn’t always a “real yes”.
Some students would rather say yes to avoid disrupting the flow of the class or avoid disappointing the teacher. Or maybe they just weren’t listening at that point and feel that to mention that would be rude.
It is important then, that instead of asking “do you understand”, you should ask questions that check for comprehension “could you tell me what this means?”, “could you give me an example sentence using this concept” etc.
Names and Titles
Lastly, we should look at naming conventions in Japan.
It’s common for Japanese to address one another with title suffixes, similar to the way we use Mr/Mrs, etc in English.
There are a number of these suffixes depending on position and status but the most common is “san”. If we wanted to use this title with our student Tanaka then we would call him Tanaka-San.
Japanese Title Suffix
Meaning
san
Mr/Mrs
sama
a more formal form of “san”
sensei
used for teachers and experts such as doctors
That being said, your students know that you are not Japanese and so don’t expect you to use this (I often don’t).
It’s useful, however, to be aware that they will likely use these suffixes when talking about yourself and other friends and colleagues.
To show respect it may be a good idea to ask from the start whether they would prefer you to use this suffix with them.
Which Topics Should You Teach?
Like any student, the topic you teach depends on what your student already knows and what they need to know.
It’s worth bearing in mind that English is taught as a compulsory subject from the age of around 10 in Japan. Therefore, you will find that anyone from that age upwards will have at least a basic grasp of the language.
If you are teaching a child from the very beginning then you will want to start with basic vocabulary, phonics and getting them used to the language.
With grammar, you will likely need to emphasise the importance of articles, plural forms and things like subject-verb agreement.
These are things that just don’t exist in the Japanese language and so even seasoned English learners can struggle with these areas.
I have found that although adults usually possess a somewhat wide vocabulary and are adept at using English grammar, they tend to struggle with pronunciation a little more than children.
For this reason, I spend a great deal of time with exercises that strengthen pronunciation.
Me, during an online English pronunciation lesson (Photo: Jonathan Race)
Pronunciation
Pronunciation needs its own section as it can be extremely difficult for a Japanese learner moving to English. First of all, they will have to learn to make new sounds which their mouths aren’t used to making.
On top of this, the pronunciation of English words can be drastically different from what is expected of the spelling.
L / R
This is one of the biggest challenges for a Japanese learner’s pronunciation, differentiating between “l” and “r”.
The reason why this is difficult is that the Japanese language doesn’t have these sounds. There is a sound that is somewhere between the two and this is usually what is used when a beginner Japanese tries to use these sounds.
It’s important when teaching this that you explain the position of the tongue, lips, and jaw at the beginning, middle and end of the sound. Use diagrams or show them your mouth to help.
Once they have the basics down you then need to drill this to make it become second nature. For that, tongue twisters can be a huge help and I usually set aside a few minutes at the start of every lesson to do that.
Diphthongs
This is another big change between the two languages. Diphthongs (gliding from one vowel sound to another e.g. the vowel sound in “my”) don’t exist in Japanese. Every vowel sound is a monophthong (e.g. the vowel sound in “egg”).
It can be easy to “cheat” these diphthongs if you are a Japanese learner by simply going from one monophthong to another. That is after all what diphthongs are.
However, in order to get these vowels to sound natural, we need to work at increasing the speed between the two.
If there is a particular diphthong that your learner is struggling with then start by getting them to make the initial vowel sound and then the final found sound separately.
You can then practise going between these two sounds slowly and gradually speed it up.
Consonants
Lastly, with regards to pronunciation, we need to look at consonants.
If you aren’t familiar with the Japanese language then you need to know that the consonant sounds come at the beginning of their syllables with a vowel after (e.g. “banana”).
Because of their familiarity with this, it makes it difficult when moving to a language which has consonants at the end of words.
You may find words like “lot” becoming “loto” or “bad” becoming “bado”.
These can be improved by first making the student aware of the sound they are making compared to how it should be.
After that, you can help them practice cutting the vowel sound at the end of the word shorter and shorter until it no longer exists.
Consonant clusters are especially difficult (e.g. “crisps”).
For these, you may want to have the student practise making the consonant sounds with just their mouth (no voice box) before getting them to piece them together.
Take each sound one at a time and again gradually speed it up until it sounds right.
Last Thoughts
As I’ve said in this article, you can learn about common grammar and pronunciation mistakes that Japanese learners tend to make.
However, remember that each student is unique and will have their own optimum way of learning.
Another thing you should consider if you haven’t already is learning the language. Now, learning Japanese is a huge undertaking but even just learning the basics will give you a massive understanding of the pronunciation and syllabary from where your learners come from.
My knowledge of the language has been indispensable when teaching Japanese learners and it has allowed me to find and fix issues quickly and effectively.
Even if you don’t choose to go down that route though you can learn these things over time with enough experience.
Best of luck in the classroom, またね!(see you later!)




)
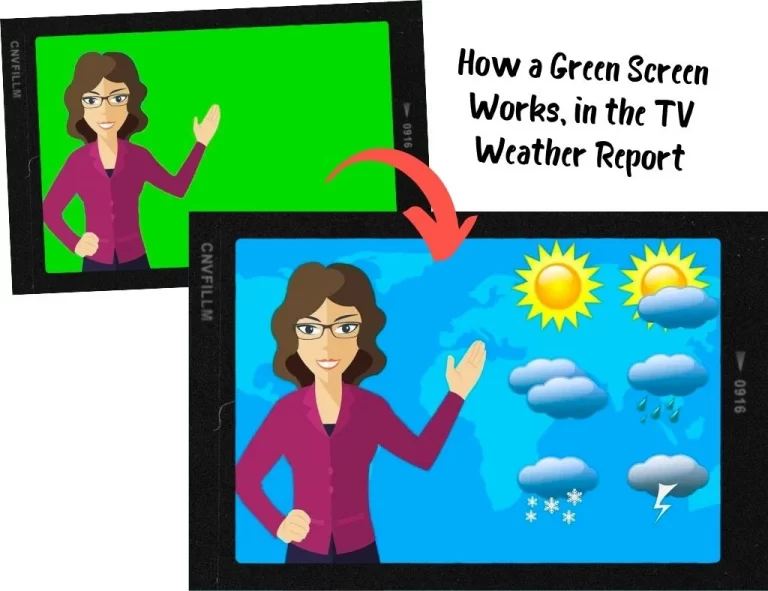


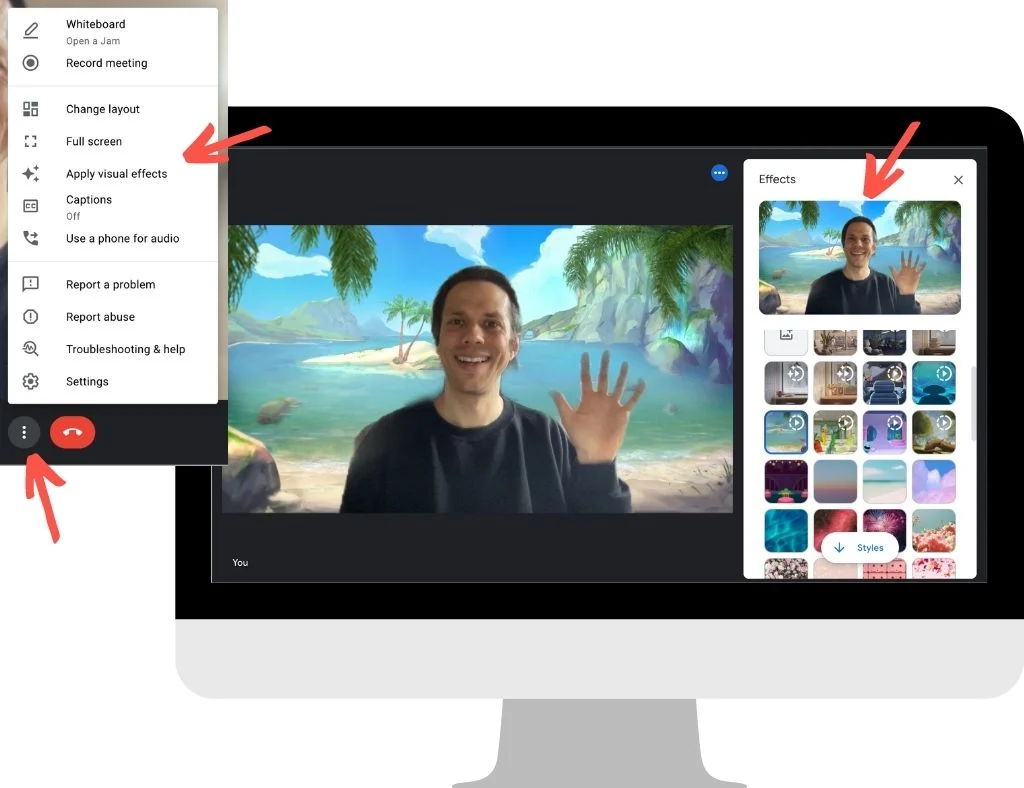
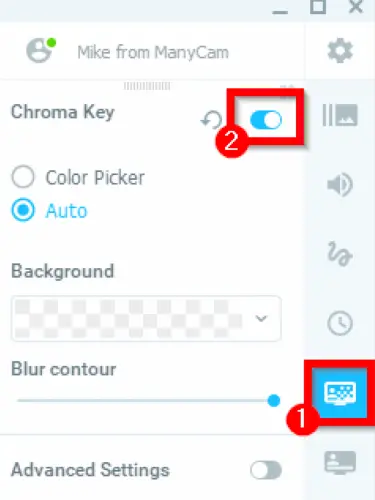
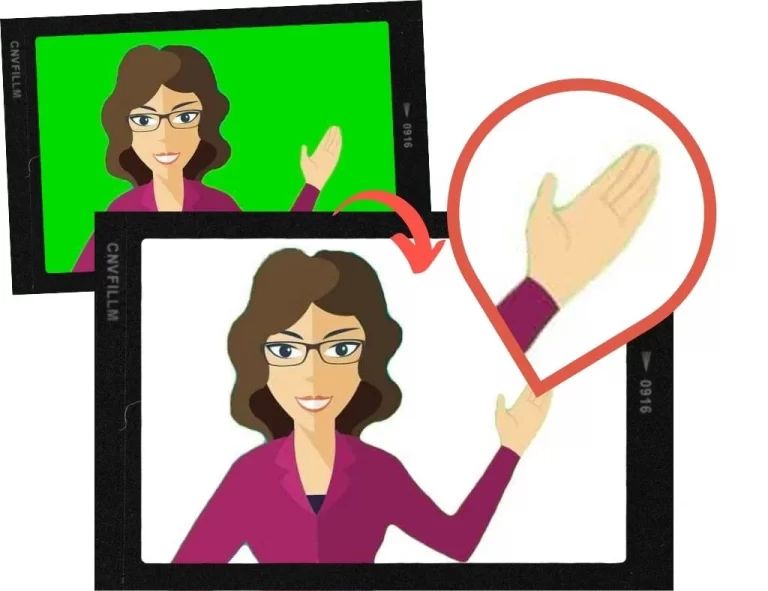













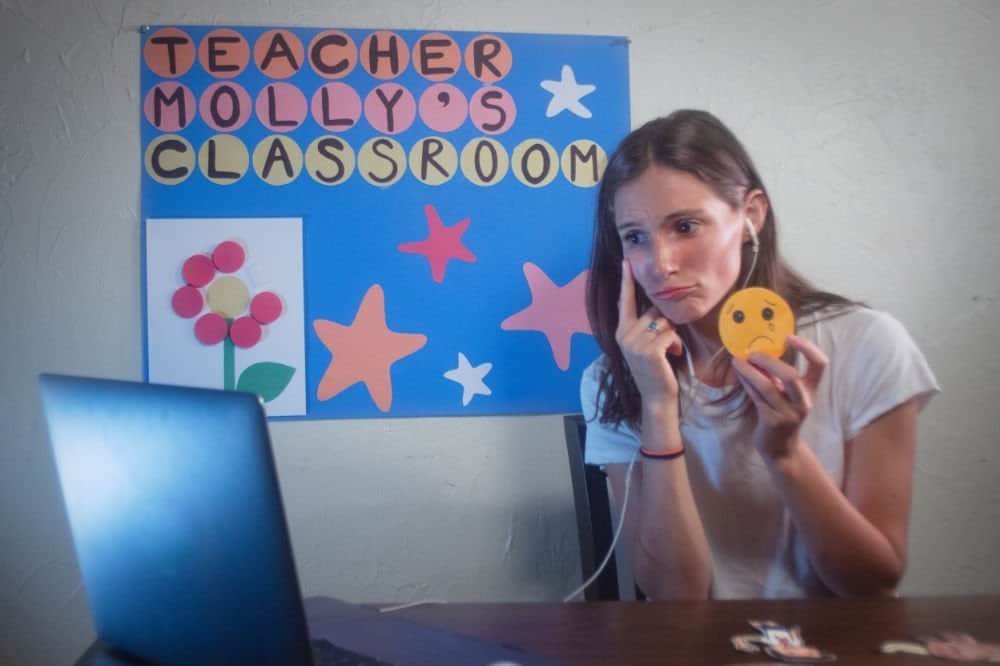
)



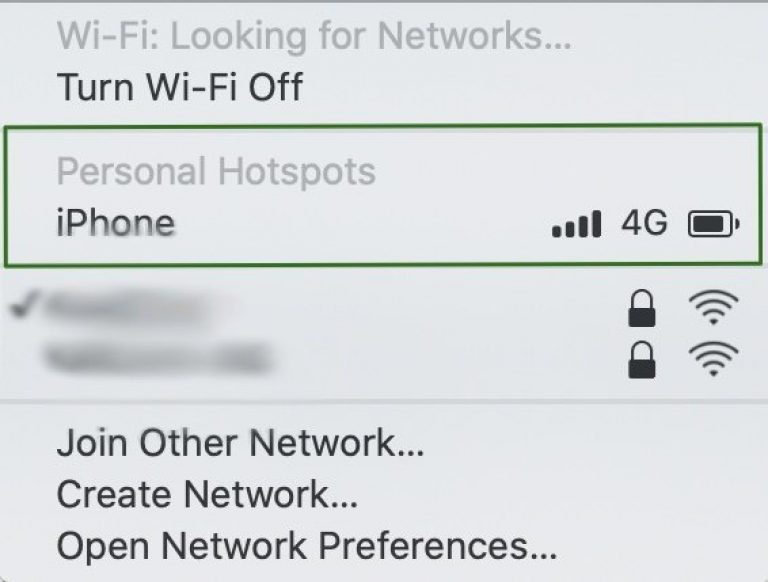








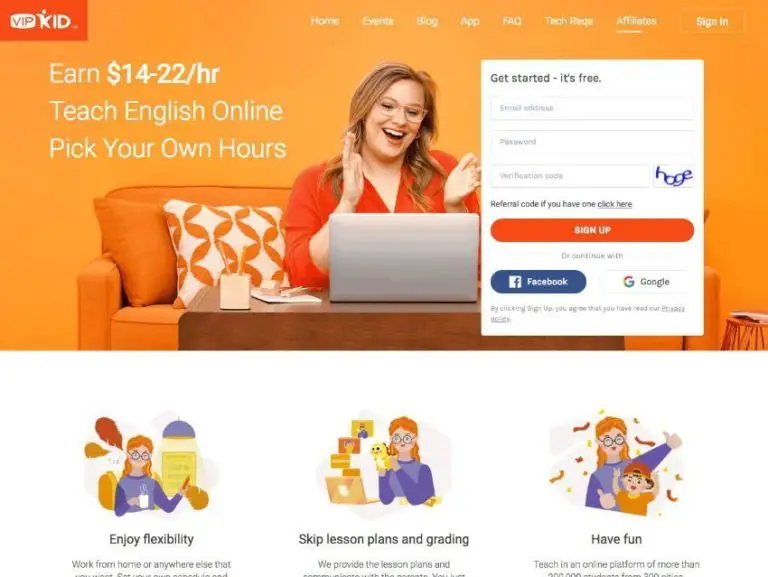
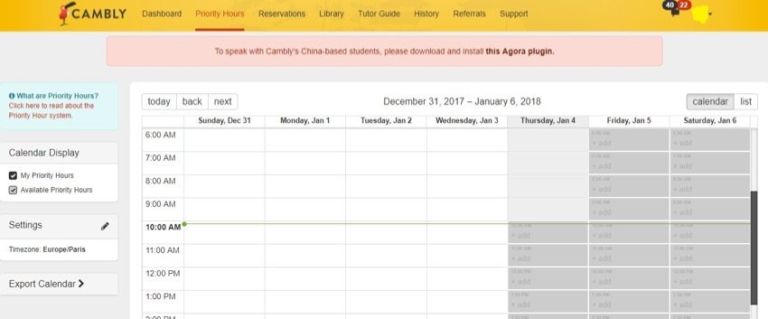
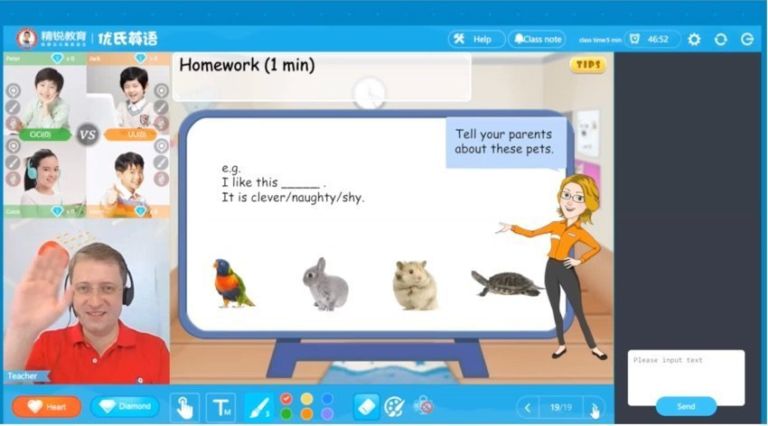
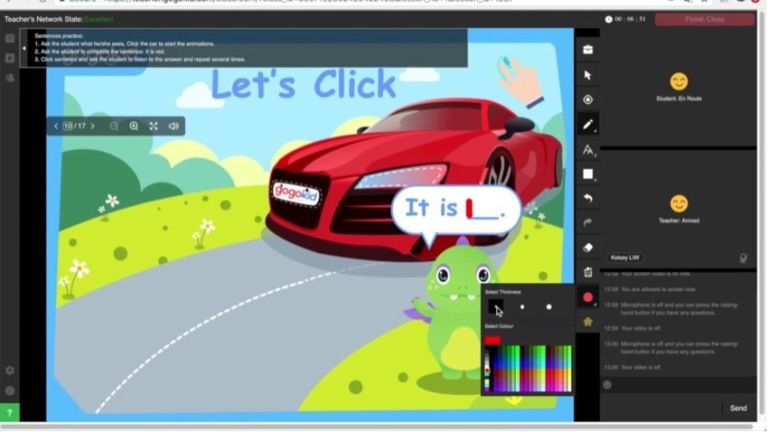
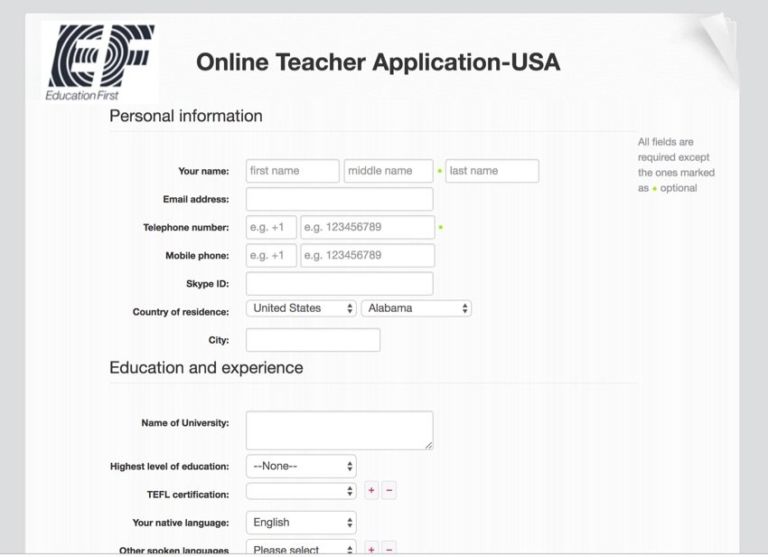

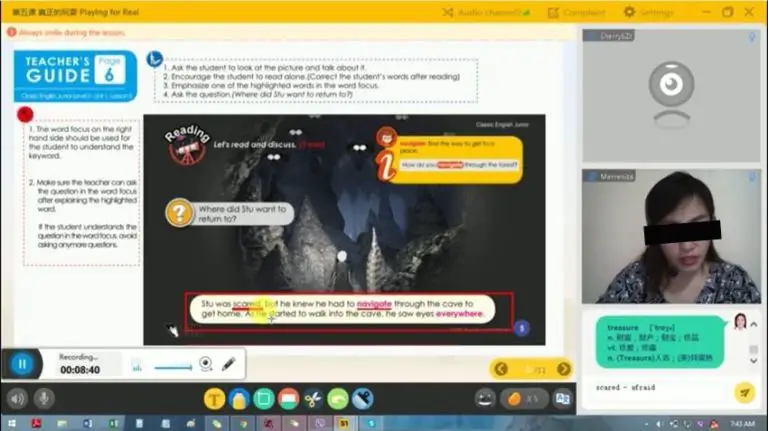

![VIPKID Teacher Requirements: The Complete Breakdown [UPDATED]](https://jimmyesl.com/wp-content/uploads/2020/09/vipkid-requirements-thumb.png)

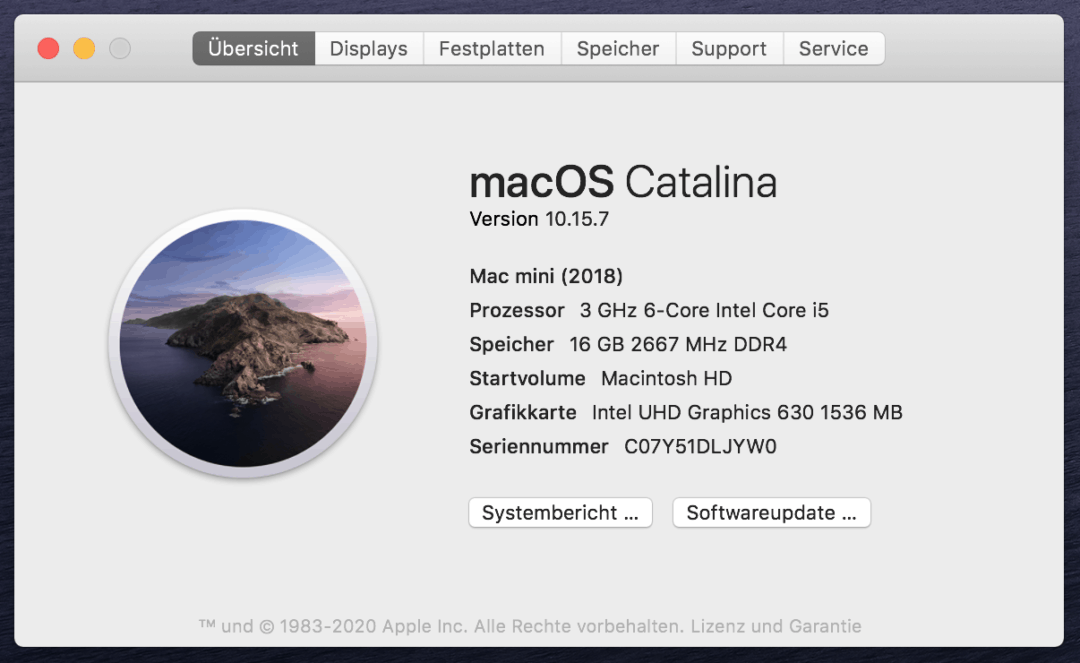
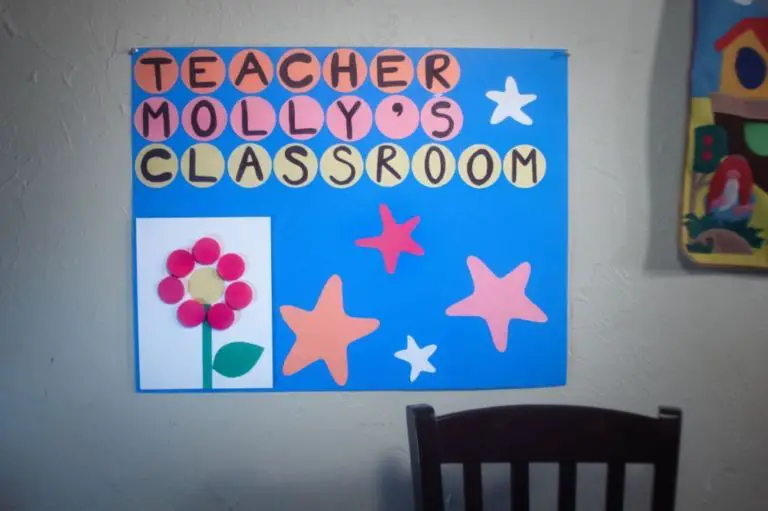
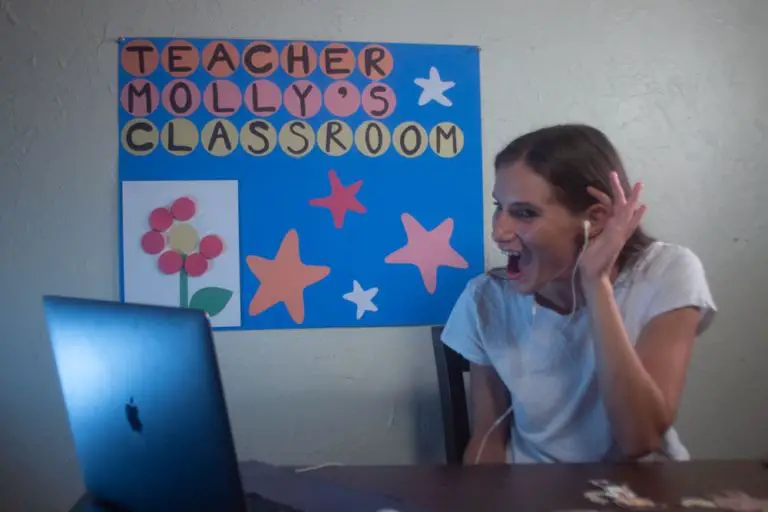


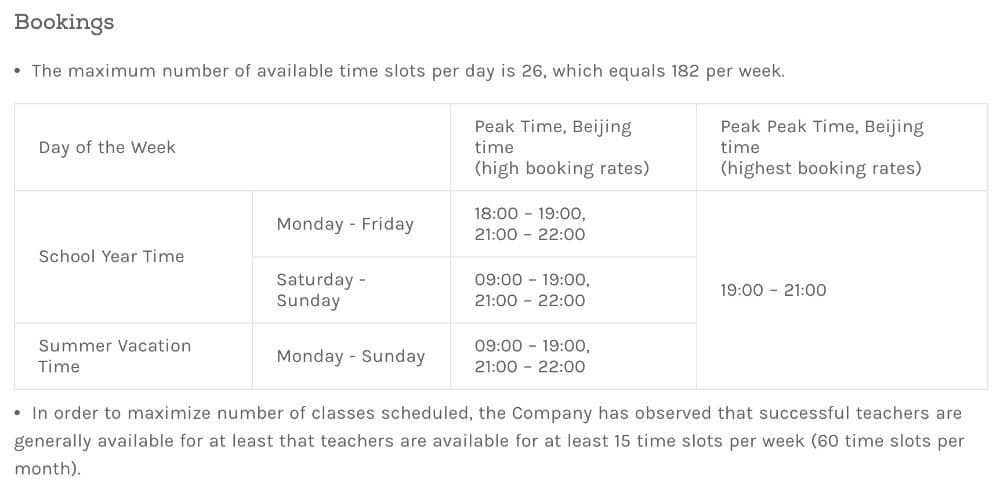
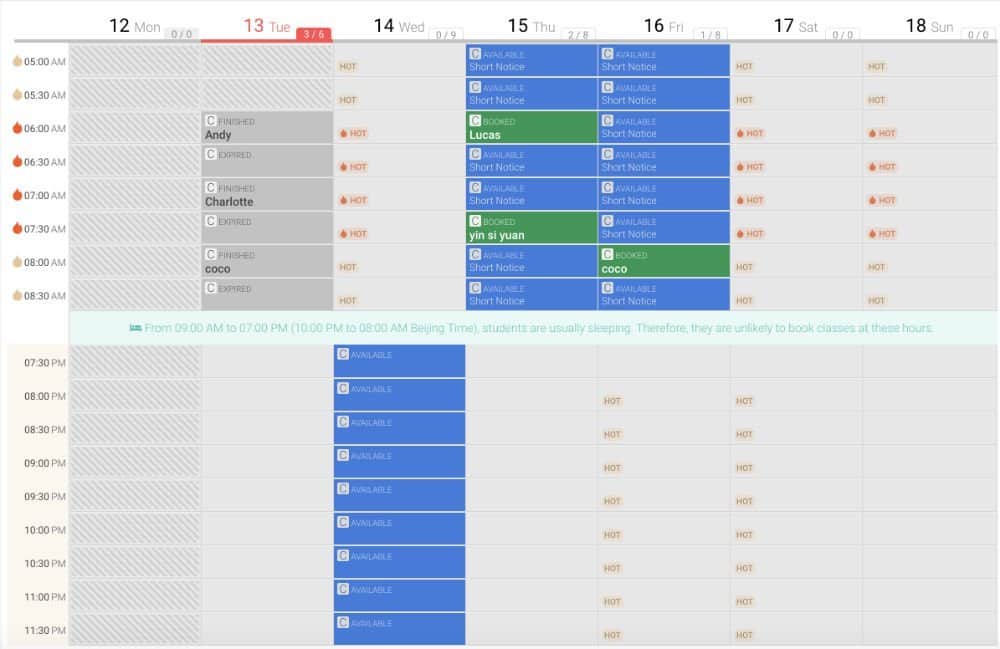
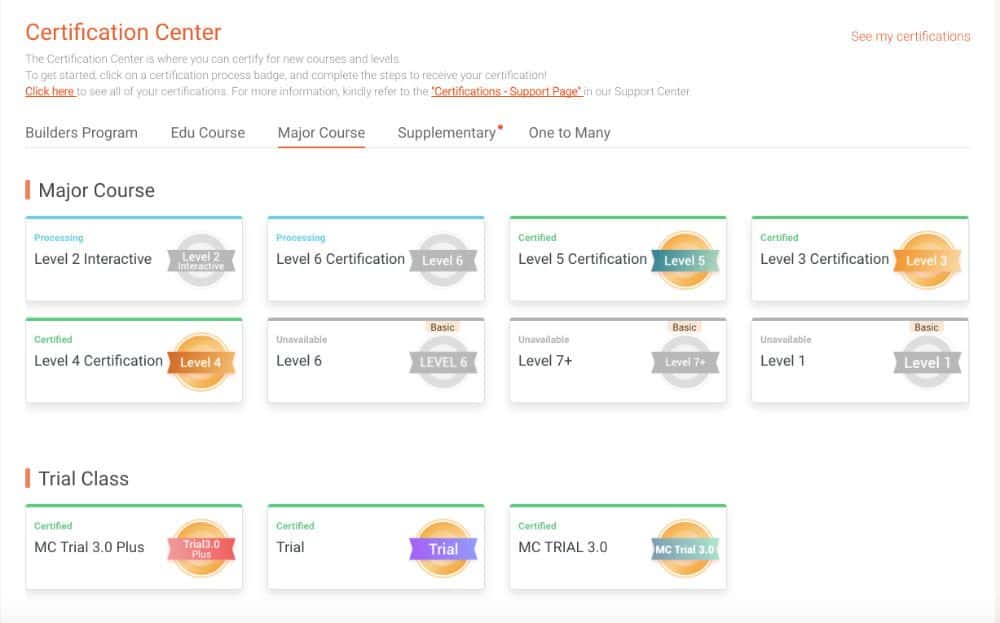



![How To Teach English With VIPKID: The Comprehensive Guide [UPDATED]](https://jimmyesl.com/wp-content/uploads/2020/04/teach-english-with-vipkid-thumb.png)