When you want to teach English online, getting hired by a company seems to be the easiest way to start your career.
But after a while…
You might become tired of teaching the same beginner lessons over and over again.
Or maybe you’ll want to start looking for opportunities to make more than roughly $15-20 per hour.
Have you ever considered starting your own independent online teaching business – having the freedom to set up your own curriculum, schedule and price model?
In this post, you will learn what it takes and how to get started.
Should You Teach English Online Independently?
Running your own online teaching business is a lot of hard work, and it’s definitely not for everyone. However, if you do go down this path, you’ll find yourself with a sustainable career that gives you flexibility, creative control, and life skills, not to mention a sizable income.
If you have good credentials and can tutor in business English or help students prepare for the TOEFL, IELTS, SAT, or other tests, you can charge a lot of money and will undoubtedly get good business.
If you spend 20 hours a week tutoring in a specialized area at $50 per hour, you’ll make $4,000 a month!
But teaching English independently doesn’t just require good teaching and curriculum development skills.
It also requires you to be self-motivated and unafraid to put yourself out there, to have good entrepreneurship as well as be able to market yourself effectively, manage your finances and your schedule, and take care of nitty-gritty details like paying taxes, figuring out cancellation policies for students, and maintaining a website.
Teaching ESL independently is undoubtedly rewarding. It makes you your own boss, gives you the ultimate freedom and flexibility, and gives you the opportunity to design your curriculum independently.
Keep in mind, you can always teach English in more than one place. For example, you can schedule classes with a major ESL company and practice your teaching skills while you work on your own teaching business and build up a client base.
These are the relevant pros and cons to consider when deciding whether to follow this route:
The Pros
Running your own teaching business gives you control over every aspect of your teaching practice, so you’ll never be subject to the whims of a major company.
You can build up a good reputation and grow a loyal customer base.
Once you’ve become established, you can cooperate with other teachers, help new independent teachers start their own businesses, and even hire teachers to work for you.
The Cons
Running your own business is a LOT of work: administration, marketing, sales, payment, and troubleshooting are all up to you.
You’ll need to put a lot of effort in before you start seeing results.
You assume all the risk, financial and otherwise, for your company.
Most teaching companies have a section based in the country where their students are and have staff that communicates with them in their native language. As an independent teacher, you have no support, so all communication, including fielding complaints, is up to you. This may be challenging if your students’ English isn’t great and you can’t communicate with them in their native language.
7+1 Steps for Starting Your Own Online Teaching Business
Starting your own company can seem totally terrifying, and with good reason. It’s a lot of work, and the responsibility for all of it falls on your shoulders.
It’s important to make a plan and strategize so that your teaching company is stable and well-run.
Here are a few tips that will help you create a successful online teaching company.
1. Choose your Specialty
Before starting your independent business, you need to set clear goals for what you want it to look like. You should figure out what specifically you want to teach, who you want to cater to, and what teaching methods you want to use.
Do you want to teach IELTS prep classes to Chinese college students or do you want to teach conversational English to kids in South Africa? Will you give students material to study on their own before class and then review it with them? Find your niche and work to excel there.
Look at what other teachers with similar experience and specialties as you charge to help determine what a fair price point for your lessons looks like.
You may also want to consider whether you want to sell class bundles, have free trials, or offer promotions.
You’ll also need to write up a student contract that details pricing and your class cancellation policy.
3. Build your Class
Create a model for curriculums including long-term plans and individual lesson plans.
You’ll probably want to modify it to fit individual students once you get to know their language levels and learning styles, but you need to build off of a strong model. This is, after all, the meat of your business.
You should also collect teaching resources, including any materials or textbooks the students will need, props for your classroom, teaching backgrounds, and more.
You’ll need to set up your classroom space, including a headset, a high-speed internet connection, and a quiet, bright teaching environment.
Lastly, you should figure out which platform you want to teach through. Whether it’s Skype or something more sophisticated, it should be easy for both you and your students to use.
This is an absolute must for your teaching business.
It’s not hard to make a website: WordPress, Wix or SquareSpace all make web design easy for anyone to do, no technical skills required.
Your website should feature information about you and your teaching model, including an introduction video and, if possible, student testimonials. It should also include contact information and information about how to sign up for classes.
You can advertise free teaching resources and a free trial class on your website to generate business.
5. Promote Yourself on Social Media
Use social media sites, teaching forums, and YouTube to advertise your company and build a name for yourself. You can write blog posts and use SEO methods to make your company more visible.
6. Set up a Payment Process
You can use PayPal or another payment platform to collect money from students.
Because you’re teaching internationally, you’ll want to make sure it’s easy for students to transfer money to you from a different currency.
If you’re living in China, you may also consider conducting payments through WeChat Pay or Alipay.
7. Always Keep Pushing Yourself
You’re never done building your online English teaching company.
In order to keep your company ahead of the curve and attractive to customers, you should work to constantly improve your business by working on your lessons, marketing, and website.
Once you’ve established your online teaching business, you can profit off of it and benefit by selling video courses on how to teach, as well as model lesson plans, marketing strategies, and other resources to help other teachers.
Also, you can sell premade courses to ESL students.
Once you’ve made these resources for sale you don’t need to do anything besides a little advertising to make money from them.
Do you want to teach English online to Japanese students from home?
Maybe you’re interested in the culture, the people or you’re learning the language and want the chance to use it in class.
But where do you find them online? And once you get a trial lesson, what do you teach them?
This article gives you all you need to know about finding your new Japanese students, considering their needs when planning lessons and some of the cultural differences you may need to deal with.
Let’s go!
The Best Online-Platforms to Teach English to Japanese Students
You will likely meet Japanese students on the same platforms you teach many of your other students.
These are online marketplaces, where you can create a teacher profile and students can book a lesson with you. Basically, you are free to set your own hours and rates.
For every book lesson, the platforms take a cut of your rates.
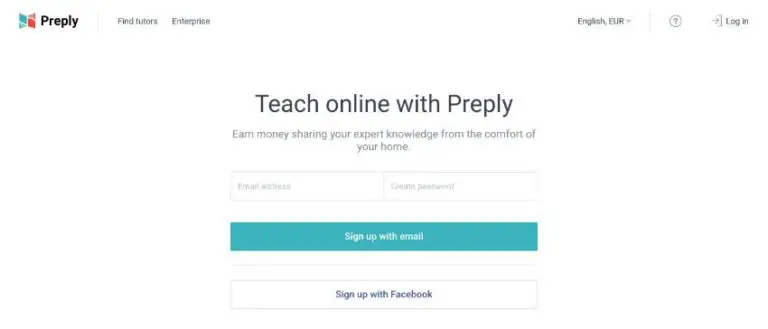
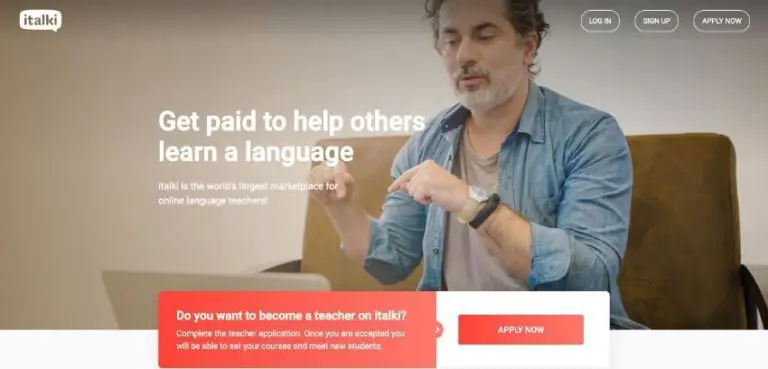
The three most popular online teaching platforms, and some of their pro and cons, are:
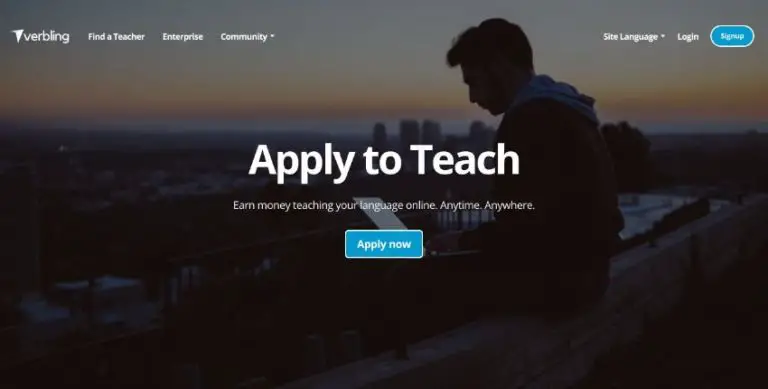
Verbling
On Verbling, teachers retain a higher percentage of lesson payment but there are fewer students available than other options.
They also include any required teaching tools such as video call, whiteboard etc on the website which makes things easy.
Platforms That Specialise in Teaching Japanese-only Students
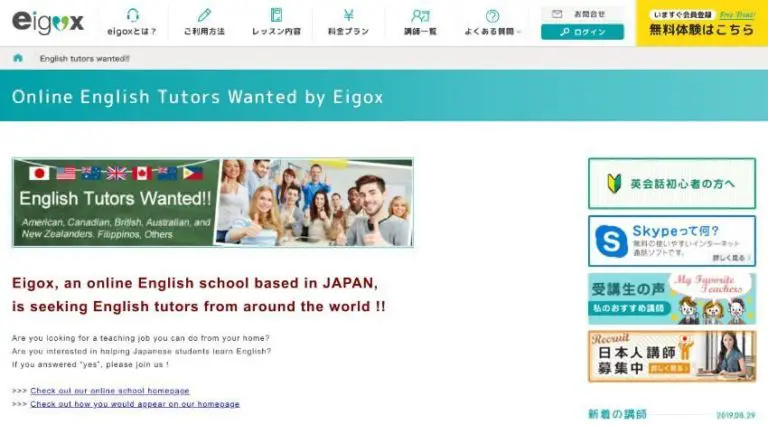
As well as these, there are dedicated companies that specialise in teaching Japanese-only students.
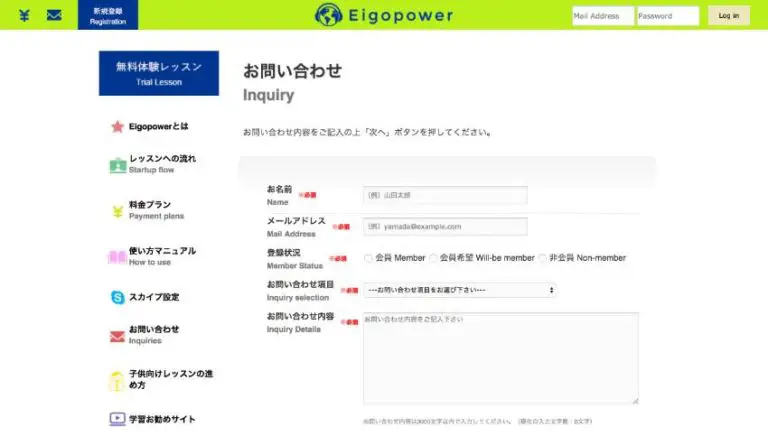
Bear in mind that these websites are aimed at Japanese natives. As such, the websites will usually be in Japanese.
Some offer an English language option but for others, you will need to know the language to a certain degree (or be happy using a translator!)
How to Navigate a Site Without Knowing Japanese
If you don’t know Japanese then there are two ways to make a website decipherable.
Change the Website Language
Look for a box that says “日本語”. This means “Japanese” and is where we will change the language.
After clicking on this box, search for “英語”. This means “English” and after selecting this option you should get the website in English (if this is an option they offer).
Use Google Translate
Search for the website in Google
Look for the option next to the website that says translate.
After selecting this, google will take you to its own translation of the website. It won’t be perfect but it will be good enough to make your way around.
Ok, so now we know we know how to read the websites, let’s compare them:
I have experience teaching on Eigox and it has its ups and downs.
The positives are that the lessons are fairly relaxed, most of the time it is a free conversation and when it isn’t you are provided with a lesson plan and all of the materials.
The pay is fairly decent (around $13 an hour) and you are free to set your own hours.
The negatives are that there isn’t a massive amount of work, there is no way to synchronise the calendar with anything else so you have to update your hours each week if you take lessons elsewhere.
They also have a cancellation policy where if you have to cancel a lesson then you not only forfeit payment for the class and are put on the watch (fair) but you also have to pay the cost of the class!
I had this happen once after a double booking occurred (I hadn’t updated my schedule on Eigox). I had to cancel the class and when I found that I would have to pay out from my next paycheque I decided that it wasn’t for me.
Not the worst available but certainly not the best. The website also isn’t one of the most professional, there are more than a few spelling mistakes to be found.
That being said, the entry requirements are fairly low (preferring one year of teaching experience) and their emphasis seems to be on teaching children so another bonus if you are wanting to specialise in that area.
I would say that you don’t want to stay on this platform forever but it looks like an accessible job if you are just starting out.
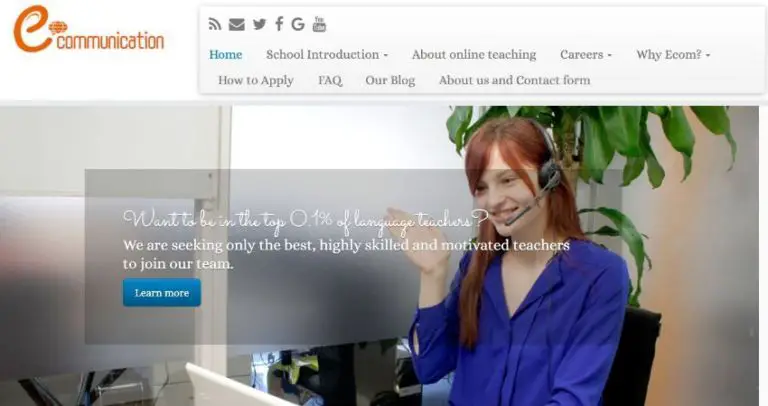
Ecom looks to be one of the more higher-end companies.
Their focus is on quality over quantity and as such require more experience (2 years) but for higher pay ($16-20 an hour).
Their focus is on business English as well as exam preparation for IELTS, TOEFL etc. Most of their students are businessmen.
One of the disadvantages (at least for myself) is that they are looking for people who can commit to 20 hours a week.
This is great if you are looking for a sole “employer”. However, for those that have other students and are looking to supplement with a few extra hours, this may not be ideal.
Another drawback is that they seem to be a lot more popular amongst teachers than the others. A great sign that they are a quality platform but it means the likelihood of getting a spot is reduced.
Go after this one if you have a bit of experience but getting in may prove a challenge!
What Are the Logistics for Teaching English Online?
There are a few things that you will need to bear in mind when working with Japanese students (and companies).
Technology and Workplace
The first thing if you haven’t got set up already is the hardware. You will need a computer connected to a decent speed internet connection. The internet speed doesn’t need to be the fastest but it does need to be stable.
You will also need a headset and webcam (if one isn’t already built into the computer). These can be picked up fairly inexpensively.
Once you have these then download your chosen video call software (I recommend Skype). This will allow you to, first of all, attend the interviews for the companies you want to work for as well as to conduct the lessons themselves.
When you attend the interview make sure you are presentable. Have a plain or tidy background, with good lighting and make sure to smile!
Time Difference
Some of your students will be Japanese natives living and possibly working abroad. In these situations, you may work with a few that match your time zone but the vast majority of Japanese people live… well in Japan.
Depending on where you live, this could be a small time difference or like me (UK) there could be a large time difference.
It actually works as an advantage for me as I work mornings and afternoons which is ideal for Japanese students who want to do lessons in the evening (after work).
Wherever you are, you need to factor this in when choosing your work schedule.
Payment
If you work on a website that caters to students from all countries then you don’t need to worry too much as you’ll likely be paid in a familiar currency such as dollars via PayPal.
If you work for a Japanese company though you are likely to be paid in Japanese Yen.
This was the case when I worked for Eigox. It was still via PayPal which made things a little easier but be aware of current currency rates and if any charges apply when looking at the remuneration of a teaching position.
Communication
Skype is widely common in Japan and I have used this for contact with most of my Japanese students as well as companies.
Don’t worry if you can’t type Japanese as plenty of people use rōmaji (Latin script) to spell their name on skype.
Special Characteristics of Japanese Students
You will find some similarities in the manner of personality between your Japanese students. This is something that you will get a feel for as you gain more experience.
However, just like any other student, Japanese students come in all shapes and sizes so don’t go into a first lesson assuming you know exactly how they will be.
Adults
In my experience, adults are usually very polite, punctual and attentive. Most of my adult Japanese students are learning for business reasons and so being generally knowledgeable in this area will be greatly appreciated.
Teens
Teenagers will usually be quite polite and like teens from other countries you can still win them over by connecting with them on their interests. Also, remember not to patronise and you should have no problems.
Children
I have found that teaching Japanese children is a lot more similar to teaching any other child online. They may be a little more polite and respectful but you have to remember that they are still children and you will still need to “win” their attention.
What Japanese Students Are Expecting of You
Like with any other student, punctuality and professionalism are expected from you.
With some adults, you can spend more time building rapport and be a bit freer with the activities in the lesson whereas others prefer to “get down to business” and be doing exercises and drills rather than talk about what they had for dinner yesterday.
Like most other children, Japanese children don’t really have expectations of how you should be. If you manage to make the lesson fun and keep the momentum going (and the parents see they are making progress) then you’ll do just fine.
There is a cliche that teachers in Japan dictate the class without a great deal of opportunity for freethinking from the class.
While this can be true for some, Japanese students know that you are a foreigner and appreciate being able to learn in a more relaxed atmosphere with free conversation and learn about your culture.
That being said, I have found it takes a few lessons for them to warm up to you and open up so just try to relax and give it time.
Cultural Differences Between Japan and the West
Although there are big differences between Japan and the west, there aren’t too many cultural differences that you will need to worry about in class.
It’s quite hard to commit a faux pas in English but there are a few things we need to consider.
Hand Gestures
First of all, let’s talk about counting with fingers.
Usually, we start with fingers bent and then extend each one to count. In Japan, it’s the opposite. They start with all fingers extended and curl each one when they count.
Another thing to consider is when pointing to oneself. We are used to pointing to our chest usually to express “me”. In Japan, it is the norm to point to one’s nose in this situation instead.
Lastly, with regard to gestures, it is perfectly normal to use a thumbs up to indicate a good job.
However, avoid the thumbs down at all costs! In Japan, it is the equivalent of “go to hell” which obviously isn’t going to go over well if used!
Here’s a short and fun video about other hand gestures that have a different meaning in Japan:
Comprehension
This can be a similar experience with students from other countries. You ask if they understand something and you will get a “yes” a lot of the time. The problem is that this isn’t always a “real yes”.
Some students would rather say yes to avoid disrupting the flow of the class or avoid disappointing the teacher. Or maybe they just weren’t listening at that point and feel that to mention that would be rude.
It is important then, that instead of asking “do you understand”, you should ask questions that check for comprehension “could you tell me what this means?”, “could you give me an example sentence using this concept” etc.
Names and Titles
Lastly, we should look at naming conventions in Japan.
It’s common for Japanese to address one another with title suffixes, similar to the way we use Mr/Mrs, etc in English.
There are a number of these suffixes depending on position and status but the most common is “san”. If we wanted to use this title with our student Tanaka then we would call him Tanaka-San.
Japanese Title Suffix
Meaning
san
Mr/Mrs
sama
a more formal form of “san”
sensei
used for teachers and experts such as doctors
That being said, your students know that you are not Japanese and so don’t expect you to use this (I often don’t).
It’s useful, however, to be aware that they will likely use these suffixes when talking about yourself and other friends and colleagues.
To show respect it may be a good idea to ask from the start whether they would prefer you to use this suffix with them.
Which Topics Should You Teach?
Like any student, the topic you teach depends on what your student already knows and what they need to know.
It’s worth bearing in mind that English is taught as a compulsory subject from the age of around 10 in Japan. Therefore, you will find that anyone from that age upwards will have at least a basic grasp of the language.
If you are teaching a child from the very beginning then you will want to start with basic vocabulary, phonics and getting them used to the language.
With grammar, you will likely need to emphasise the importance of articles, plural forms and things like subject-verb agreement.
These are things that just don’t exist in the Japanese language and so even seasoned English learners can struggle with these areas.
I have found that although adults usually possess a somewhat wide vocabulary and are adept at using English grammar, they tend to struggle with pronunciation a little more than children.
For this reason, I spend a great deal of time with exercises that strengthen pronunciation.
Me, during an online English pronunciation lesson (Photo: Jonathan Race)
Pronunciation
Pronunciation needs its own section as it can be extremely difficult for a Japanese learner moving to English. First of all, they will have to learn to make new sounds which their mouths aren’t used to making.
On top of this, the pronunciation of English words can be drastically different from what is expected of the spelling.
L / R
This is one of the biggest challenges for a Japanese learner’s pronunciation, differentiating between “l” and “r”.
The reason why this is difficult is that the Japanese language doesn’t have these sounds. There is a sound that is somewhere between the two and this is usually what is used when a beginner Japanese tries to use these sounds.
It’s important when teaching this that you explain the position of the tongue, lips, and jaw at the beginning, middle and end of the sound. Use diagrams or show them your mouth to help.
Once they have the basics down you then need to drill this to make it become second nature. For that, tongue twisters can be a huge help and I usually set aside a few minutes at the start of every lesson to do that.
Diphthongs
This is another big change between the two languages. Diphthongs (gliding from one vowel sound to another e.g. the vowel sound in “my”) don’t exist in Japanese. Every vowel sound is a monophthong (e.g. the vowel sound in “egg”).
It can be easy to “cheat” these diphthongs if you are a Japanese learner by simply going from one monophthong to another. That is after all what diphthongs are.
However, in order to get these vowels to sound natural, we need to work at increasing the speed between the two.
If there is a particular diphthong that your learner is struggling with then start by getting them to make the initial vowel sound and then the final found sound separately.
You can then practise going between these two sounds slowly and gradually speed it up.
Consonants
Lastly, with regards to pronunciation, we need to look at consonants.
If you aren’t familiar with the Japanese language then you need to know that the consonant sounds come at the beginning of their syllables with a vowel after (e.g. “banana”).
Because of their familiarity with this, it makes it difficult when moving to a language which has consonants at the end of words.
You may find words like “lot” becoming “loto” or “bad” becoming “bado”.
These can be improved by first making the student aware of the sound they are making compared to how it should be.
After that, you can help them practice cutting the vowel sound at the end of the word shorter and shorter until it no longer exists.
Consonant clusters are especially difficult (e.g. “crisps”).
For these, you may want to have the student practise making the consonant sounds with just their mouth (no voice box) before getting them to piece them together.
Take each sound one at a time and again gradually speed it up until it sounds right.
Last Thoughts
As I’ve said in this article, you can learn about common grammar and pronunciation mistakes that Japanese learners tend to make.
However, remember that each student is unique and will have their own optimum way of learning.
Another thing you should consider if you haven’t already is learning the language. Now, learning Japanese is a huge undertaking but even just learning the basics will give you a massive understanding of the pronunciation and syllabary from where your learners come from.
My knowledge of the language has been indispensable when teaching Japanese learners and it has allowed me to find and fix issues quickly and effectively.
Even if you don’t choose to go down that route though you can learn these things over time with enough experience.
Best of luck in the classroom, またね!(see you later!)
You’ve decided to start teaching online and you’re ready to start finding some students, great!
But what’s the best software to connect with your students?
You’ve heard of Skype and want to get set up. Or… Likely you have been using Skype for a while but want to be able to do more with it.
In this article, you will learn everything you need to know about teaching English online via Skype and getting the most out of it.
After reading, you will be able to give professional lessons and know exactly what to do when you encounter any technical problems.
Why Teaching English Online with Skype?
So why should you even use Skype? After all, there are plenty of choices when it comes to video call software.
Well, first of all, it’s free. You don’t need to pay to install it and you don’t need to pay any subscription charges to keep using it.
Secondly, it’s available across the majority of platforms: PC, Mac, iOS, and Android. So, it’s likely going to run on your chosen system, whatever that may be.
It also has plenty of users so it’s likely your students will already have an account, meaning less work for them to do to take your class.
Skype is also the standard for a lot of online teaching platforms so you will want to make sure it is installed for those lessons (if you haven’t already installed it for the interview stage or personal use).
Finally, it has plenty of useful features such as screen sharing, session recording and sending files, etc. which give you more tools to work with in your lesson.
Hardware Requirements
So what do we need in order to run Skype?
The first thing you need is a computer. Skype isn’t a major resource hog so you don’t need to worry too much about RAM (512MB+) or CPU power (1GHz+).
However, if you are using other teaching resources and have multiple tabs and applications open then you certainly don’t want things freezing in the middle of a class due to a slow computer so try to get at least a model from the last 5 years.
A larger screen is another thing to consider in order to help you balance using Skype with your other teaching resources. This is especially the case with a laptop where screens can get quite small; I couldn’t imagine using anything less than my 15” screen on my laptop.
There is so much more we could go into with computers, although there isn’t room for it in this article, here is a great look at the best computers for online teaching.
Which Headset and Camera to Choose
Another important thing you’ll need is a good quality headset to make sure your communication is clear. The Logitech H340 Headset is one of the standards and as well as being a quality USB headset, it’s also pretty cheap!
If you can spend a little more, the Plantronics Voyager Focus UC-M B825 is another great choice. It comes with a few more bells and whistles such as the ability to end and start Skype calls right from the headset’s controls.
Finally, you need to make sure you have a webcam set up so your students can see you. Most laptops will have this feature built in but if not (or if you are on a desktop) then the Cam Sync HD 720p is an excellent, low-cost choice for quality 720p video.
With the hardware sorted, now we are ready to set up Skype and this process couldn’t be easier:
1. Download
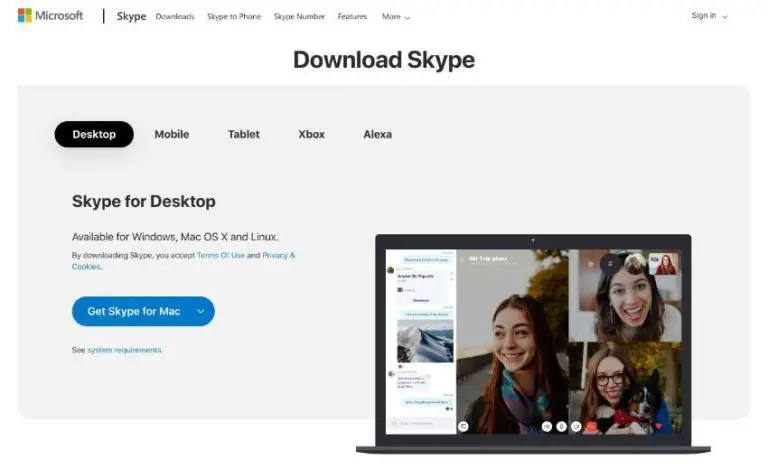
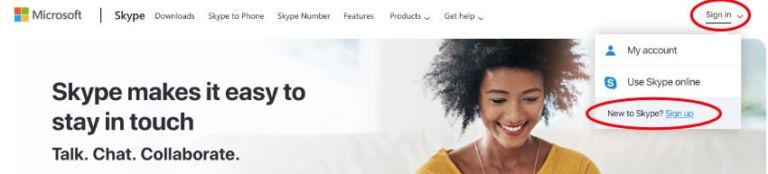
Download Skype from the website. You can’t miss the big “Get Skype…” button on the homepage. If the page hasn’t detected your operating system then go to the “Downloads” page at the top to select the correct version.
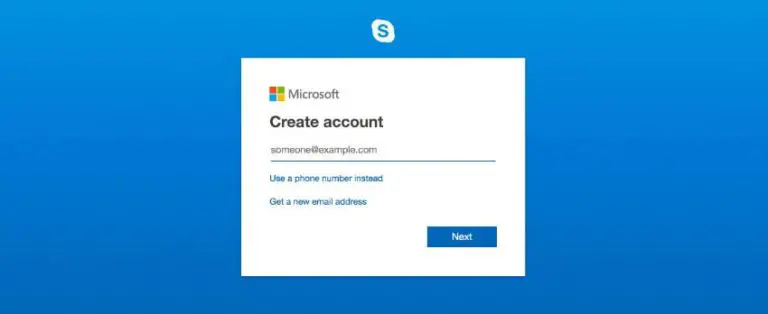
2. Create Account
Create a free account for Skype. Go to the top right of the screen and in the “sign in” section you can click “sign up”.
3. Sign In
Sign in to Skype using your details. Once your download has completed you can open up the app and click “sign in” with the details from before.
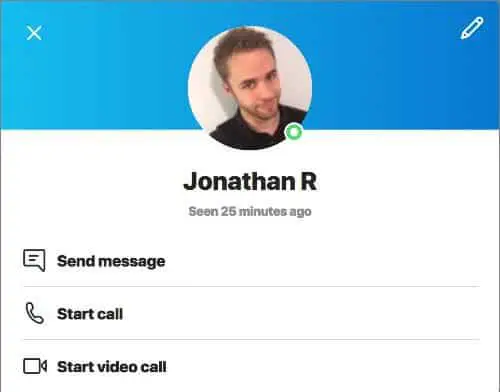
Remember! These details are going to be shown to every student and employer you contact so be careful with the information you use. Keep it professional and friendly.
When you create your username just pick your first and last name. “sk8rBoi69” doesn’t scream professional teacher.
On the same subject with profile pictures, make sure the lighting is good, don’t obstruct your face and remember to smile.
My Skype Profile name and picture.
Workplace
Once your system and account is set up we need to look at your workplace.
You want to see your environment through your student’s eyes. Would you prefer a teacher who had a messy room with tacky posters? Or would you prefer to see a clean, professional environment? Exactly!
Background
First of all, you want a tidy background. It doesn’t have to look like a Cambridge library but at the very minimum needs to be neutral without any distractions.
You need adequate lighting. You want your students to see you clearly but too much light can be a little unflattering. Experiment with having the curtains open at different amounts or having additional lamps to get a light level that works for you.
That’s how the student sees me and the “classroom” during the Skype lessons.
If you want to use an artificial background, consider using ManyCam software, which works with any other video tool like Skype.
Noise Level
You also need to pay attention to noise levels.
If you have a choice of rooms in your house then find the one that is the quietest.
If you don’t have a choice then try to keep the windows closed. Also, inform anyone else living there that you will be doing a lesson (if they are noisy) and ask (politely) to be quieter for the next hour or so.
Another thing, don’t do your lessons in the local starbucks!
Sure the coffee’s arguably great but your students won’t love the background noise and I don’t think the other customers will appreciate your overly-passionate lesson about prepositions!
Equipment
If you need things such as realia or a whiteboard for your lessons then make sure they are nearby and easy to reach. You won’t want to be rummaging around in the next room trying to find your flashcards halfway through your class of 15 preschoolers.
Lastly, we also need to look at comfort. You will (hopefully) be spending a lot of time at your workstation so you want to reduce the stress on your body as much as possible.
Make sure you have water nearby, this is essential when you use your voice all day. Have a good quality chair and set it correctly; this will reduce any strain on your back etc.
In order to avoid eye strain, screen brightness shouldn’t be set too high.
Volume shouldn’t be too high on your headset either to avoid ear fatigue. I generally find a setting where I can hear a student well but without it being excessive.
If I really need to focus on their pronunciation for a specific part then I can turn the volume up briefly to hear better and then turn it back down afterward.
Clothes
Wear appropriate clothing.
For a class of business students, it might be appropriate to wear more formal clothing.
For a class of preschoolers though you will want to make sure you are wearing something comfortable, for example, a polo, so you can be expressive.
Tips for Conducting Great Online Lessons
With everything set up let’s look at some ways to give the best lessons on skype.
Before the Lesson
“By failing to prepare, you are preparing to fail.”
Benjamin Franklin
The first thing you need to do is to plan the lesson. How long is it? What topic will you cover? What exercises will you do?
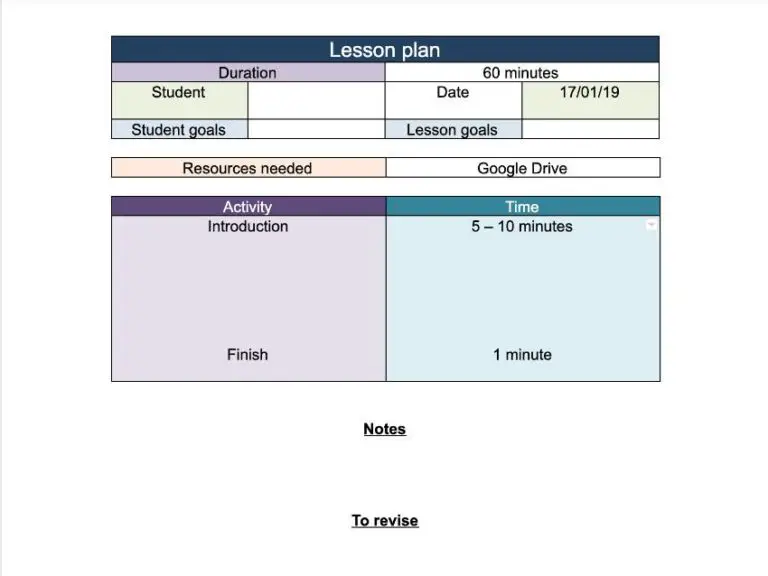
Here is an example of a lesson plan I use:
Activities are added with the amount of time taken for each one. The more information you have in the lesson plan, the more likely a class will go according to plan.
Always have a backup activity or two in case you finish everything extra early. There’s nothing worse than finishing everything you had planned and realising you have twenty minutes left till the end.
The Start of the Lesson
For adults, you can warm up by asking them about their week. For children, you can warm up with a game or maybe even a song.
Reviewing previous classes is usually a good idea near the start. You can’t expect a student to always revise in their own time and if they don’t, then they could easily forget what they have previously learned.
The End of the Lesson
Be mindful of the time during class, you don’t have to stick perfectly to your lesson plan but try to stay close to make sure you achieve your goals.
Have the homework prepared and ready to give at the end of the class.
Check the date and time for the next class at the end, this can be a good reminder if a student regularly forgets to book.
Now you’re all set up with the basics but there’s still more we can do to get the most from Skype.
Familiarise yourself with the following tools and they can add heaps of value to your lessons.
Screen Sharing
Using screen sharing is a very useful (often time-saving) tool when you want to show your student’s a particular resource.
I use it to share exercise books, highlight sections on a website for reading exercises or just to troubleshoot.
To activate screen sharing during a call, press the “overlapped squares” icon in the bottom right of the screen during a call.
When you are using two screens, you can select which screen to share with the student.
Send Documents
Sending audio, video, and PDF files is very easy to do in Skype.
Just drag and drop a resource into the chat, hit enter and off it goes. Or click on the “share files” icon and select a file from your hard drive.
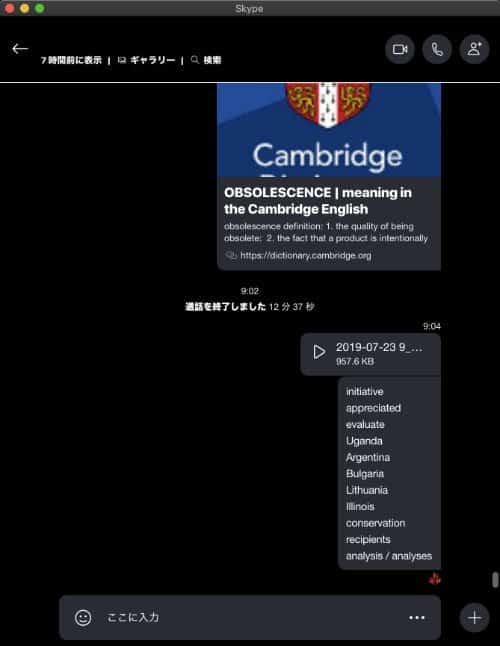
That’s how the student receives the files in his chat window:
If your files are big then it might be an idea to send it ahead of the lesson so you don’t spend too long waiting for your student to download it.
I usually send audio the most. I record myself reading a list of words for pronunciation and then send this to the student so they have a reference to practise with.
Record Session
It’s possible to record a Skype session. This is a great tool for your students to be able to review the class. You can also use it to reflect on the class and see if there’s anything you can improve in the way you teach.
Bear in mind, this isn’t done automatically. You will need to set the recording at the beginning if you want to make sure the session is captured.
Start the recording from the “other options” menu within the video window:
After canceling the call, the record file is saved to your computers hard drive. This may take a while, depending on the length of the recorded session.
If this is the first time you are doing it with a student then it’s also polite (and more importantly legal) to inform them you are planning to record the session.
This can be another way to improve interaction and can be great for engaging younger students.
There are premium plans which cost but mostly you are also able to try it out or use basic features for free.
Shared Workspace via Google Drive
This guide wouldn’t be complete without mentioning the shared workspace in Google Drive. In case you haven’t heard of this already, it is an online storage space with a few nifty tools for word processing and spreadsheet editing, etc.
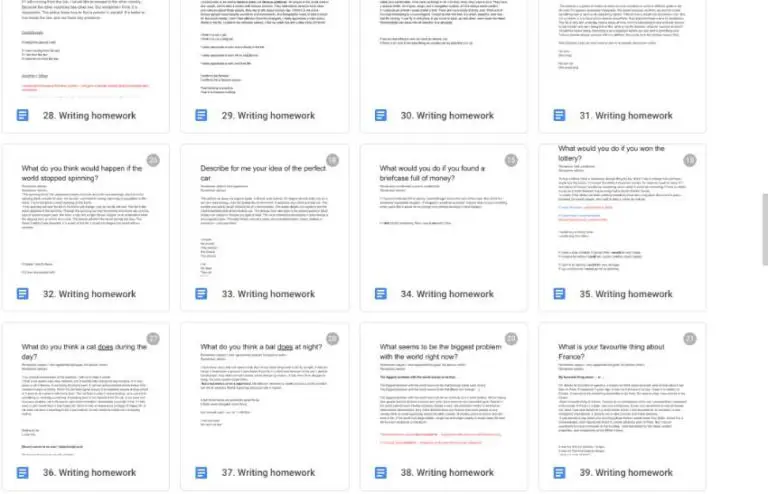
Here’s a homework folder from one of my student’s on Google Drive:
The advantage with this is that you can share a link to a document you are working on and the student can see what you are editing and vice-versa.
I use this with most students to mark homework, essays, etc. It has a great “suggesting mode” which keeps a record of what you mark so that the student can see the before and after.
I even use Google Drive so much that I ended up doing all of my lesson plans in there too, it’s just so easy!
Common Technical Issues
Sooner or later you will encounter technical issues. You need to plan accordingly with the mindset of “when these things happen” and not “if they happen”.
Let’s have a look at some of the most common issues and their possible solutions:
You Can’t Hear Your Student
Use the chatbox to communicate if you aren’t sure they can hear you.
Get the student to check the audio settings on their operating system and then check the audio settings inside skype.
If these don’t fix it then ask if they have a spare headset they can try.
Your Student Can’t Hear You
Go through the same routine as above. Make sure to tell your student what you are doing via the chat and ask them to be patient while you fix the problem.
Your Student Can’t See You
Check if the light is on your webcam. If so then it is on and working.
Check the video settings in Skype and make sure your camera is selected.
Seeing the student isn’t as important unless you are doing some pronunciation work that requires you to see their mouth. As such, I tend not to spend too long trying to fix a situation if I can’t see them.
Audio or Video Quality is Bad
This is usually a connection problem. Check that you don’t have any other programs open that are using a lot of bandwidth. Make sure you are as close to an internet router as possible (preferably wired). Check these things with your student.
Battery Dying on Laptop
This is something that happens with my students sometimes. You often won’t know what happens as the call will drop immediately.
If the call suddenly cuts then wait a while. The student will usually call back from their mobile or once they have a charger to let you know what happened.
When Everything Else Fails
These are all specific fixes to common problems. If they don’t fix the situation then you can always try the classic – hang up and call again!
For peace of mind, always have a backup internet connection (I use my mobile), have a backup device (again a mobile can be used in a difficult situation) and it may even be an idea to have a backup headset in case that fails.
Skype Alternatives
This guide is aimed at Skype and while the majority of users use this software, it’s worth knowing some of the others in case your student has a preference for something else.
Zoom
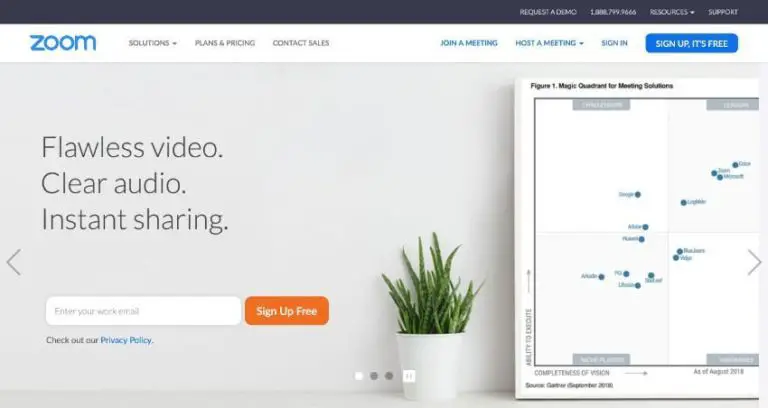
Zoom has a few more tools for viewing documents as well as more functions during group calls such as “virtual hand-raising”. Bear in mind that group calls exceeding 40 minutes require a paid subscription.
Google Hangouts
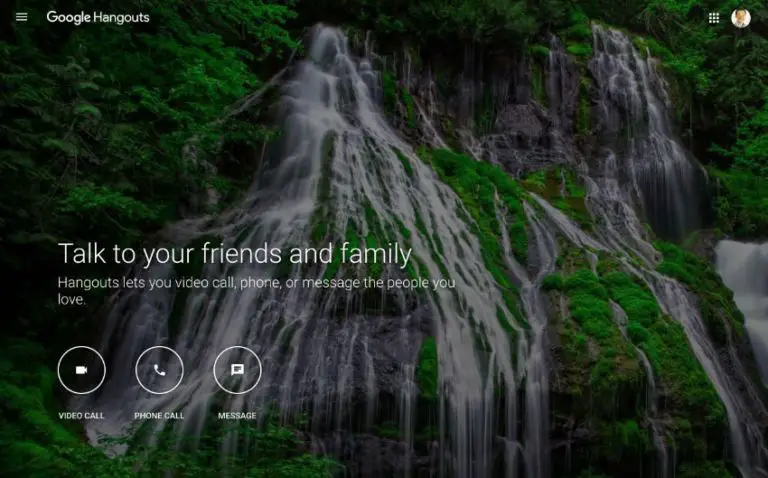
The great thing about Google Hangouts is that it can be used directly from a web browser without needing any installation. However, it is slightly more limited in that you can’t send files other than images.
Mobile Video Call
This option is not that professional. Not to mention, some people feel less comfortable about giving you their phone number than their Skype username.
That being said, I have used this option more than once as a backup when I have had problems with my computer.
Teaching Platform Software
Some teaching platforms such as Verbling have built-in video software which can be really useful as the tools are more targeted towards teaching functionality.
The downside is that stability and speed are usually never as high as something like Skype.
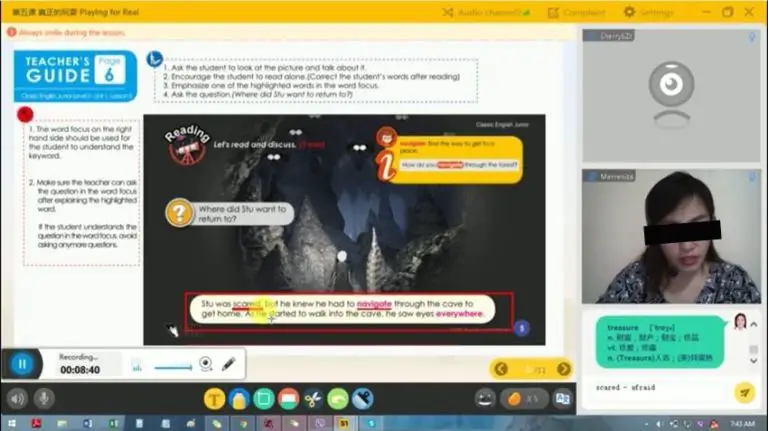
Online teaching software from “Likeshuo”
Getting Your First Students
Okay so now you’re set up and ready to get teaching. The only thing we need now is some students! Let’s look at some of the most common ways of finding them.
Work for a Teaching Company
Working as a subcontractor for an online teaching company like VIPKID is a great option for guaranteed work. You sign a contract with a company and agree to work x hours a week.
Quite often you will even get the materials and syllabus which means less prep work.
However, it can take away some of the freedom of setting your own hours and being able to teach in a way that you prefer.
In this situation, you are essentially self-employed. The teaching platform will put you in touch with students for a fee. You then set your hours, price and design your own lessons.
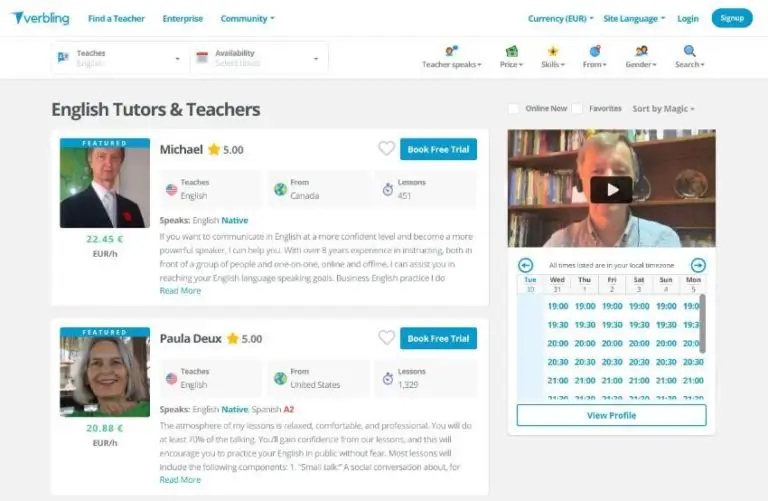
ESL teachers advertising their lessons on Verbling.com
This one gives you more freedom than working for a company but the cost is less stability as you aren’t guaranteed a minimum number of hours a week.
For this reason, It may be an idea to sign up to more than one teaching platform in order to “not put all of your eggs in one basket”.
Find Students Yourself
If you would prefer not to pay a third party for every lesson you give then try finding your own students.
You could make your own website, use social media or even post classifieds in newspapers or online on websites like Gumtree.
Once you are in contact with a potential student, offer the first lesson free or heavily discounted. Students like to “try before they buy” and this gives you a chance to convince them in a trial class.
These are just some ideas to get your first students. There is plenty more material here on how to teach English online.
Conclusion
There you have it, you should now have your Skype account set up just right in an environment conducive to learning. If done correctly this should keep your lessons stress free and effective for many years to come.
Make sure to play about with the tools in Skype and stay on top of updates for any juicy new additions that can make your lessons even better.
Bear in mind, Skype is just the delivery system that connects you with your students. Once you have this area mastered you can focus on the content itself, high-quality teaching!